I read that it isn’t wise to set concrete piers in the ground with nothing beneath them because over time they can sink. And I would prefer not to live in a house that slopes; for one thing, you’d never be sure how much liquid you have in a measuring cup. It would also probably not be very easy on your ankles to live in a sloping house. So there should be a footing of some kind to prevent the sinking. Some people lay gravel and over that a few inches of rebar-reinforced concrete, and then put a sonotube on top of that.
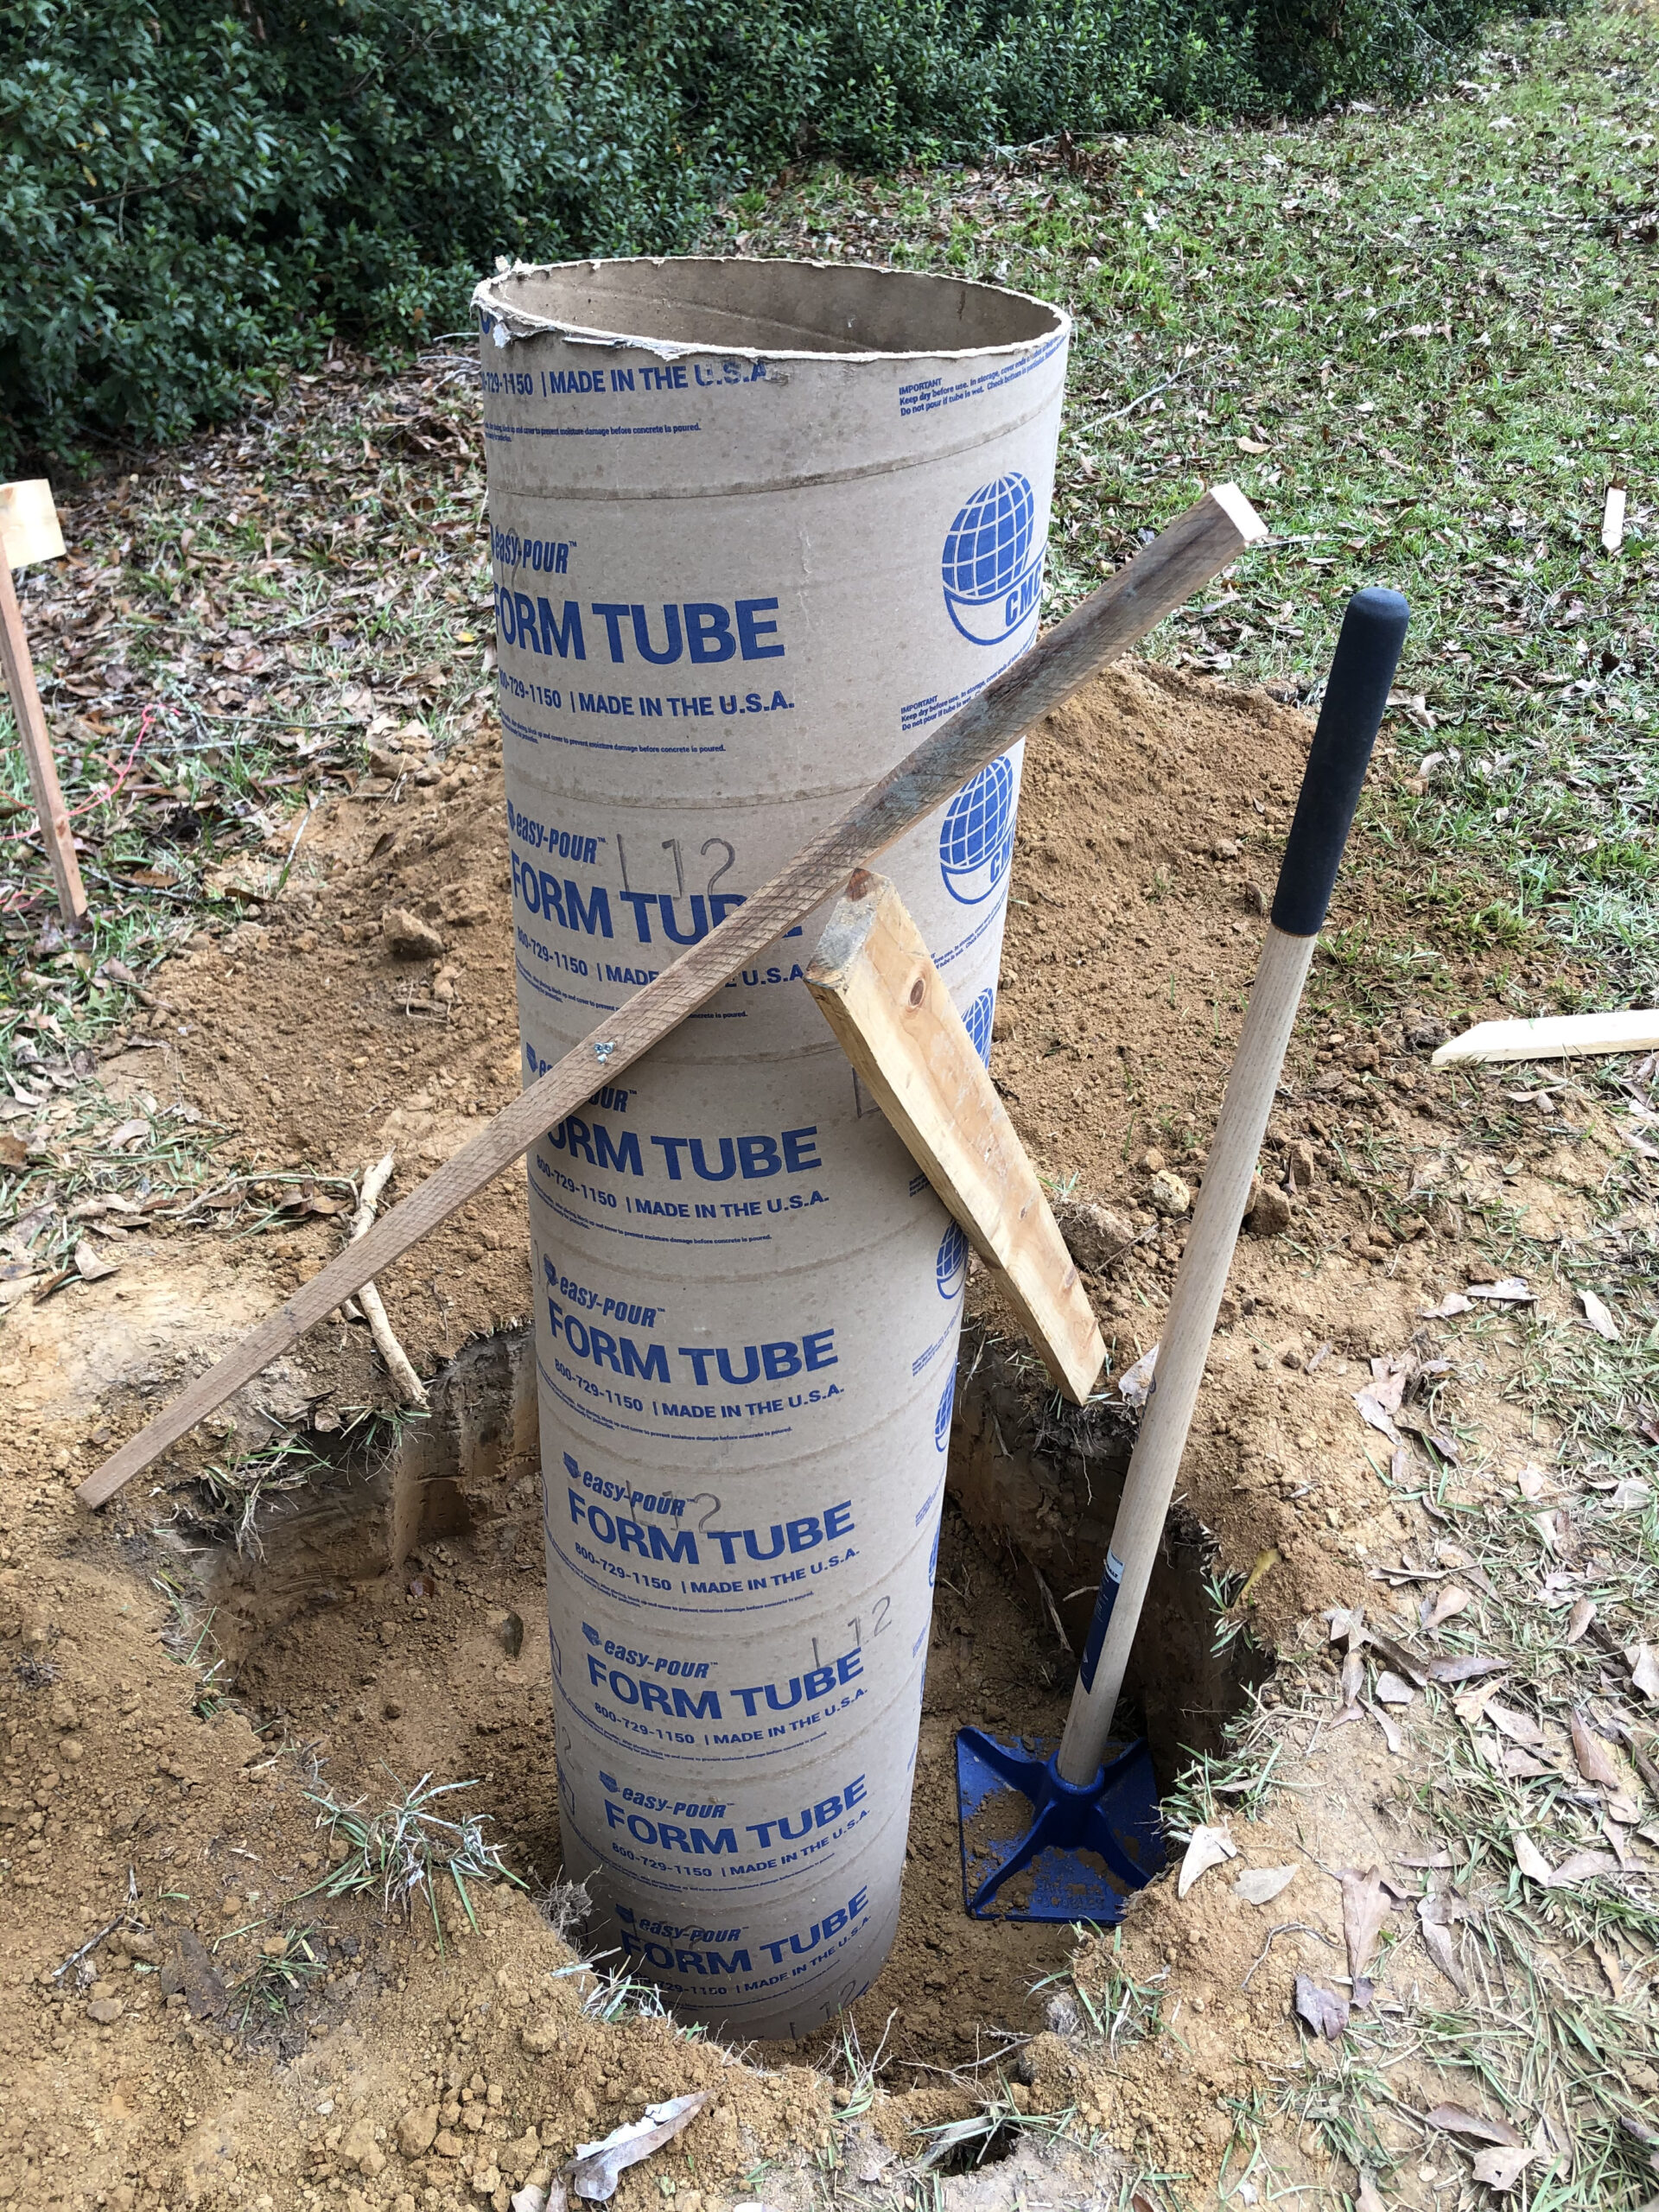
(NOTE: In fact we live nearest to a Lowe’s, which sells the Quik-Tube brand tube form, made by Quikrete. But I’ll be referring to sonotube as a generic term, since I think most people use it that way, like “kleenex,” with no offense intended to the nice folks at the Quikrete Corporation.)
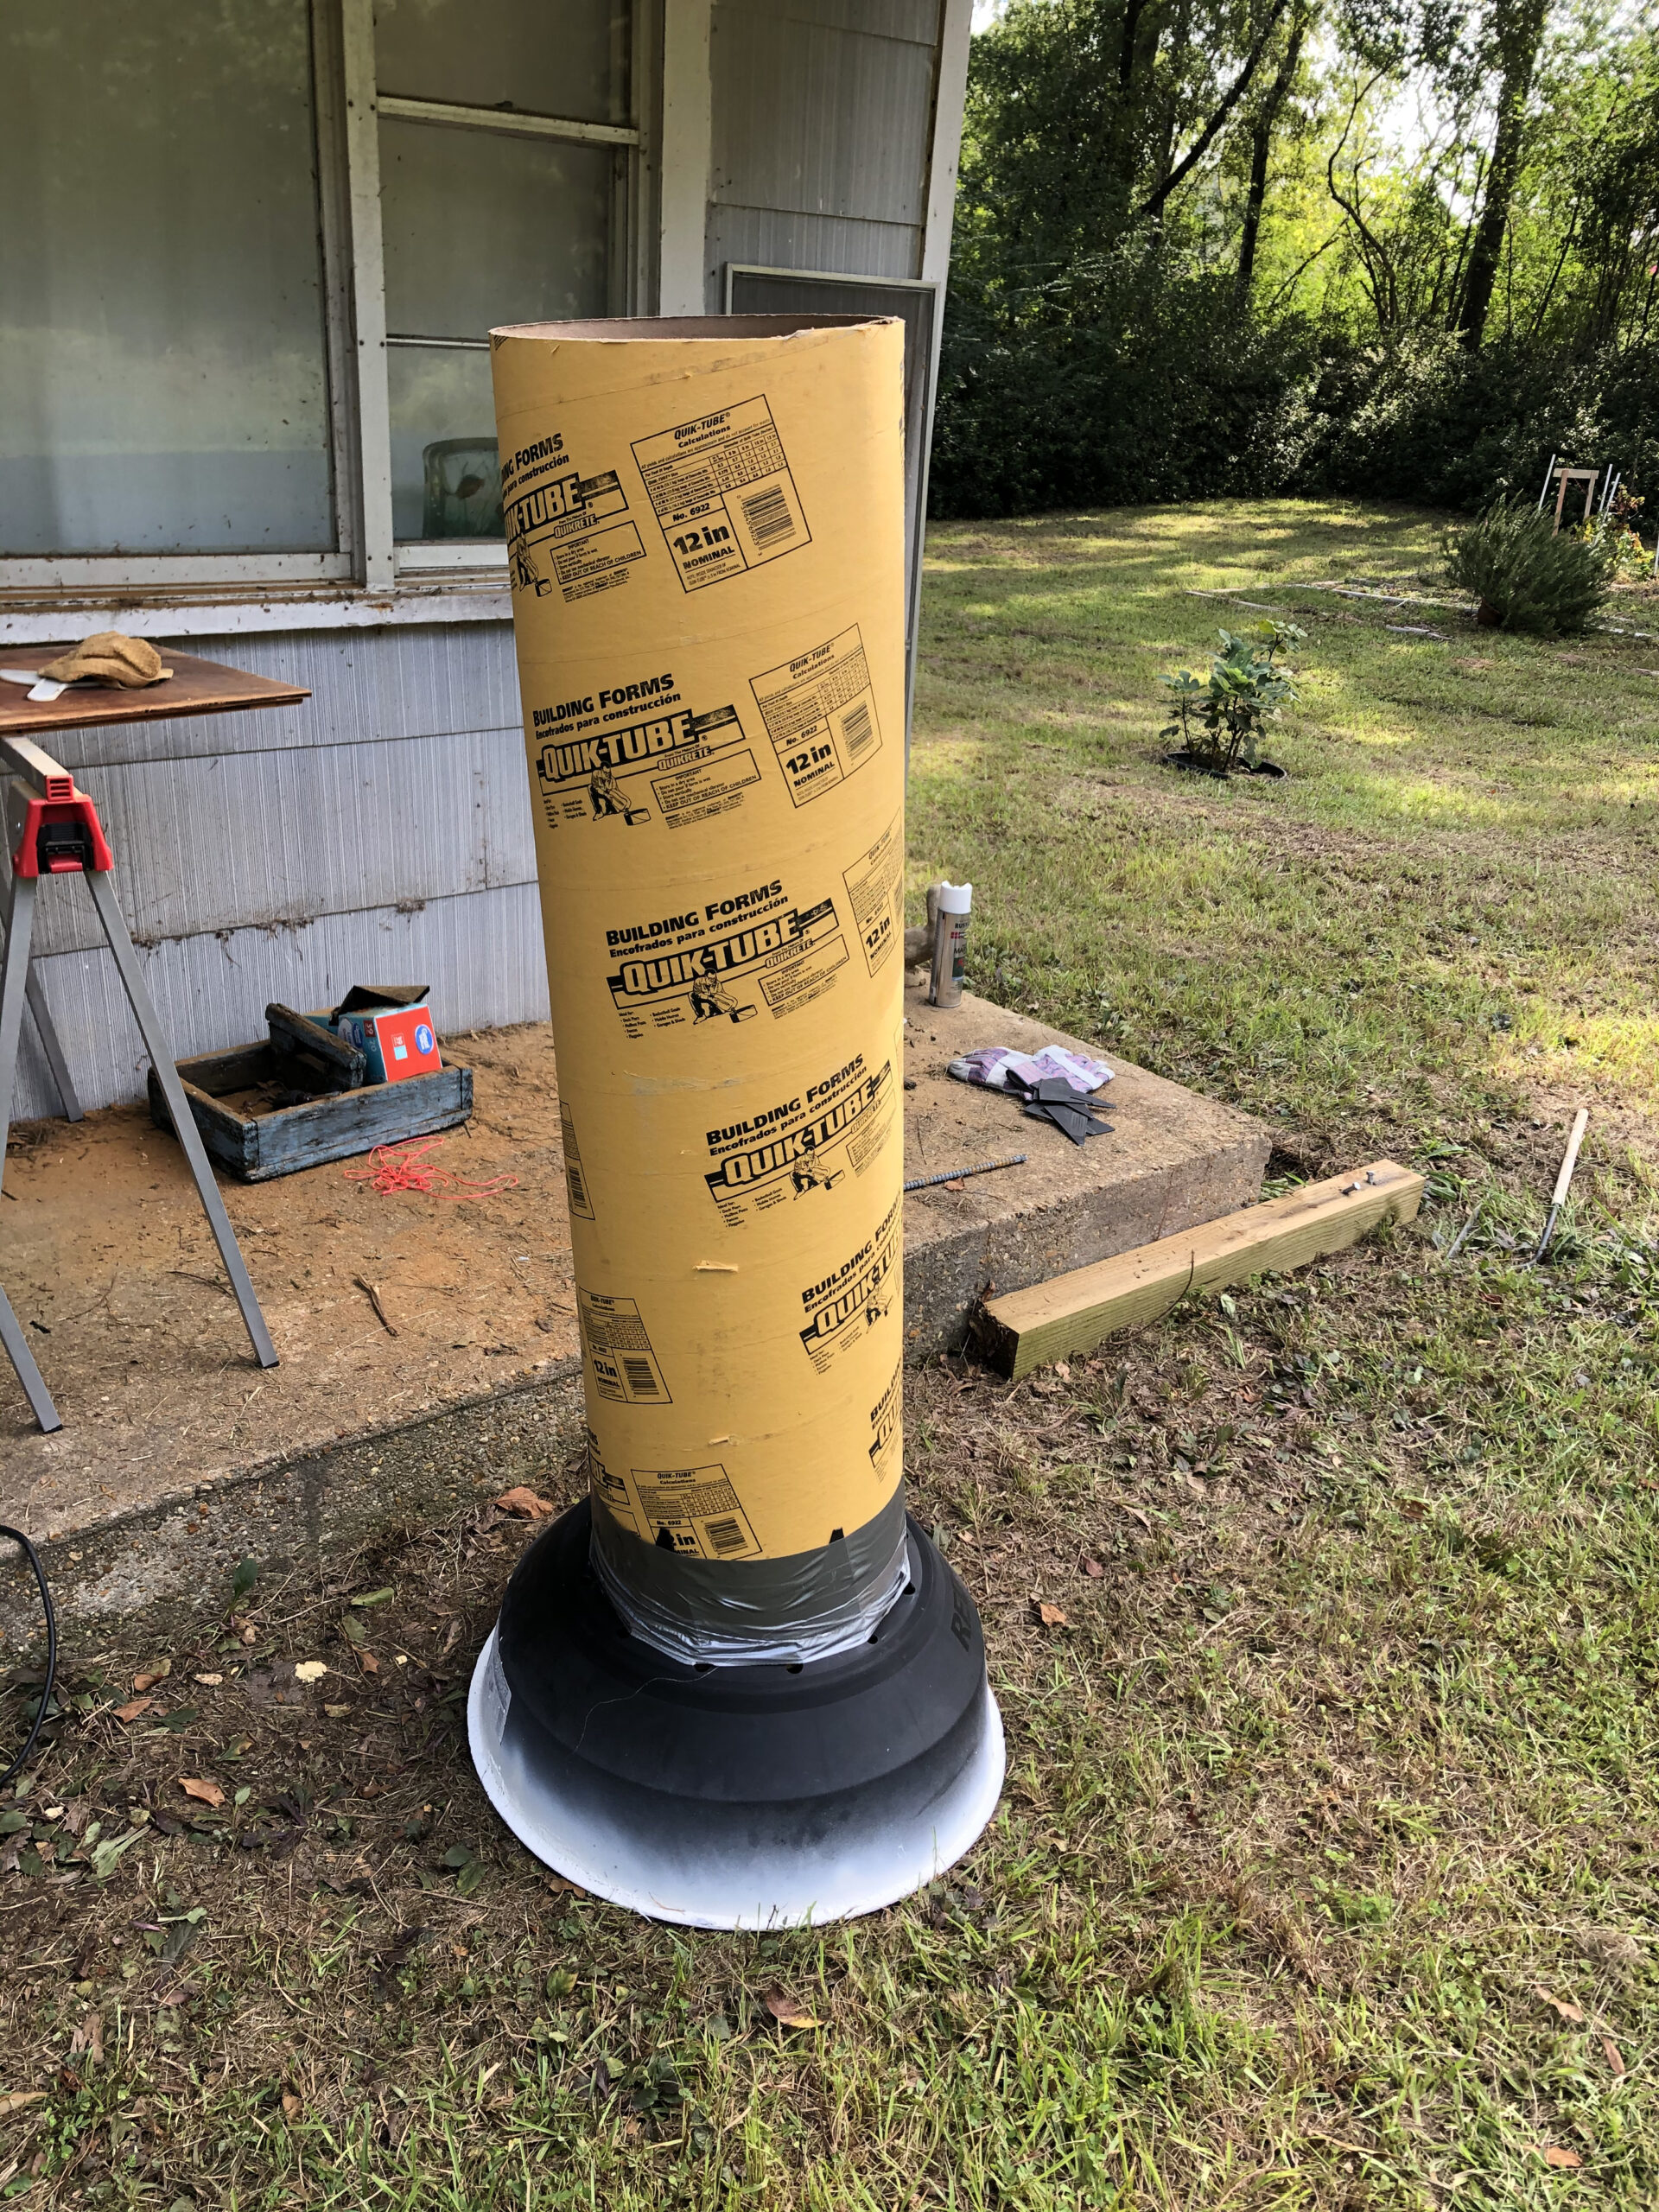
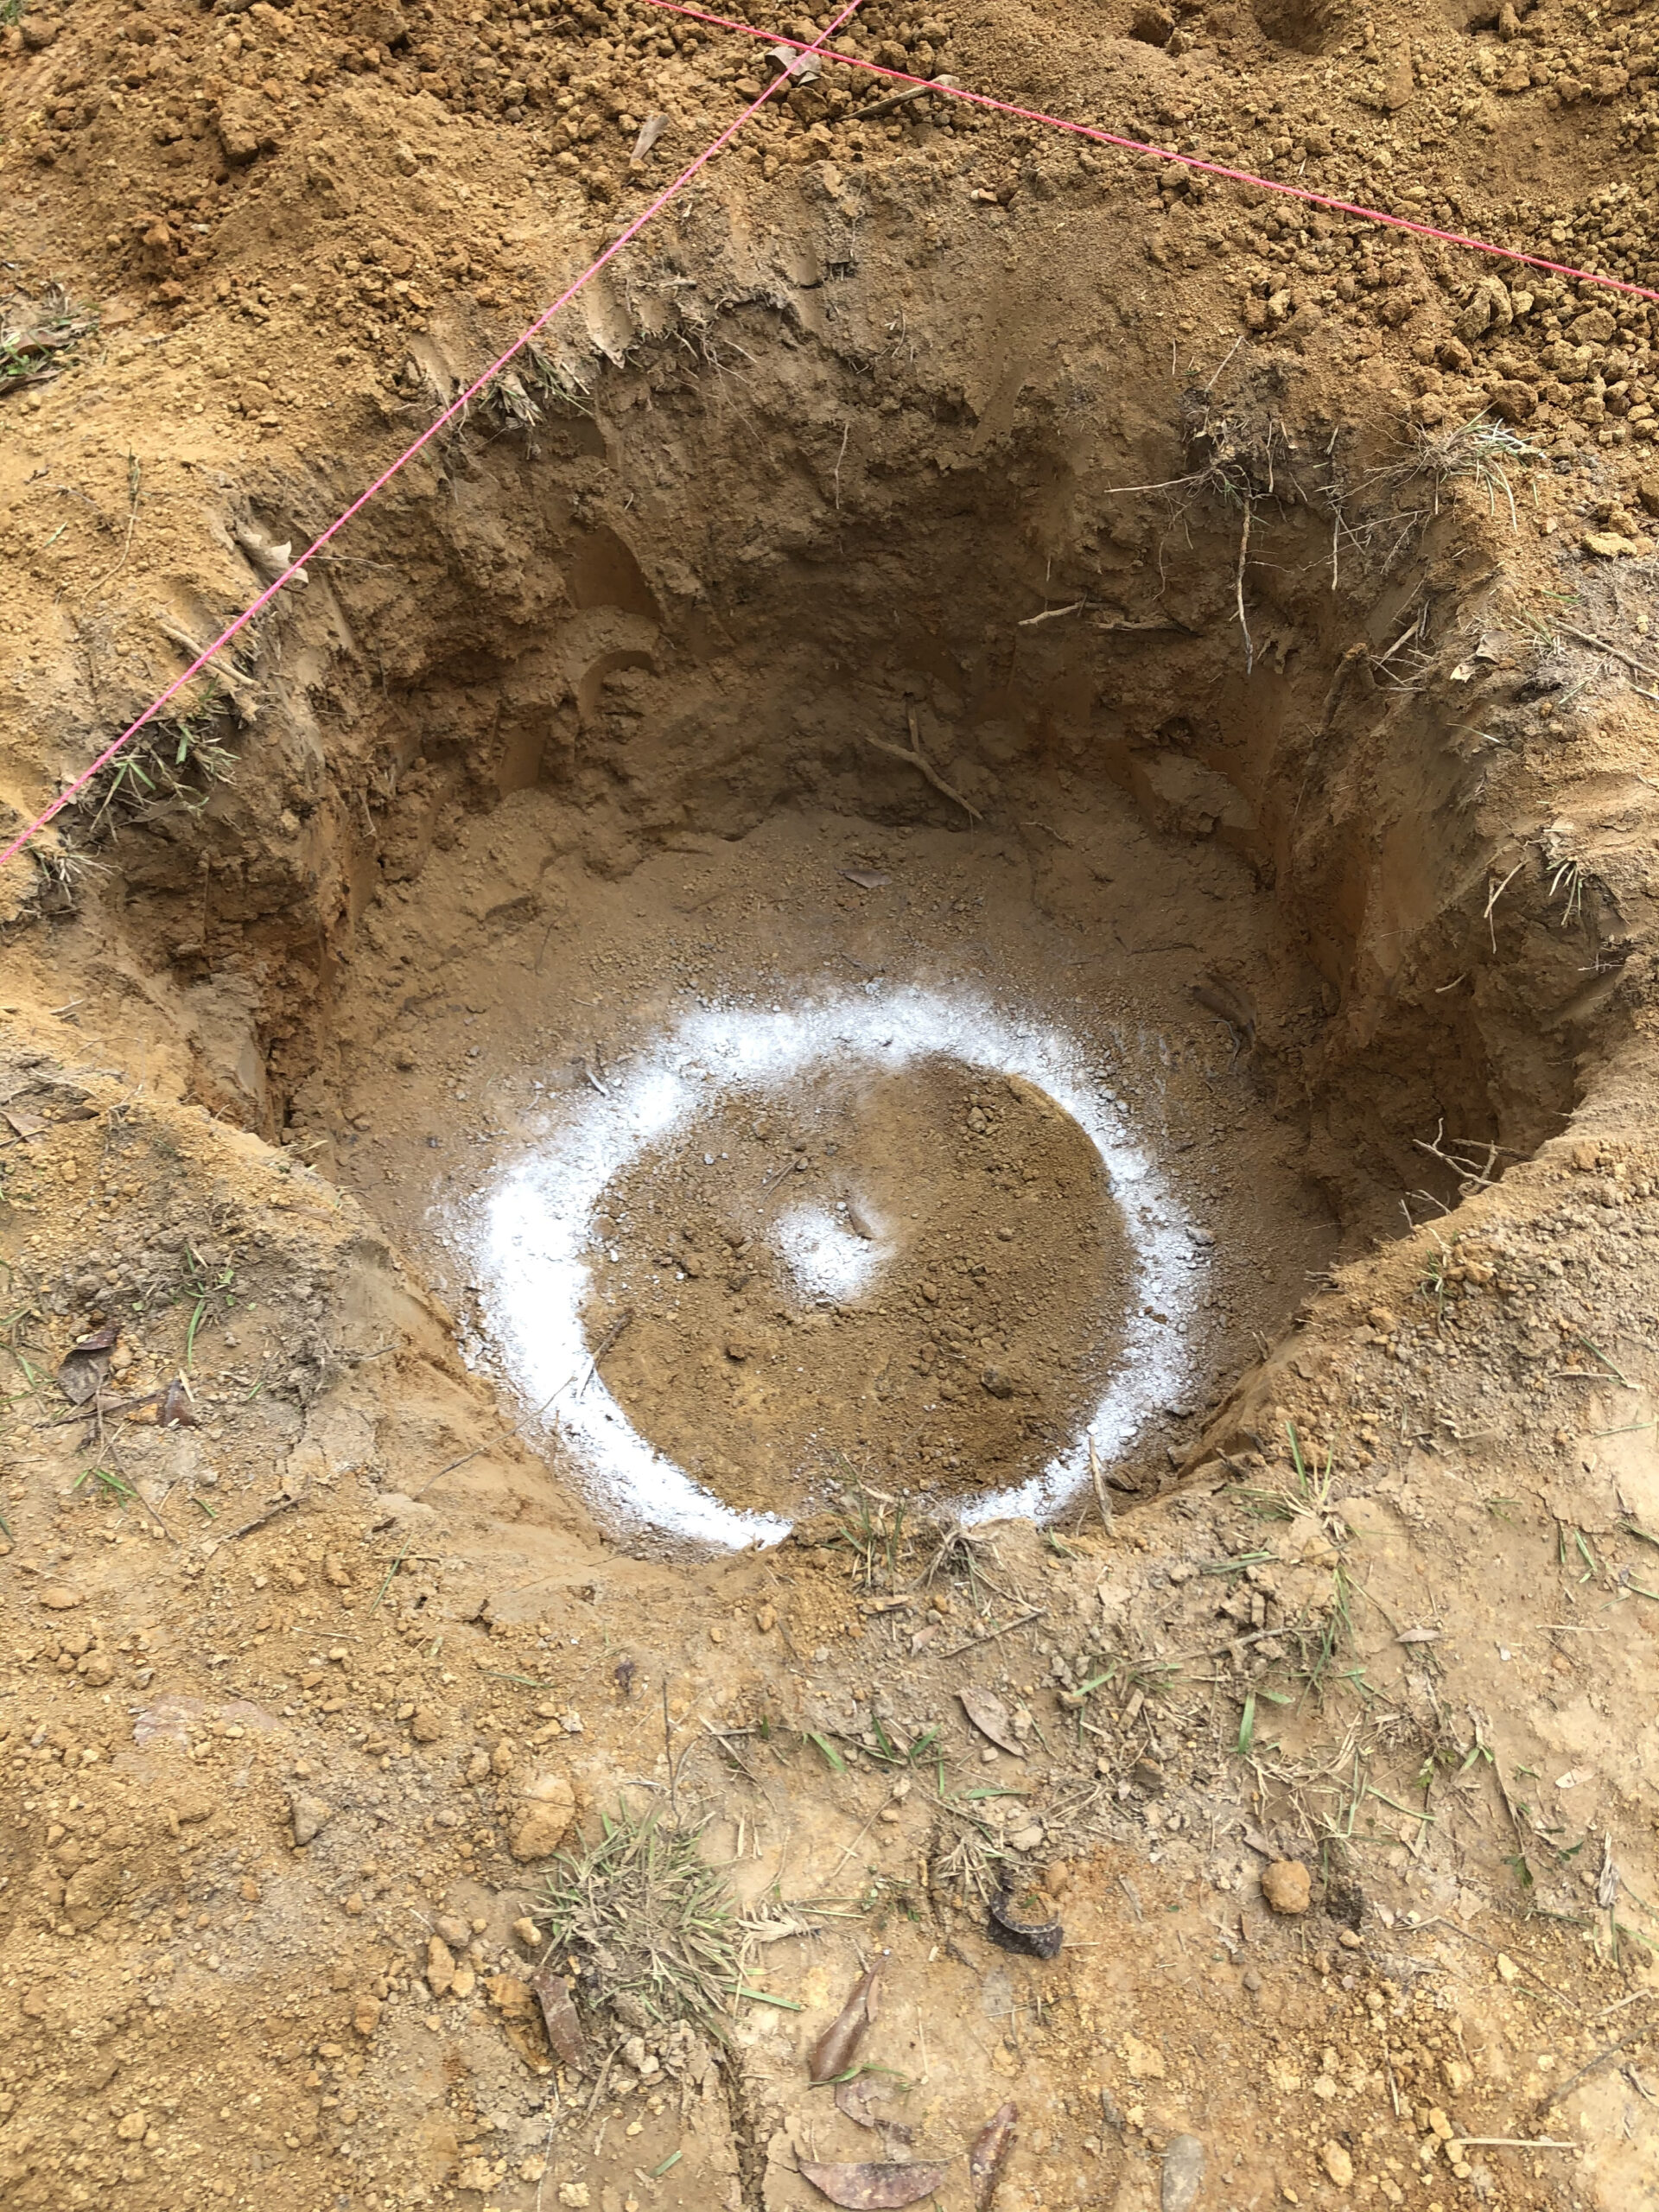
I came across a really great thing called Redibase, which is a plastic form that attaches easily to the bottom of your sonotube and gives you your footing and pier all in one shot. They’re around 20 bucks and sold at both Home Depot and Lowe’s. One nice feature is that they work for 8-, 10-, and 12-inch tubes. Another benefit is they’re quicker; you don’t have to wait for your footing to set before pouring your pier. My Lowe’s didn’t stock them but I could order them online (in units of six) and pick them up at the store.
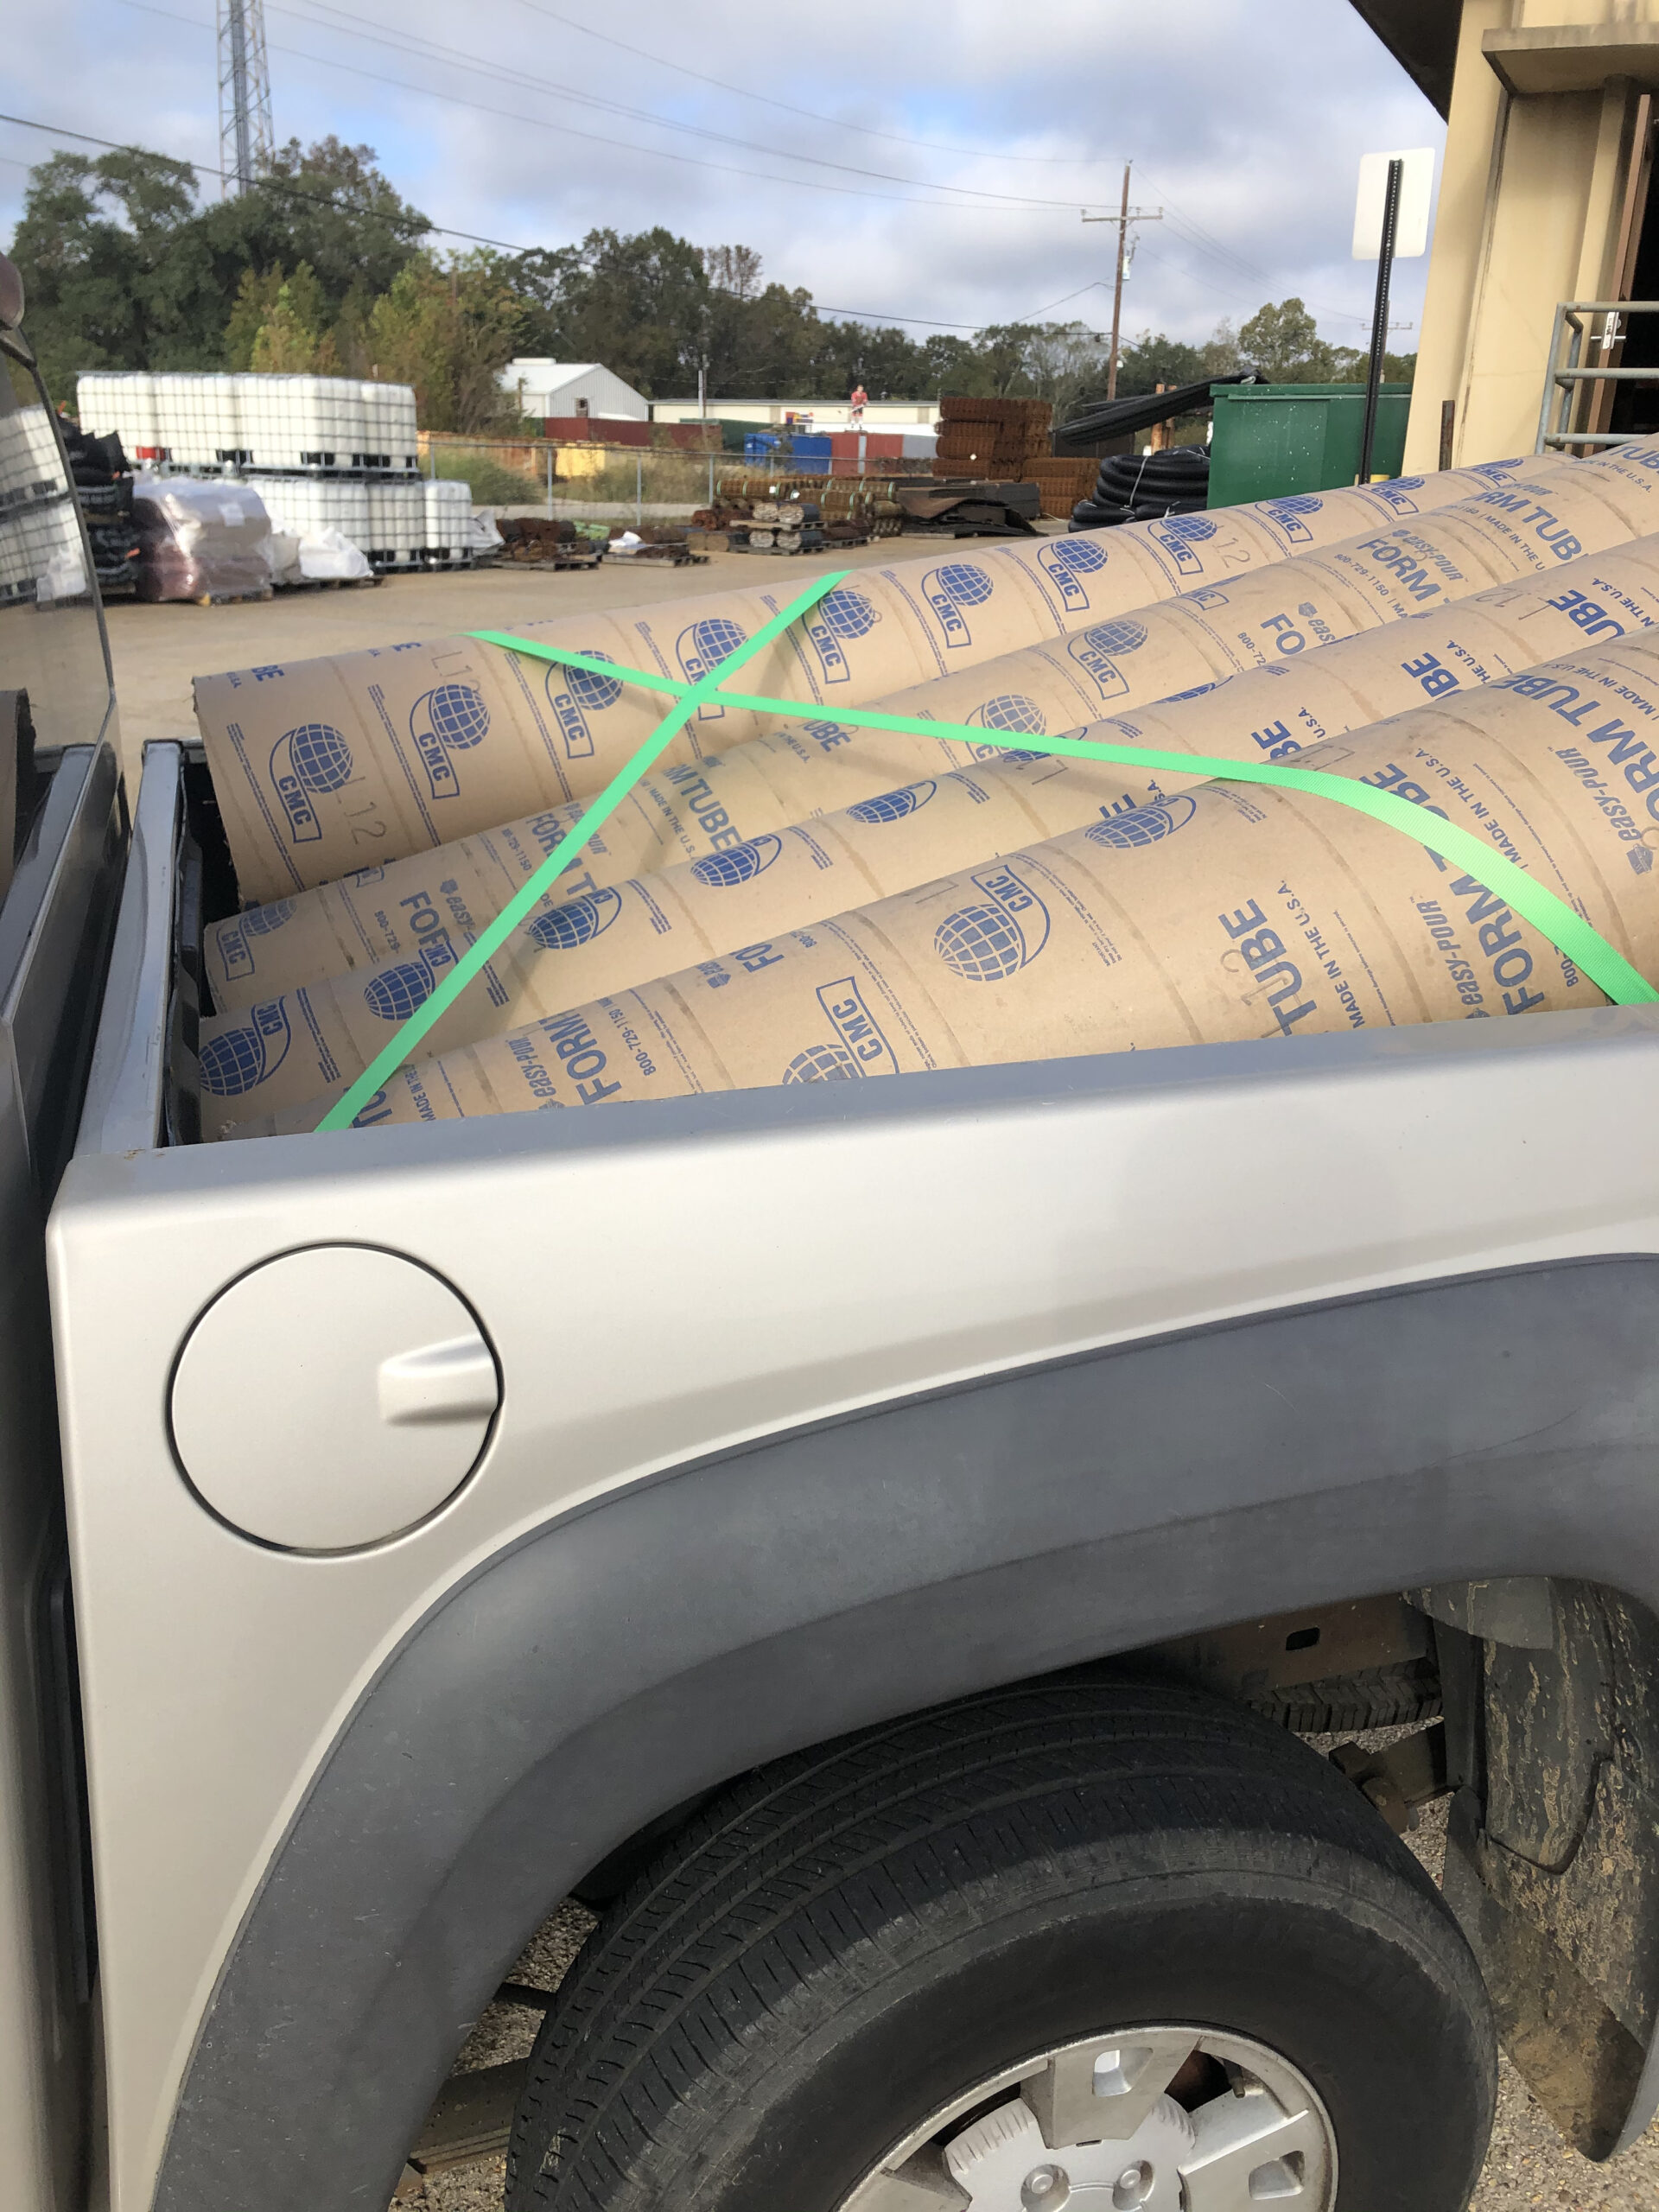
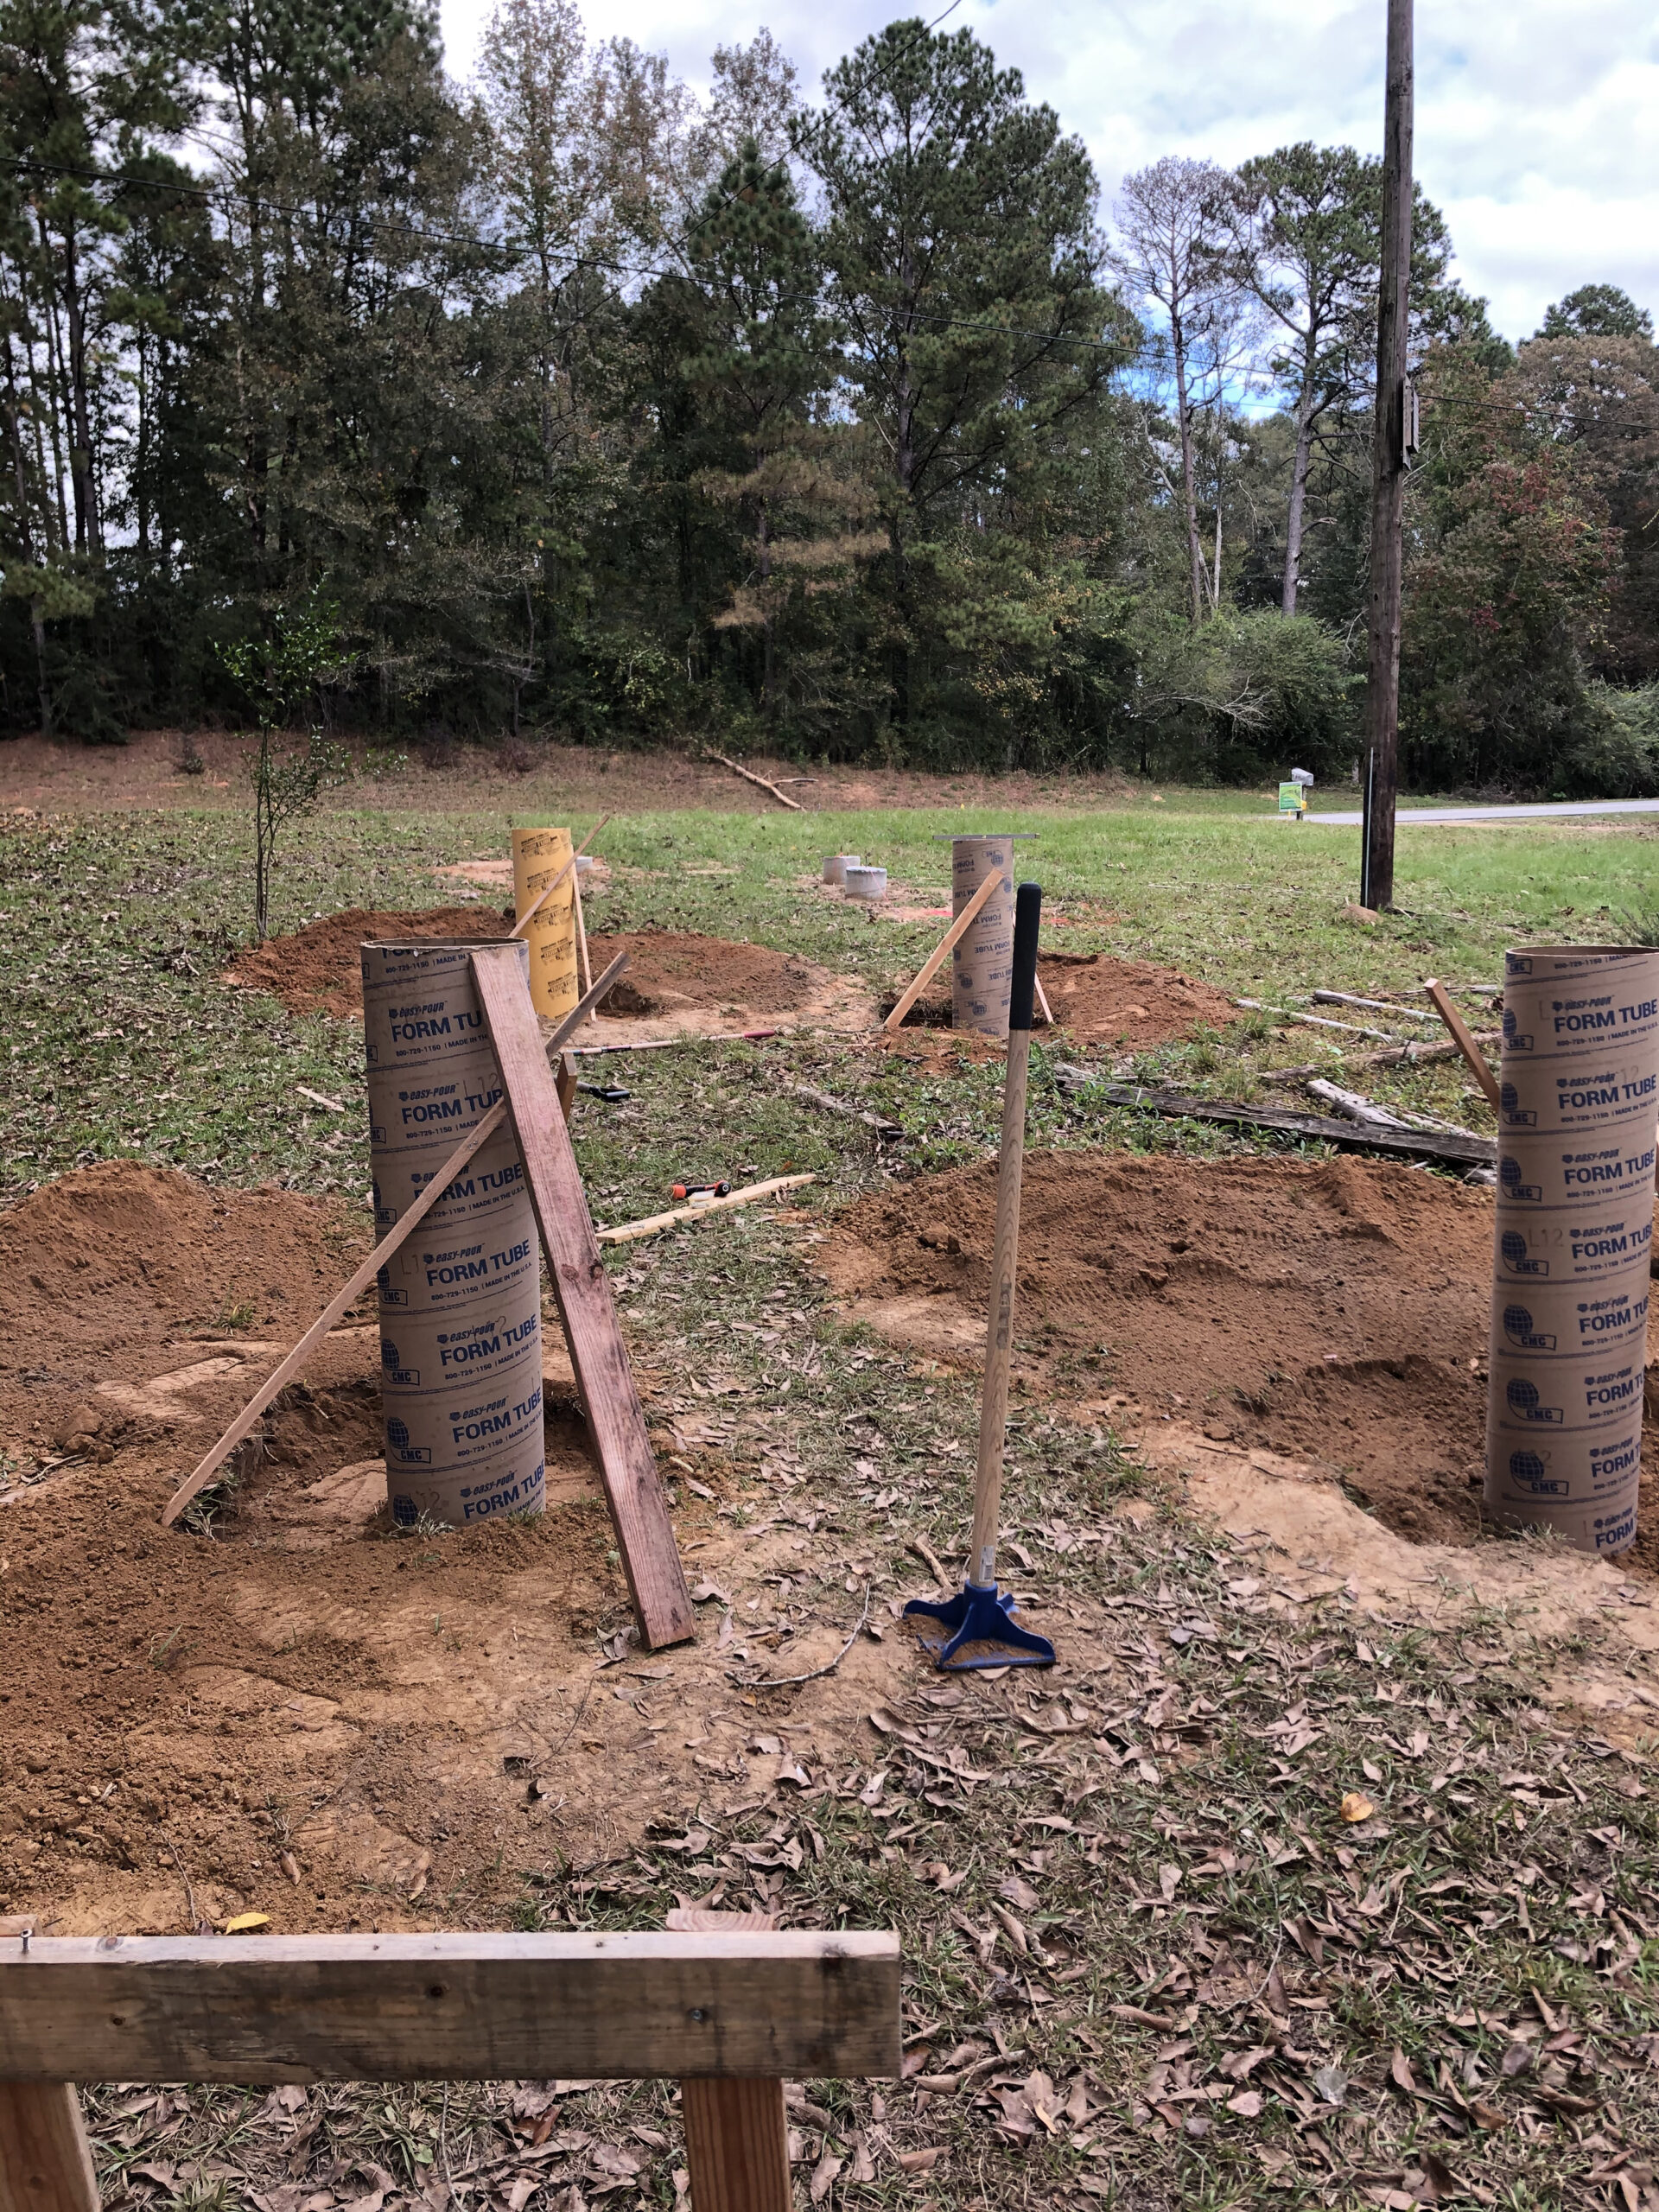
Our Lowe’s, by the way, sells sonotubes only in four-foot lengths, so for our taller piers I had to drive about 100 miles to a construction-supply store in Baton Rouge and buy 12-foot ones. I cut them into 8-foot lengths to fit in the back of the truck. Such is life in the rural South—everything isn’t just a few minutes away.
Although we are planning to do almost all of the work on our container conversion project ourselves, one thing we most certainly did not want to do was dig holes. The Redibase is 24 inches in diameter, so each hole had to be a bit bigger across than that. At the front end of the container, where the ground is higher, the container would be only about eight inches high, with the pier going down a foot-and-a-half or so. That’s a good bit of dirt.
At the rear of the container, where it is around three feet off the ground because of the slope in the yard, three or four feet of pier would be buried. And that’s a lot of dirt.
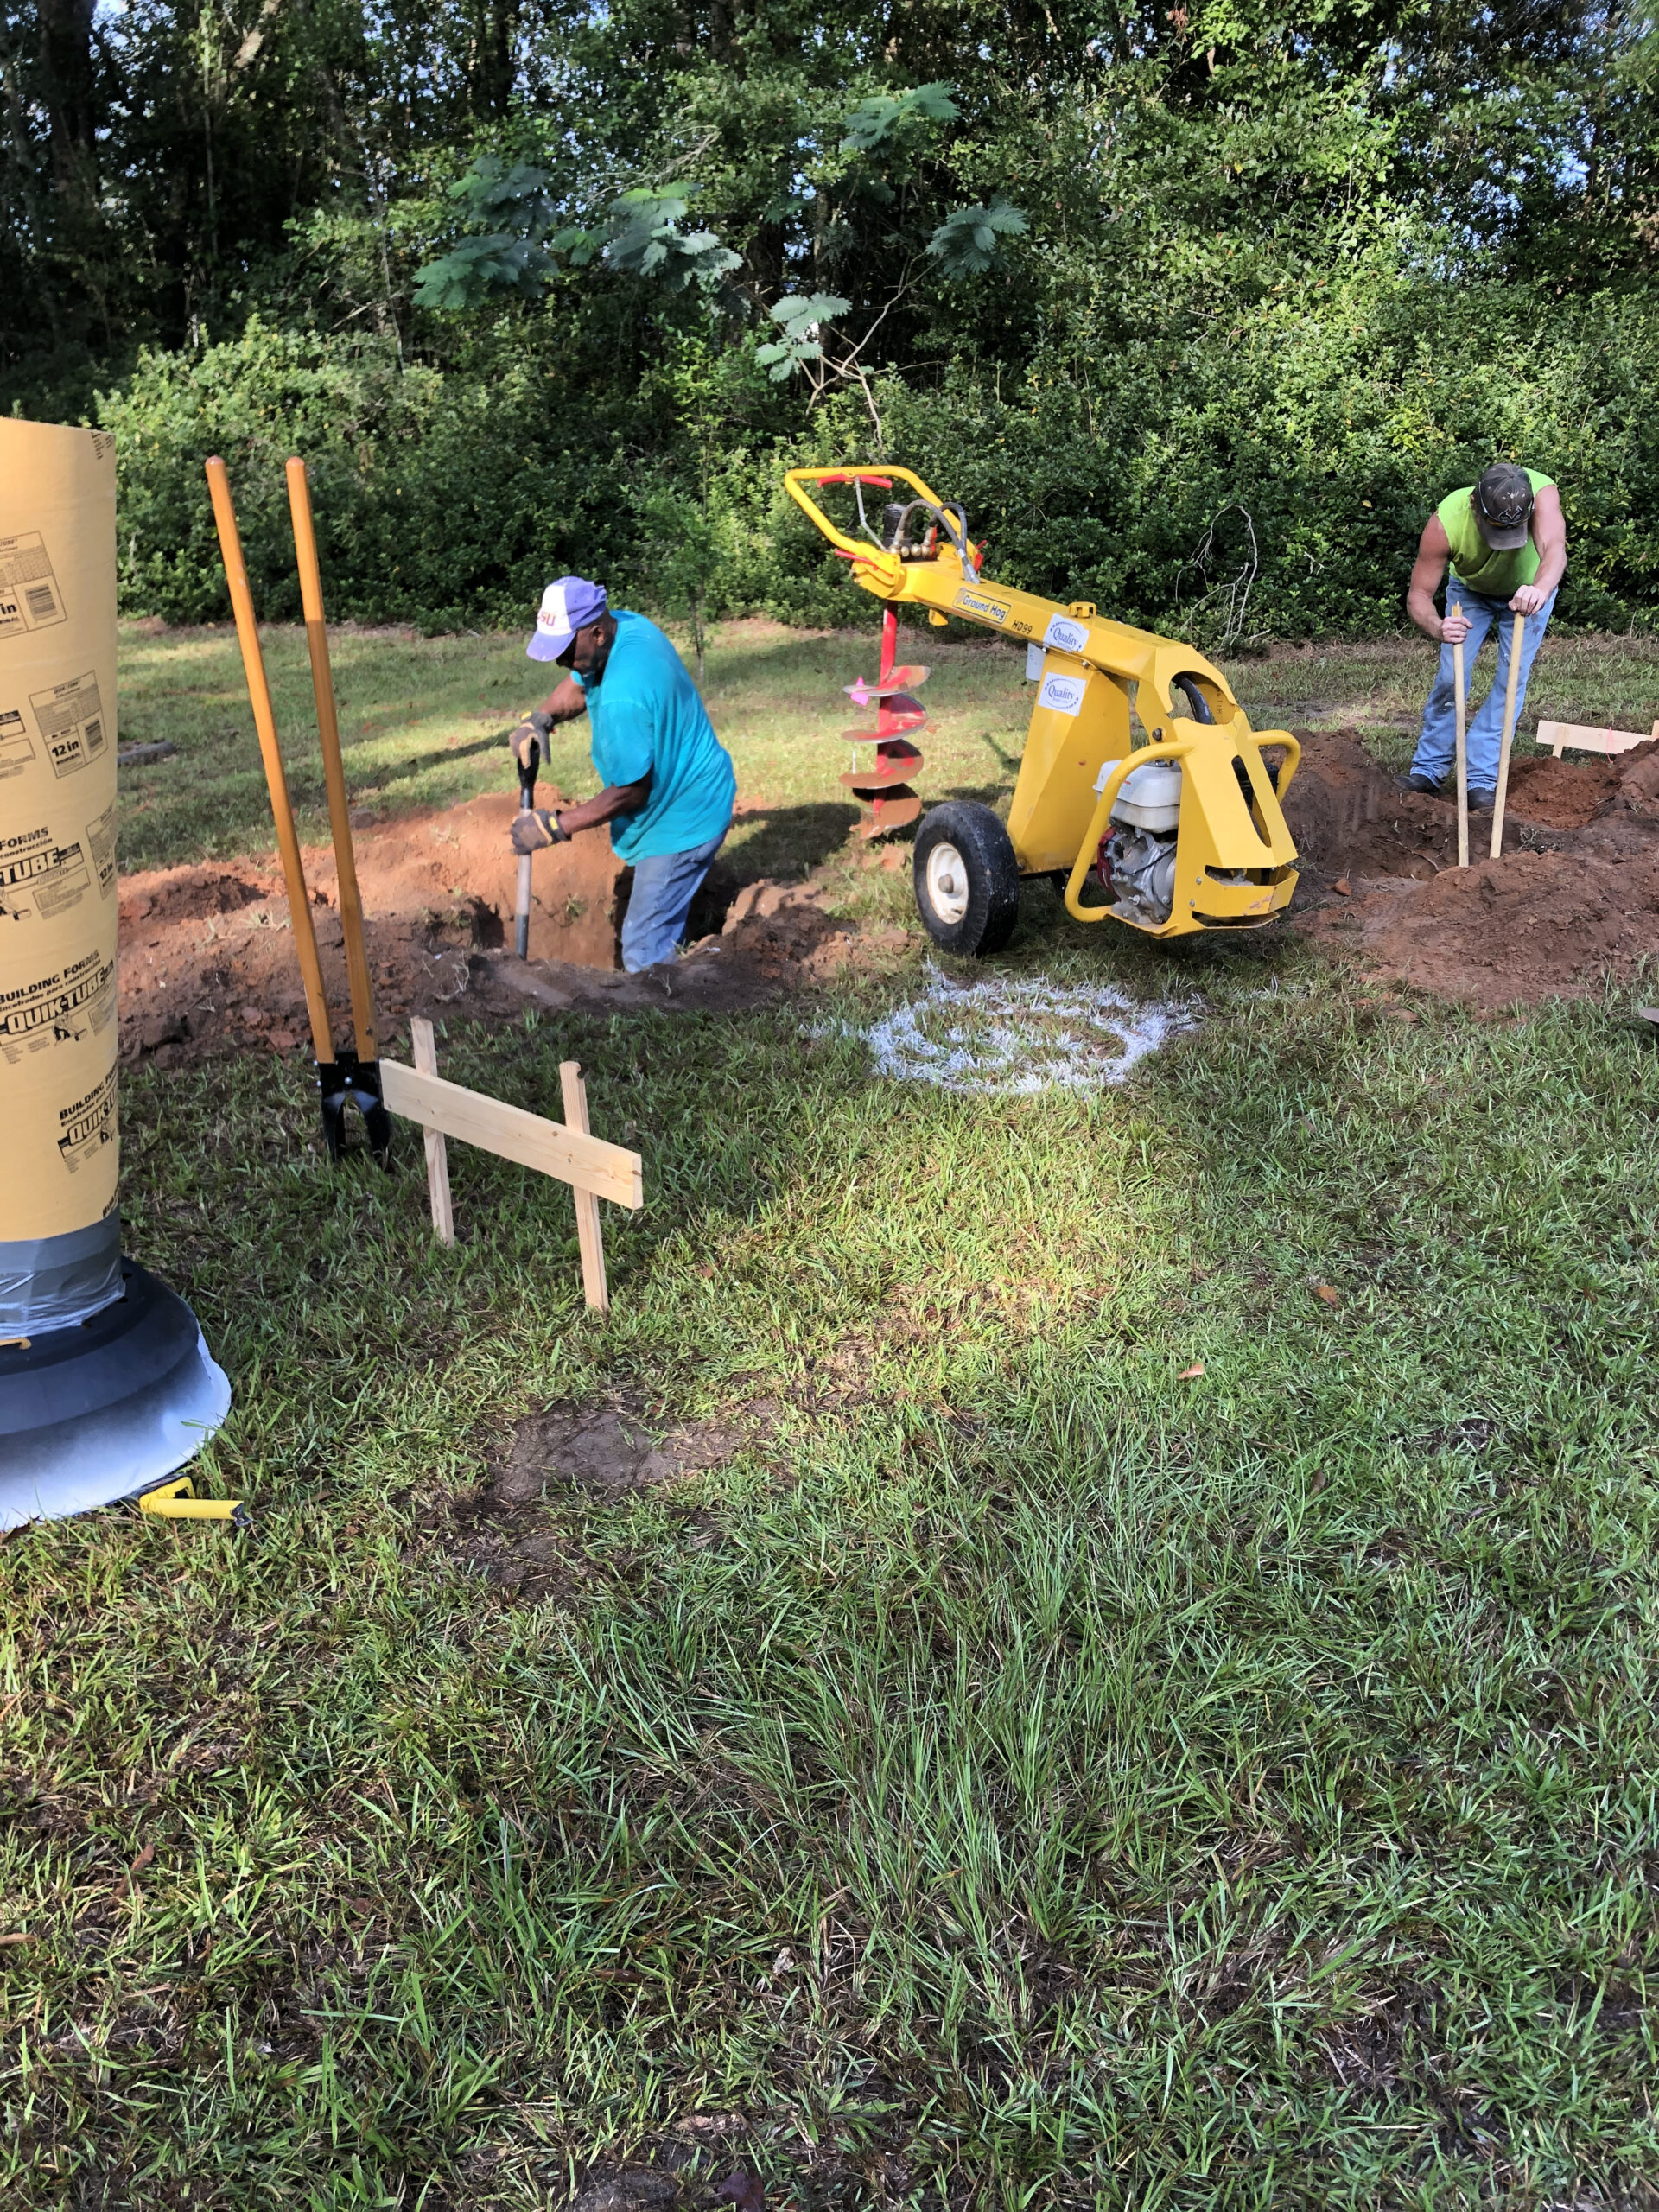
I called my friend Mr. Sammy, whose crew does all-around maintenance, handyman, and light construction work. I rented a trailer-mounted auger with a 10-inch bit, the biggest the rental place had, and Sammy’s crew went to digging.
I was fairly confident in my measurements, but of course once the holes were dug—their bottoms made as level as possible—I’d have to reconnect the strings to the batter boards and get out my plumb bob to be sure the Redibases were placed exactly right in each hole. Once in place, you hold the Redibases down with several spikes on the edges. The sonotubes would already have been attached to the bases with duct tape.
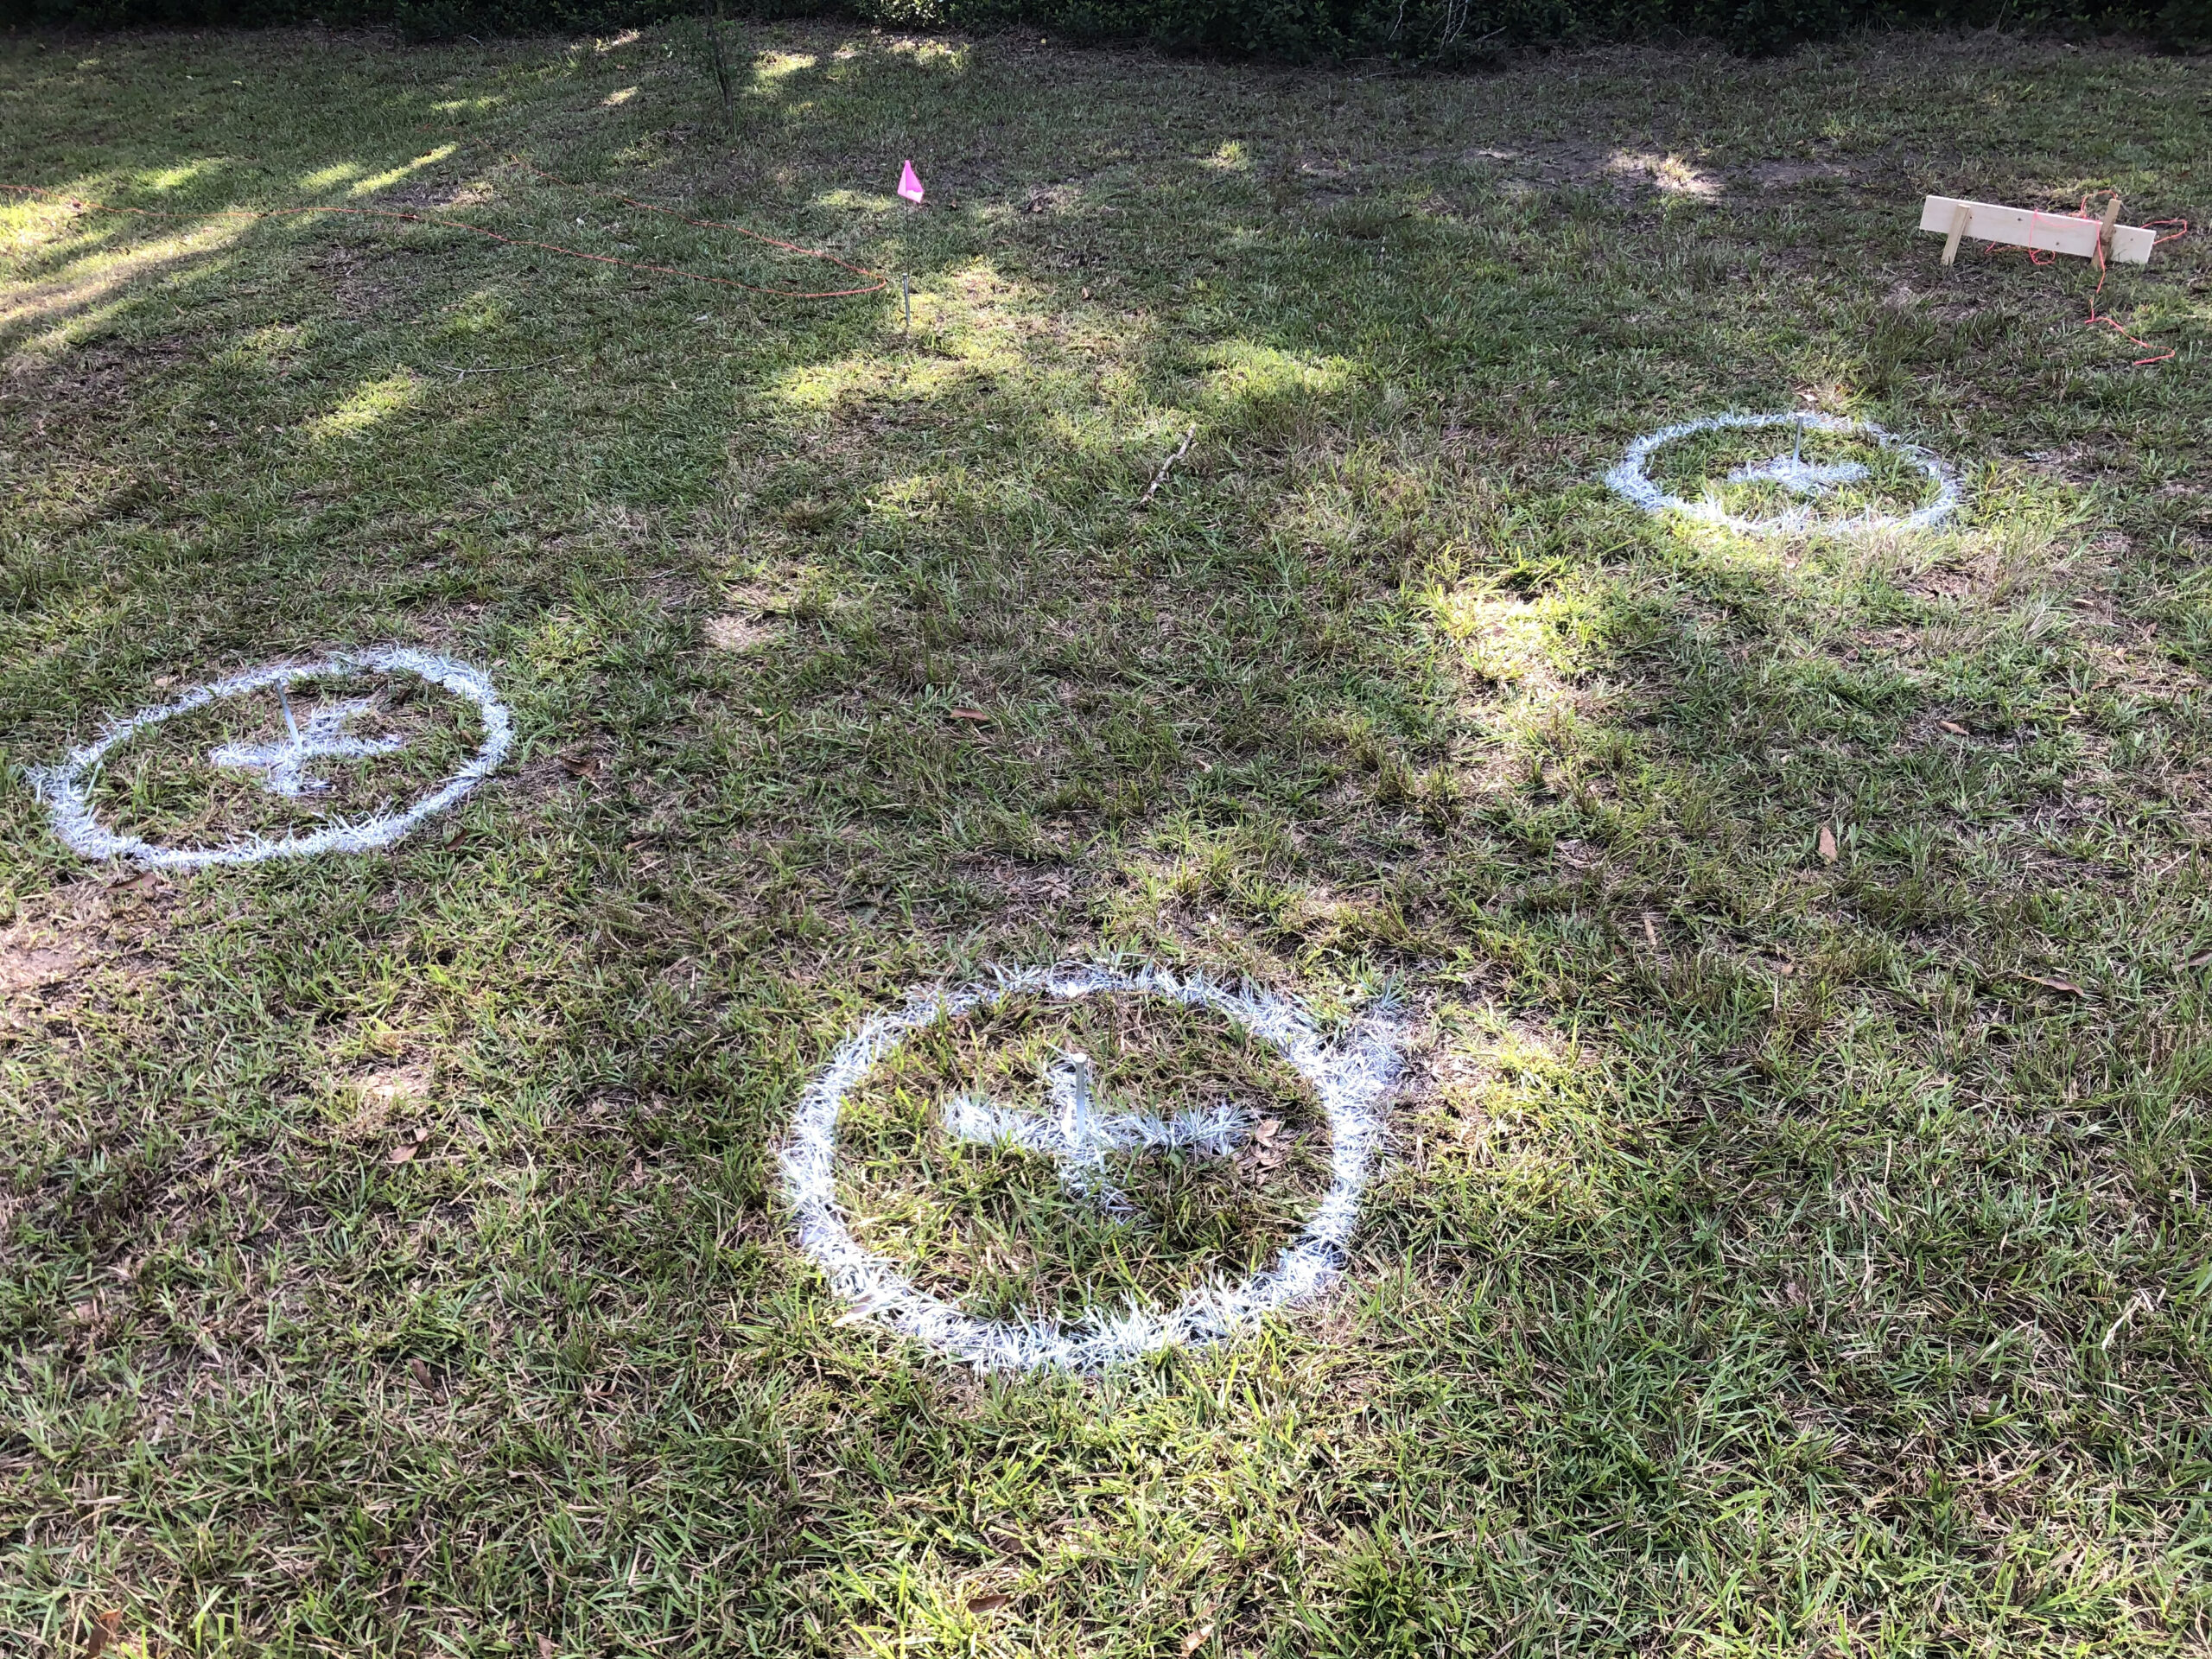
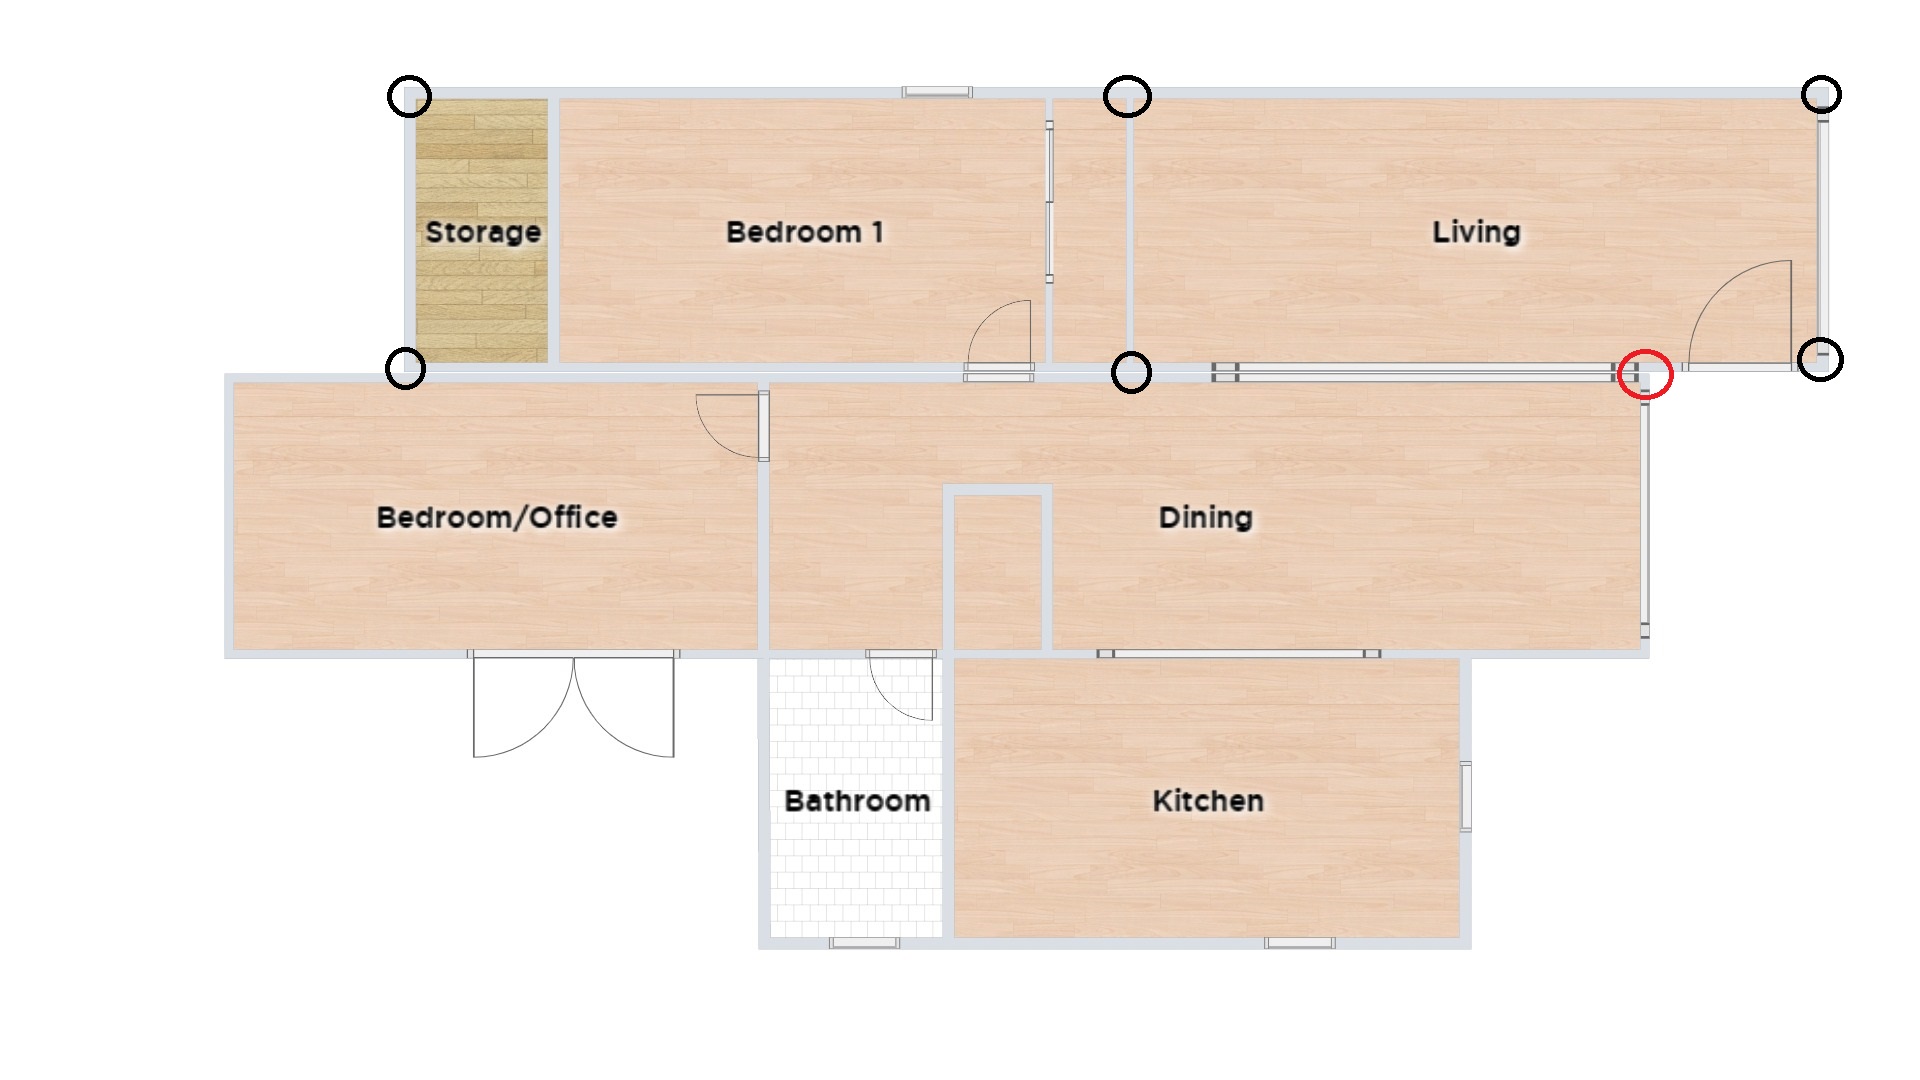
We did the pier placement over two sessions in late 2020, seven piers in all. Although each 40-foot container would have six piers, there were seven here because one of them (in red on the diagram) would eventually serve as a corner support for the next container.
For obvious reasons, concrete piers need to be vertical, else they lose strength. And so it was important to brace them absolutely plumb while backfilling and tamping down soil.
To be continued…
Pingback: CONTAINER 2: CONCRETE PIERS & A DESIGN CHANGE – Our Shipping Container House