Ever since that time in the mid-1960s that my asshole brother told me to touch a nine-volt battery to my tongue because it would feel “neat,” I have not been a great fan of electricity. Oh, I like it when electricity-driven machinery—computers, refrigerators, impact drivers, the lamp on my nightstand—do what they’re supposed to do, and I dislike it very much when the power goes out, especially in winter. But I’ve never had an interest in poking around in, say, a wall outlet or breaker box. It’s therefore curious that I’ve been doing just that recently. A lot of it.
But from the beginning…
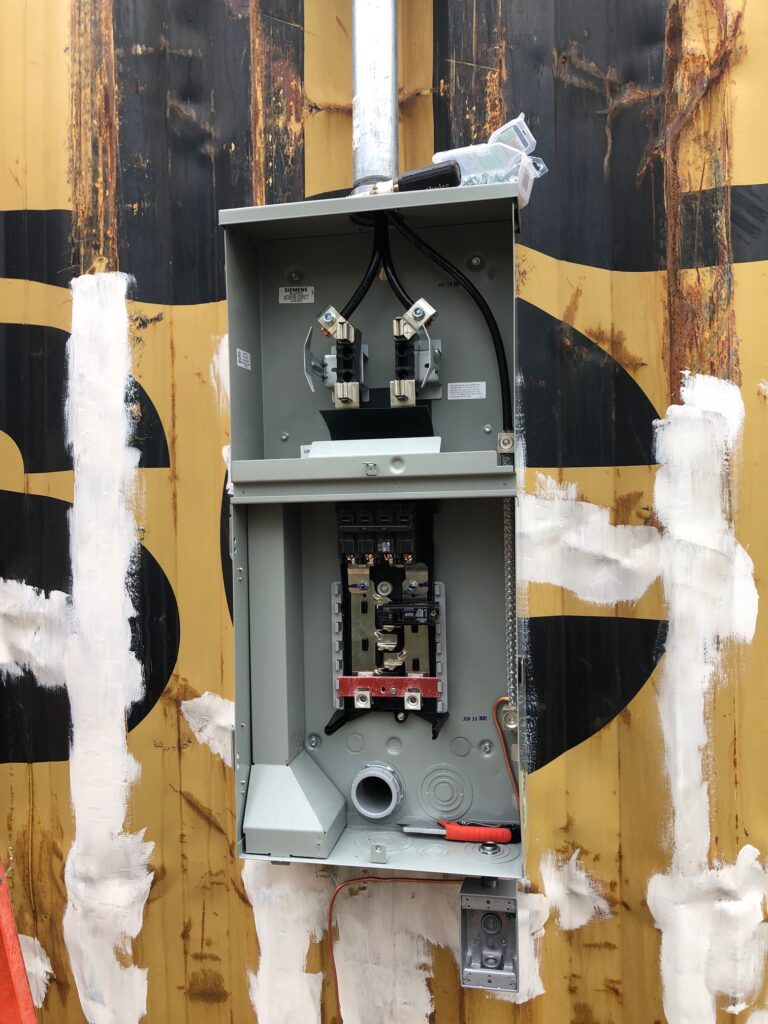
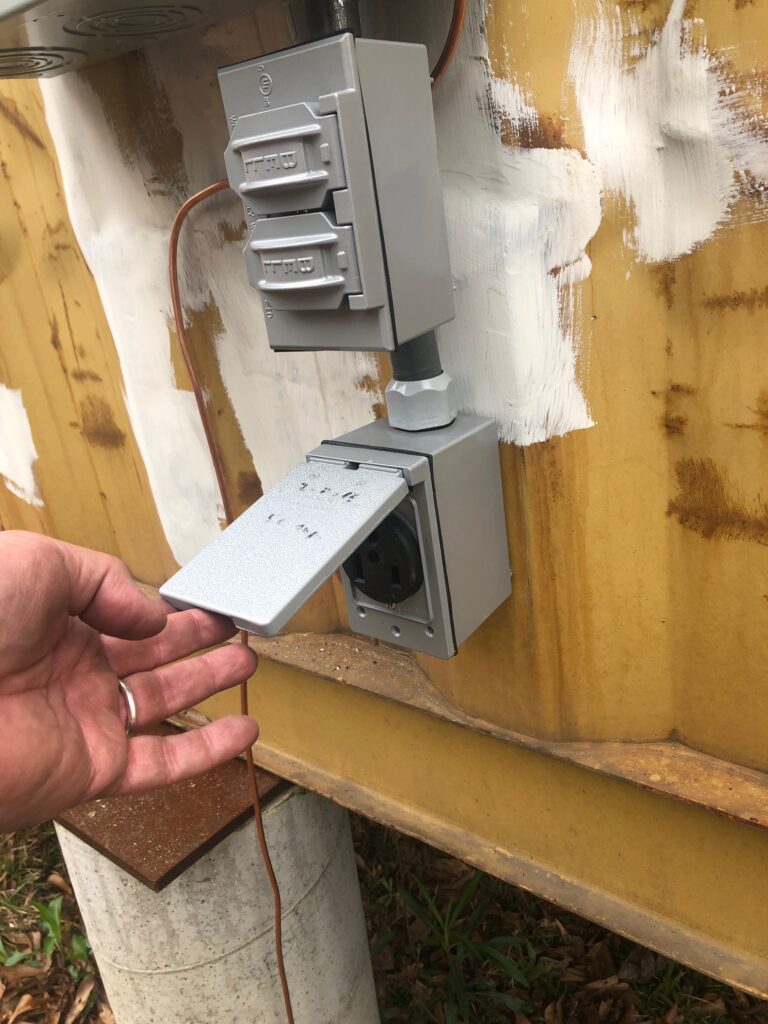
Very soon after the first container was set in place on its piers, Judd, who is our terrific electrician, came out and attached the service mast and box for the meter. He also put in an outdoor receptacle and a 50-amp receptacle for my welding machine. These were so we could use power tools and have some light inside the container without having to run extension cords across the yard from our existing house. Judd cleverly made these receptacles independent from the main line that would eventually run in to the main panel indoors. This way we could use them as soon as power came in from the pole, rather than waiting for the indoor panel to be connected.
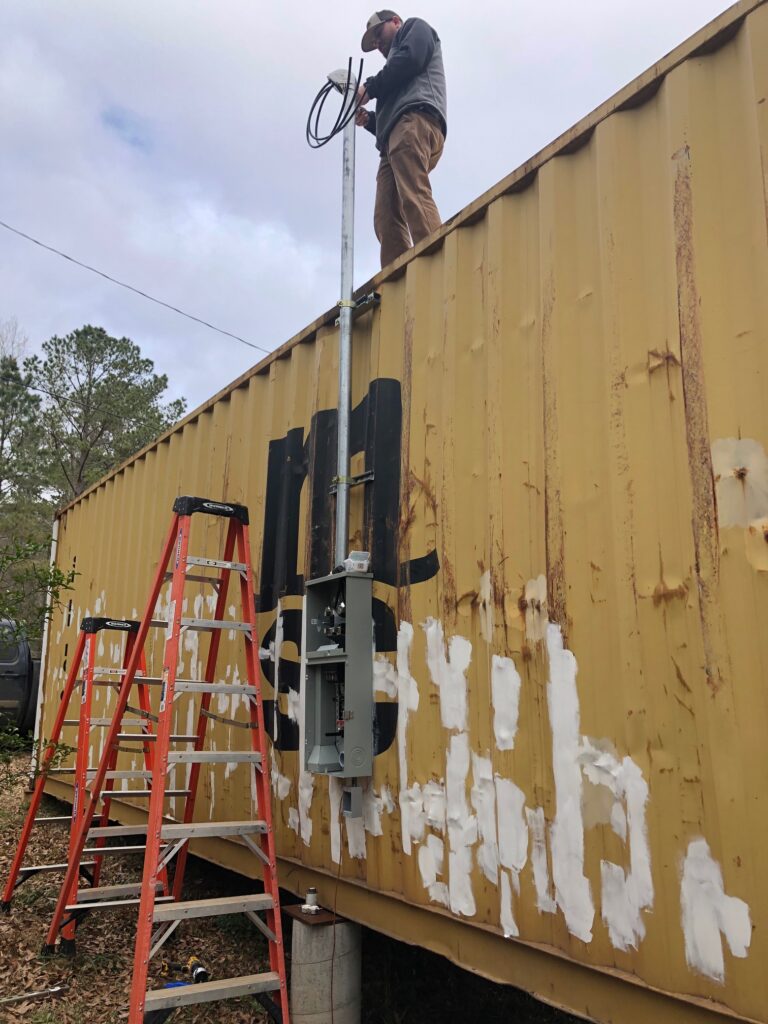
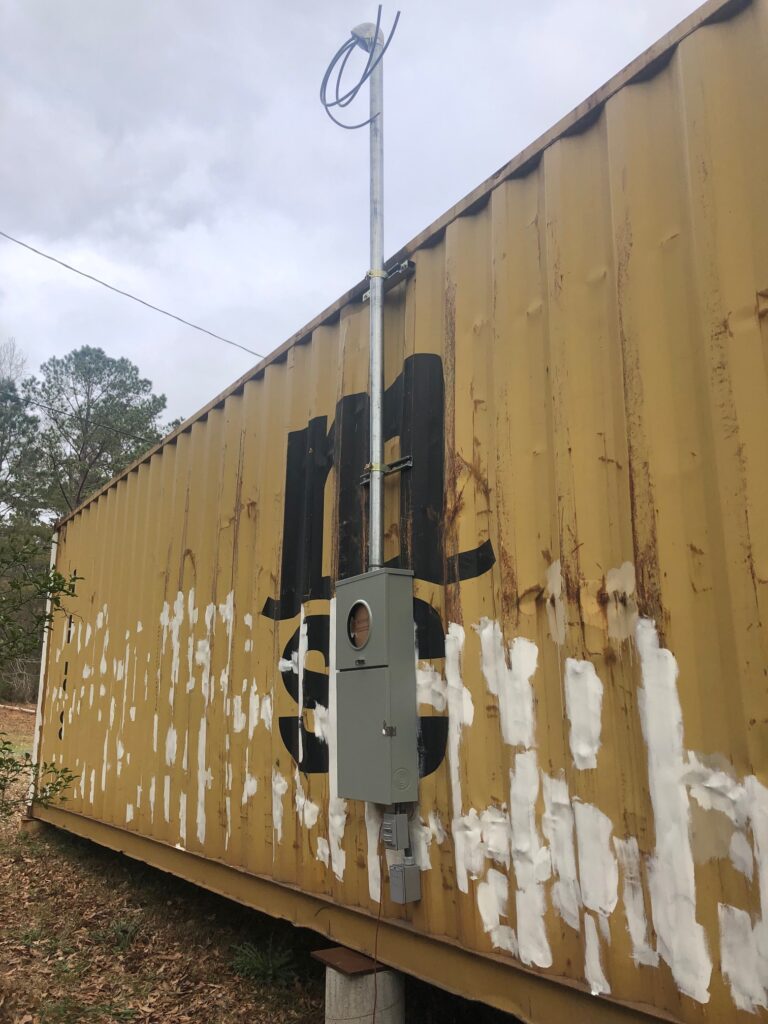
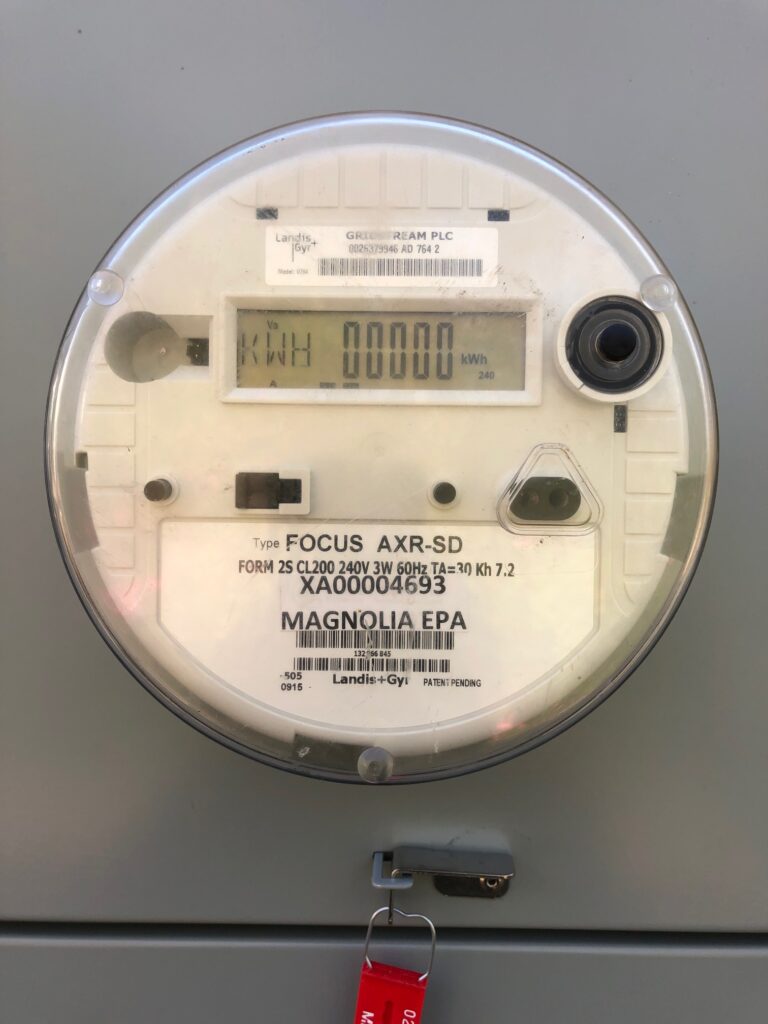
The next step toward electric living was for Magnolia Electric Power Co-op to come out and run the line in from the pole.
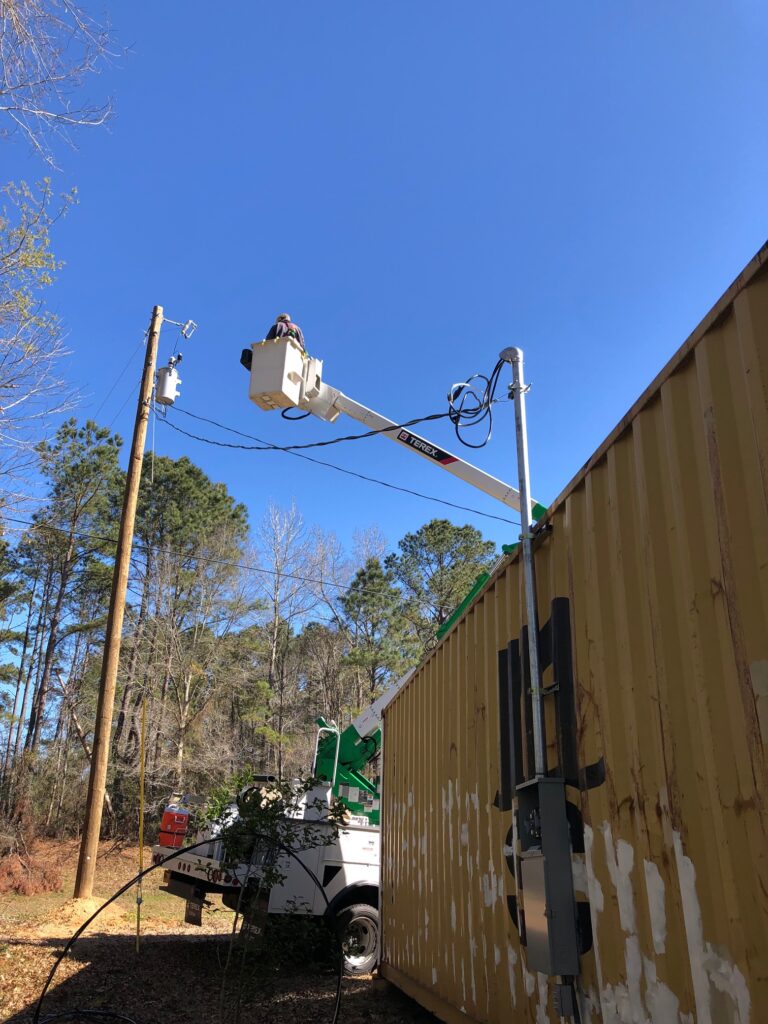
We plugged an extension cord into the new receptacle, with a work light at the other end, and it was very satisfying indeed when the light came alive. It made us feel for the first time that the container was more than just a big steel box sitting in our front yard. It was the very beginning of a home.
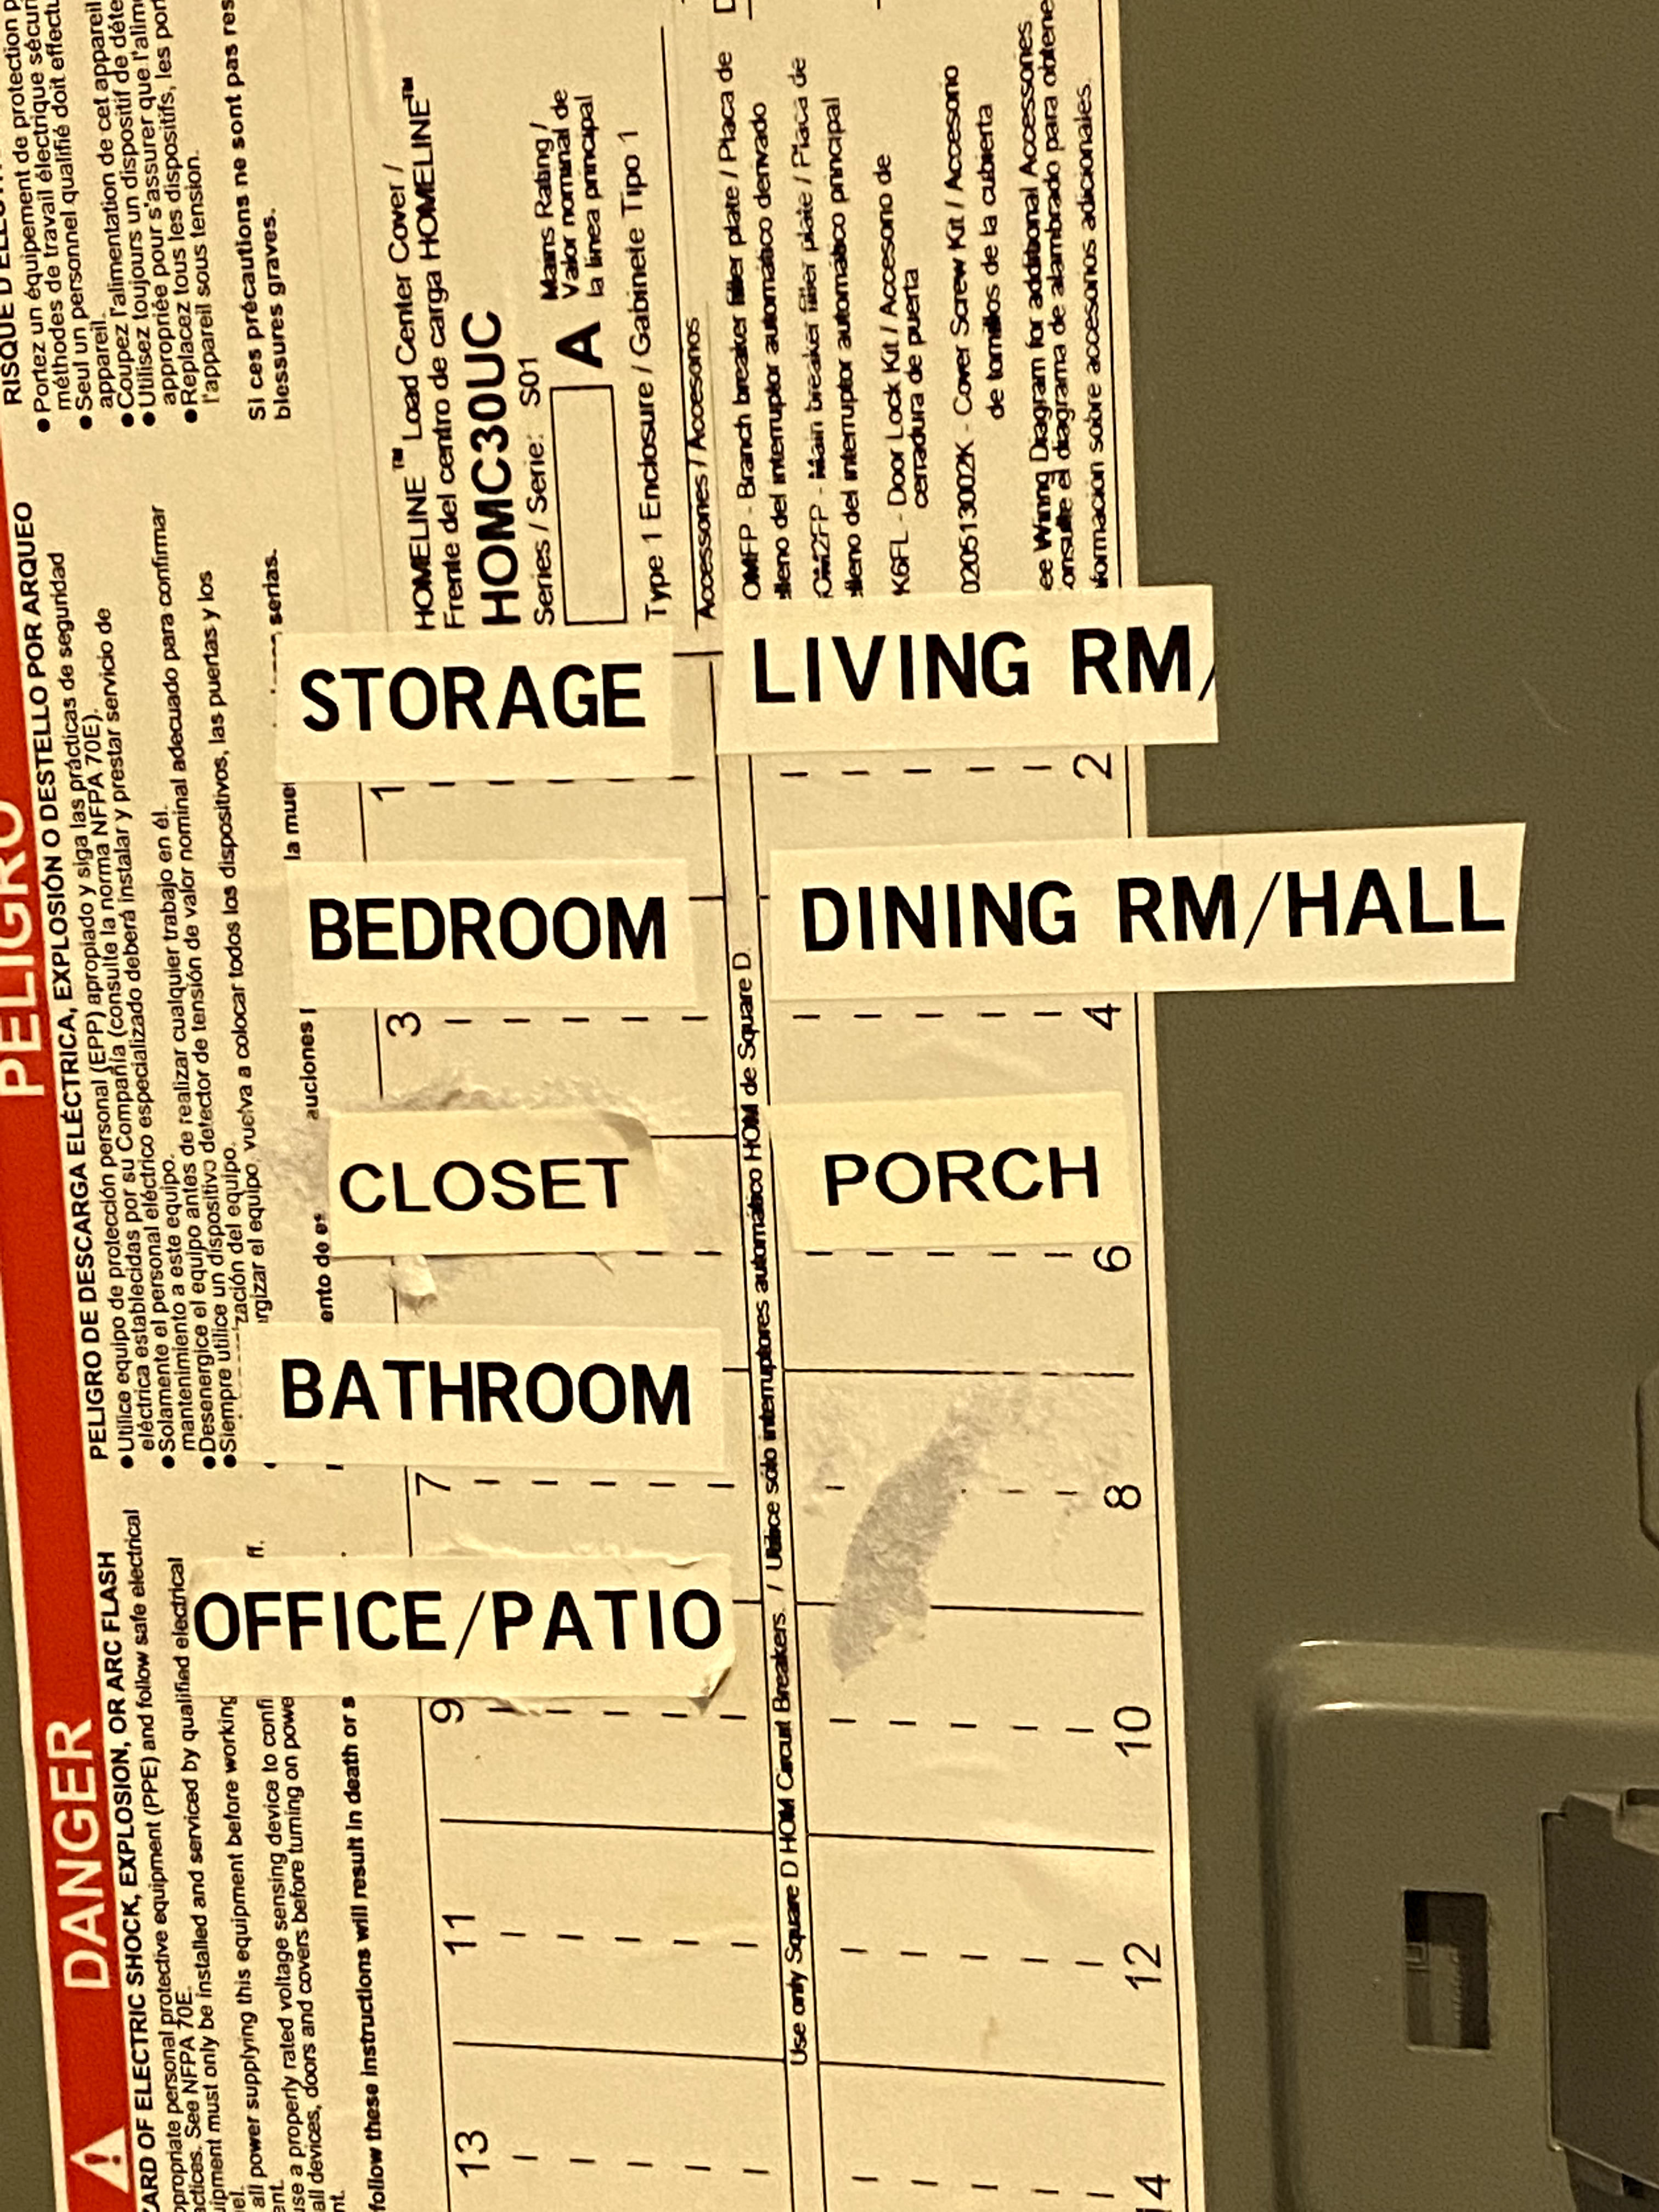
I bought a panel at Home Depot. We live a lot closer to a Lowe’s but they didn’t have many in stock. The panel I chose has a very long name: Square D Homeline 200 Amp 30-Space 60-Circuit Indoor Main Breaker Plug-On Neutral Load Center with Cover (HOM3060M200PCVP)
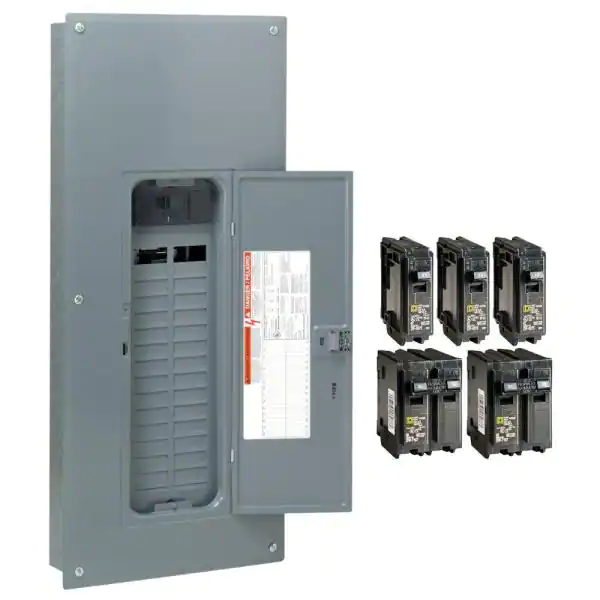
Thirty circuits seemed like plenty for an 800-square-foot dwelling, and if it ever came to it, you could stick a two-circuit breaker in one slot to allow even more circuits. And based on my research, the plug-on neutral feature would make things easier for me down the road. I say “for me” because I planned to do all the interior wiring myself. Also, this panel comes with a handful of breakers as a bonus.
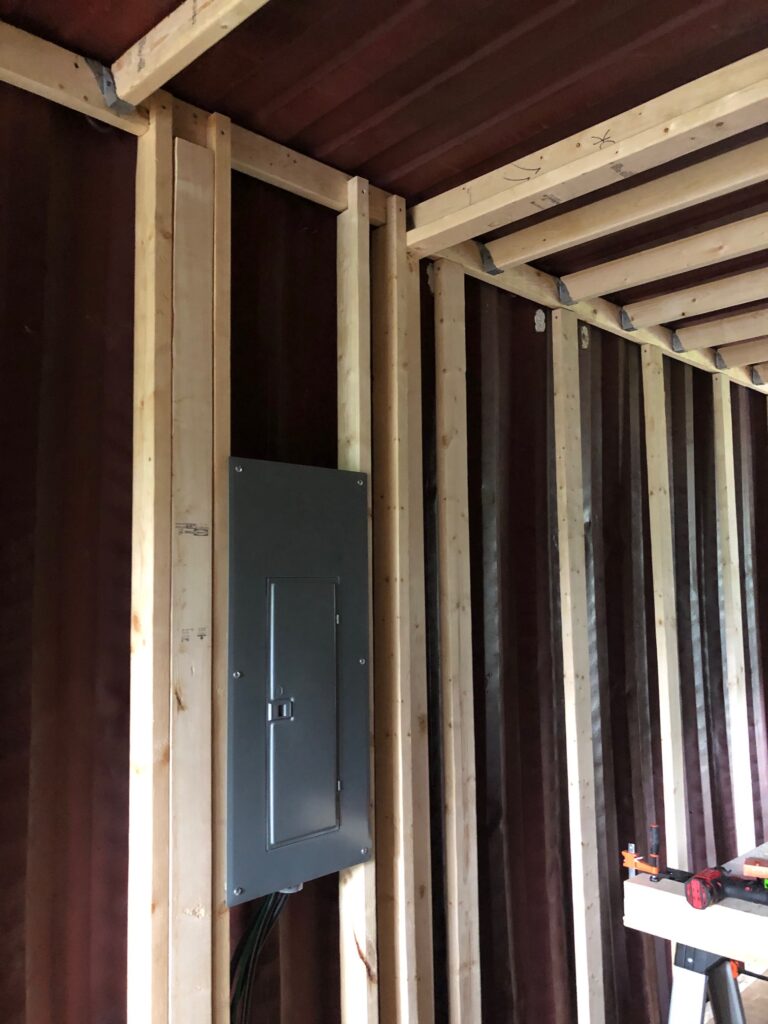
I mounted the panel in what would be the bedroom closet. As I noted in my post about framing, I know that National Electrical Code says that electrical panels shouldn’t go in closets. I know it but put it there anyway.
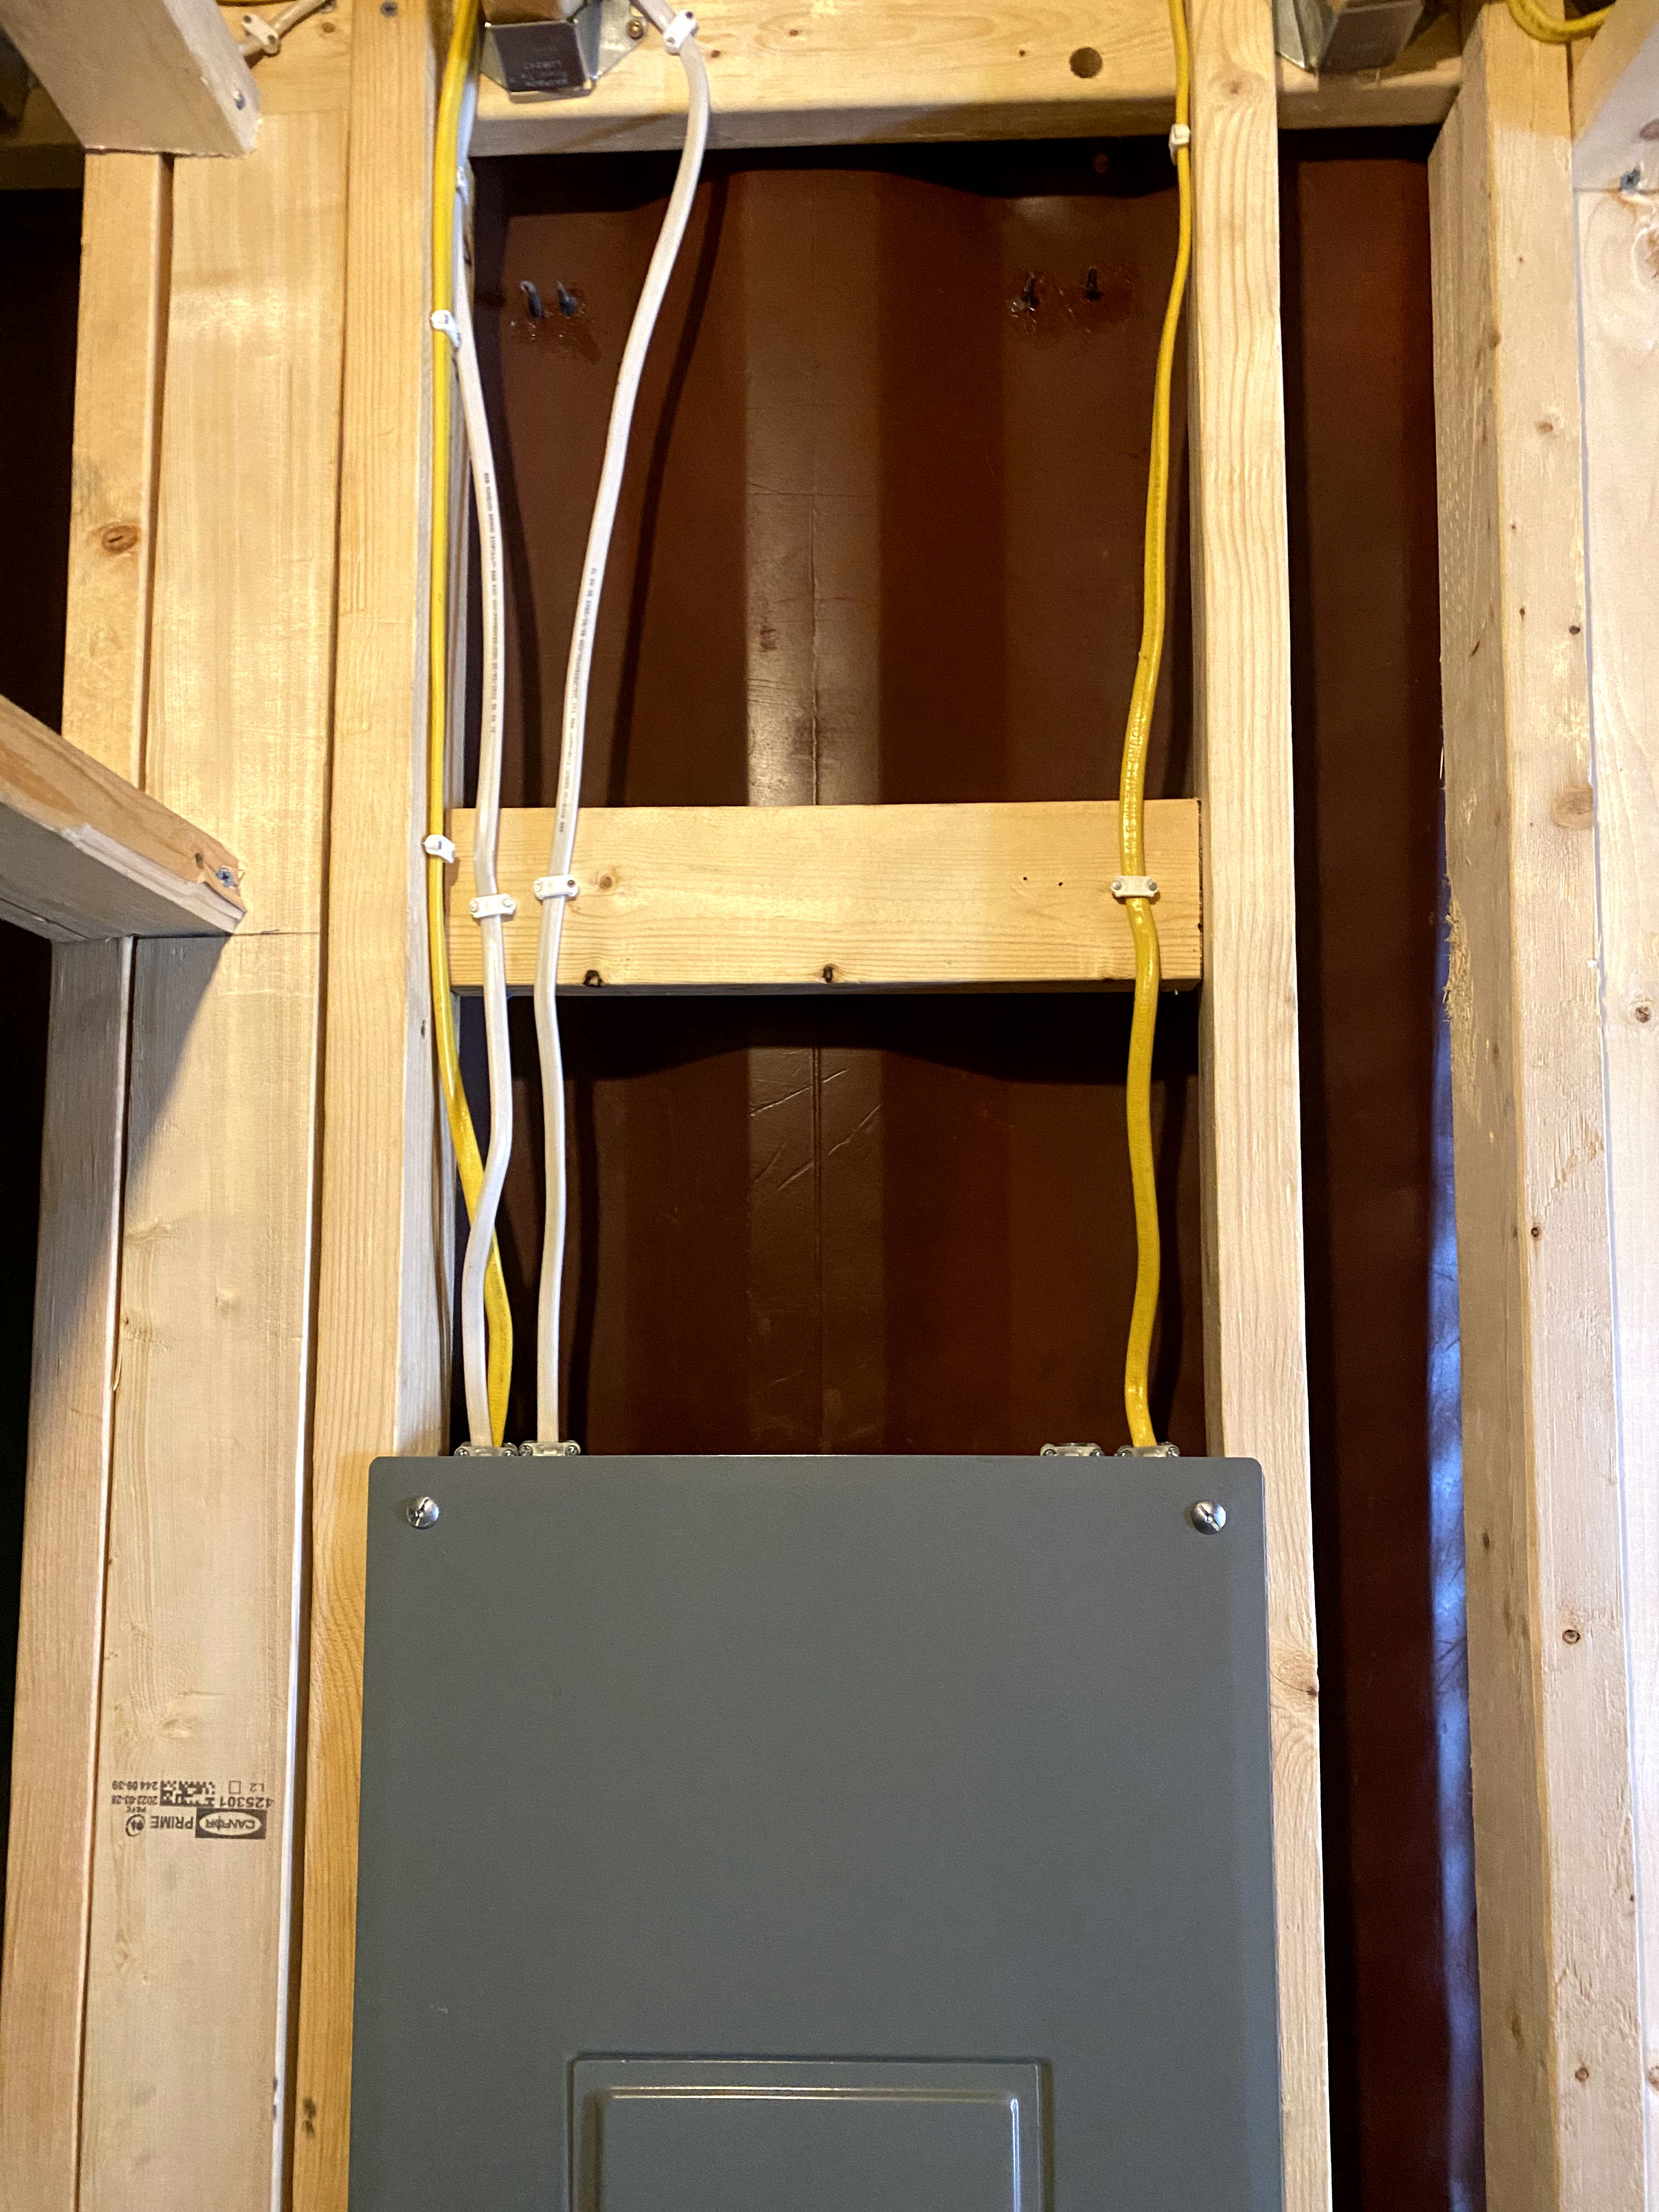
Judd the Electrician came back and ran power in from the exterior panel. From here on, electricity would be in my hands. So to speak.
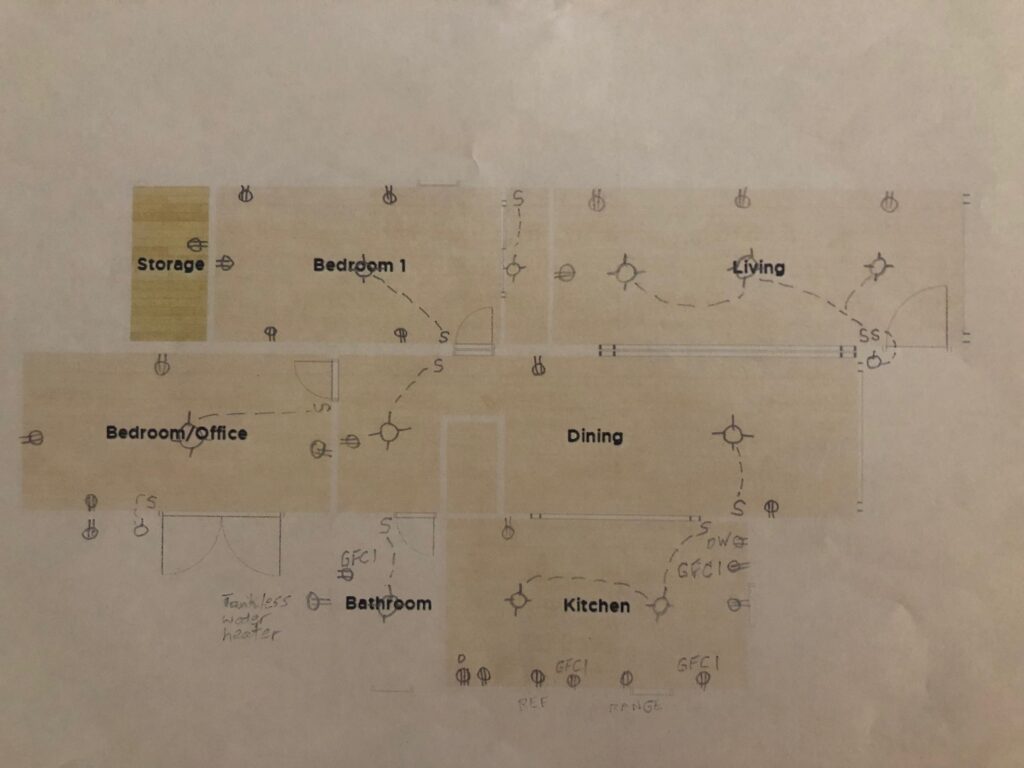
My first task was to make a plan for the entire house, even though we had only the first of three containers. So I drew up a diagram of every socket, switch and hardwire connection.
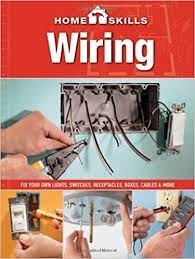
Then I did some cramming, both online and in books, to learn how to run wiring. This book was especially helpful.
An online source I came across where I learned a lot is this YouTube channel by a fellow named Benjamin Sahlstrom. He explains things clearly, with just the right amount of technical detail.
I learned the recommended amperages and wire sizes for various circuits and then started planning which outlets would go on which circuit.
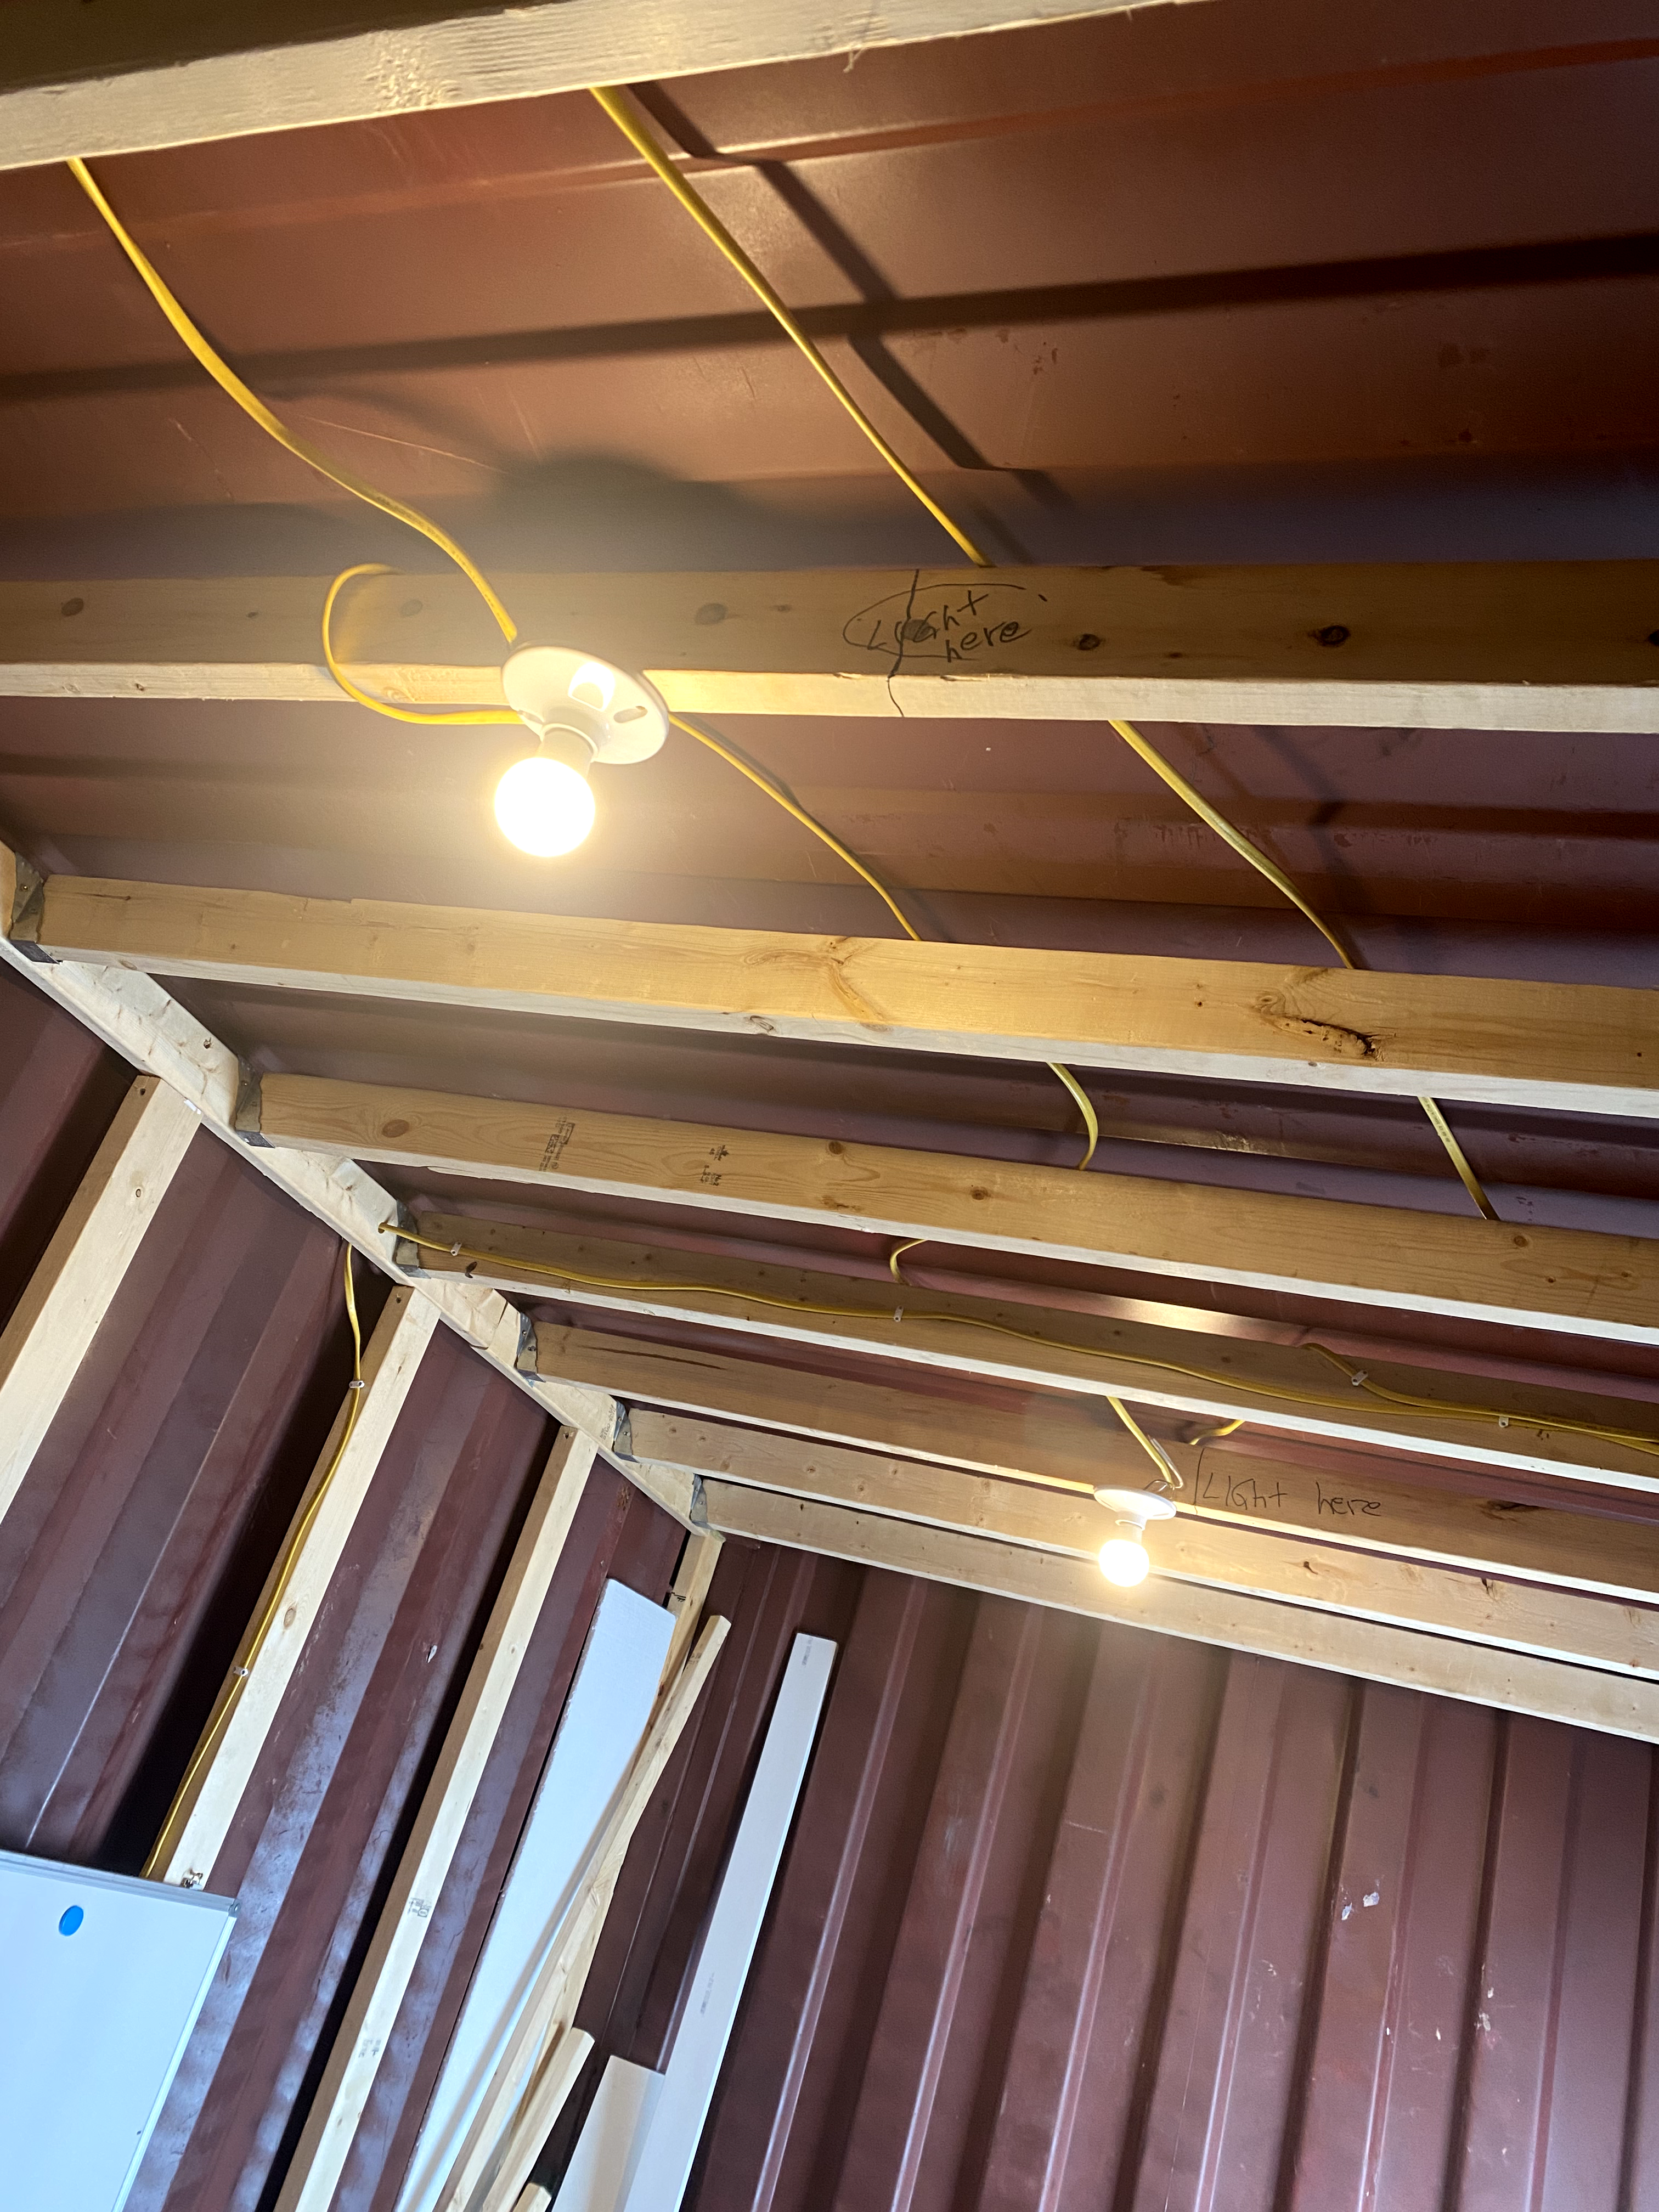
Some of the plan was straightforward and traditional—the bedroom on its own circuit, the living room on its own, etc.—while other parts might be less traditional. For example, the closet didn’t need its own circuit; the only thing in there is an overhead light! Likewise the front porch, with only a porch light and receptacle. I’ll explain later why those peculiarities came about.
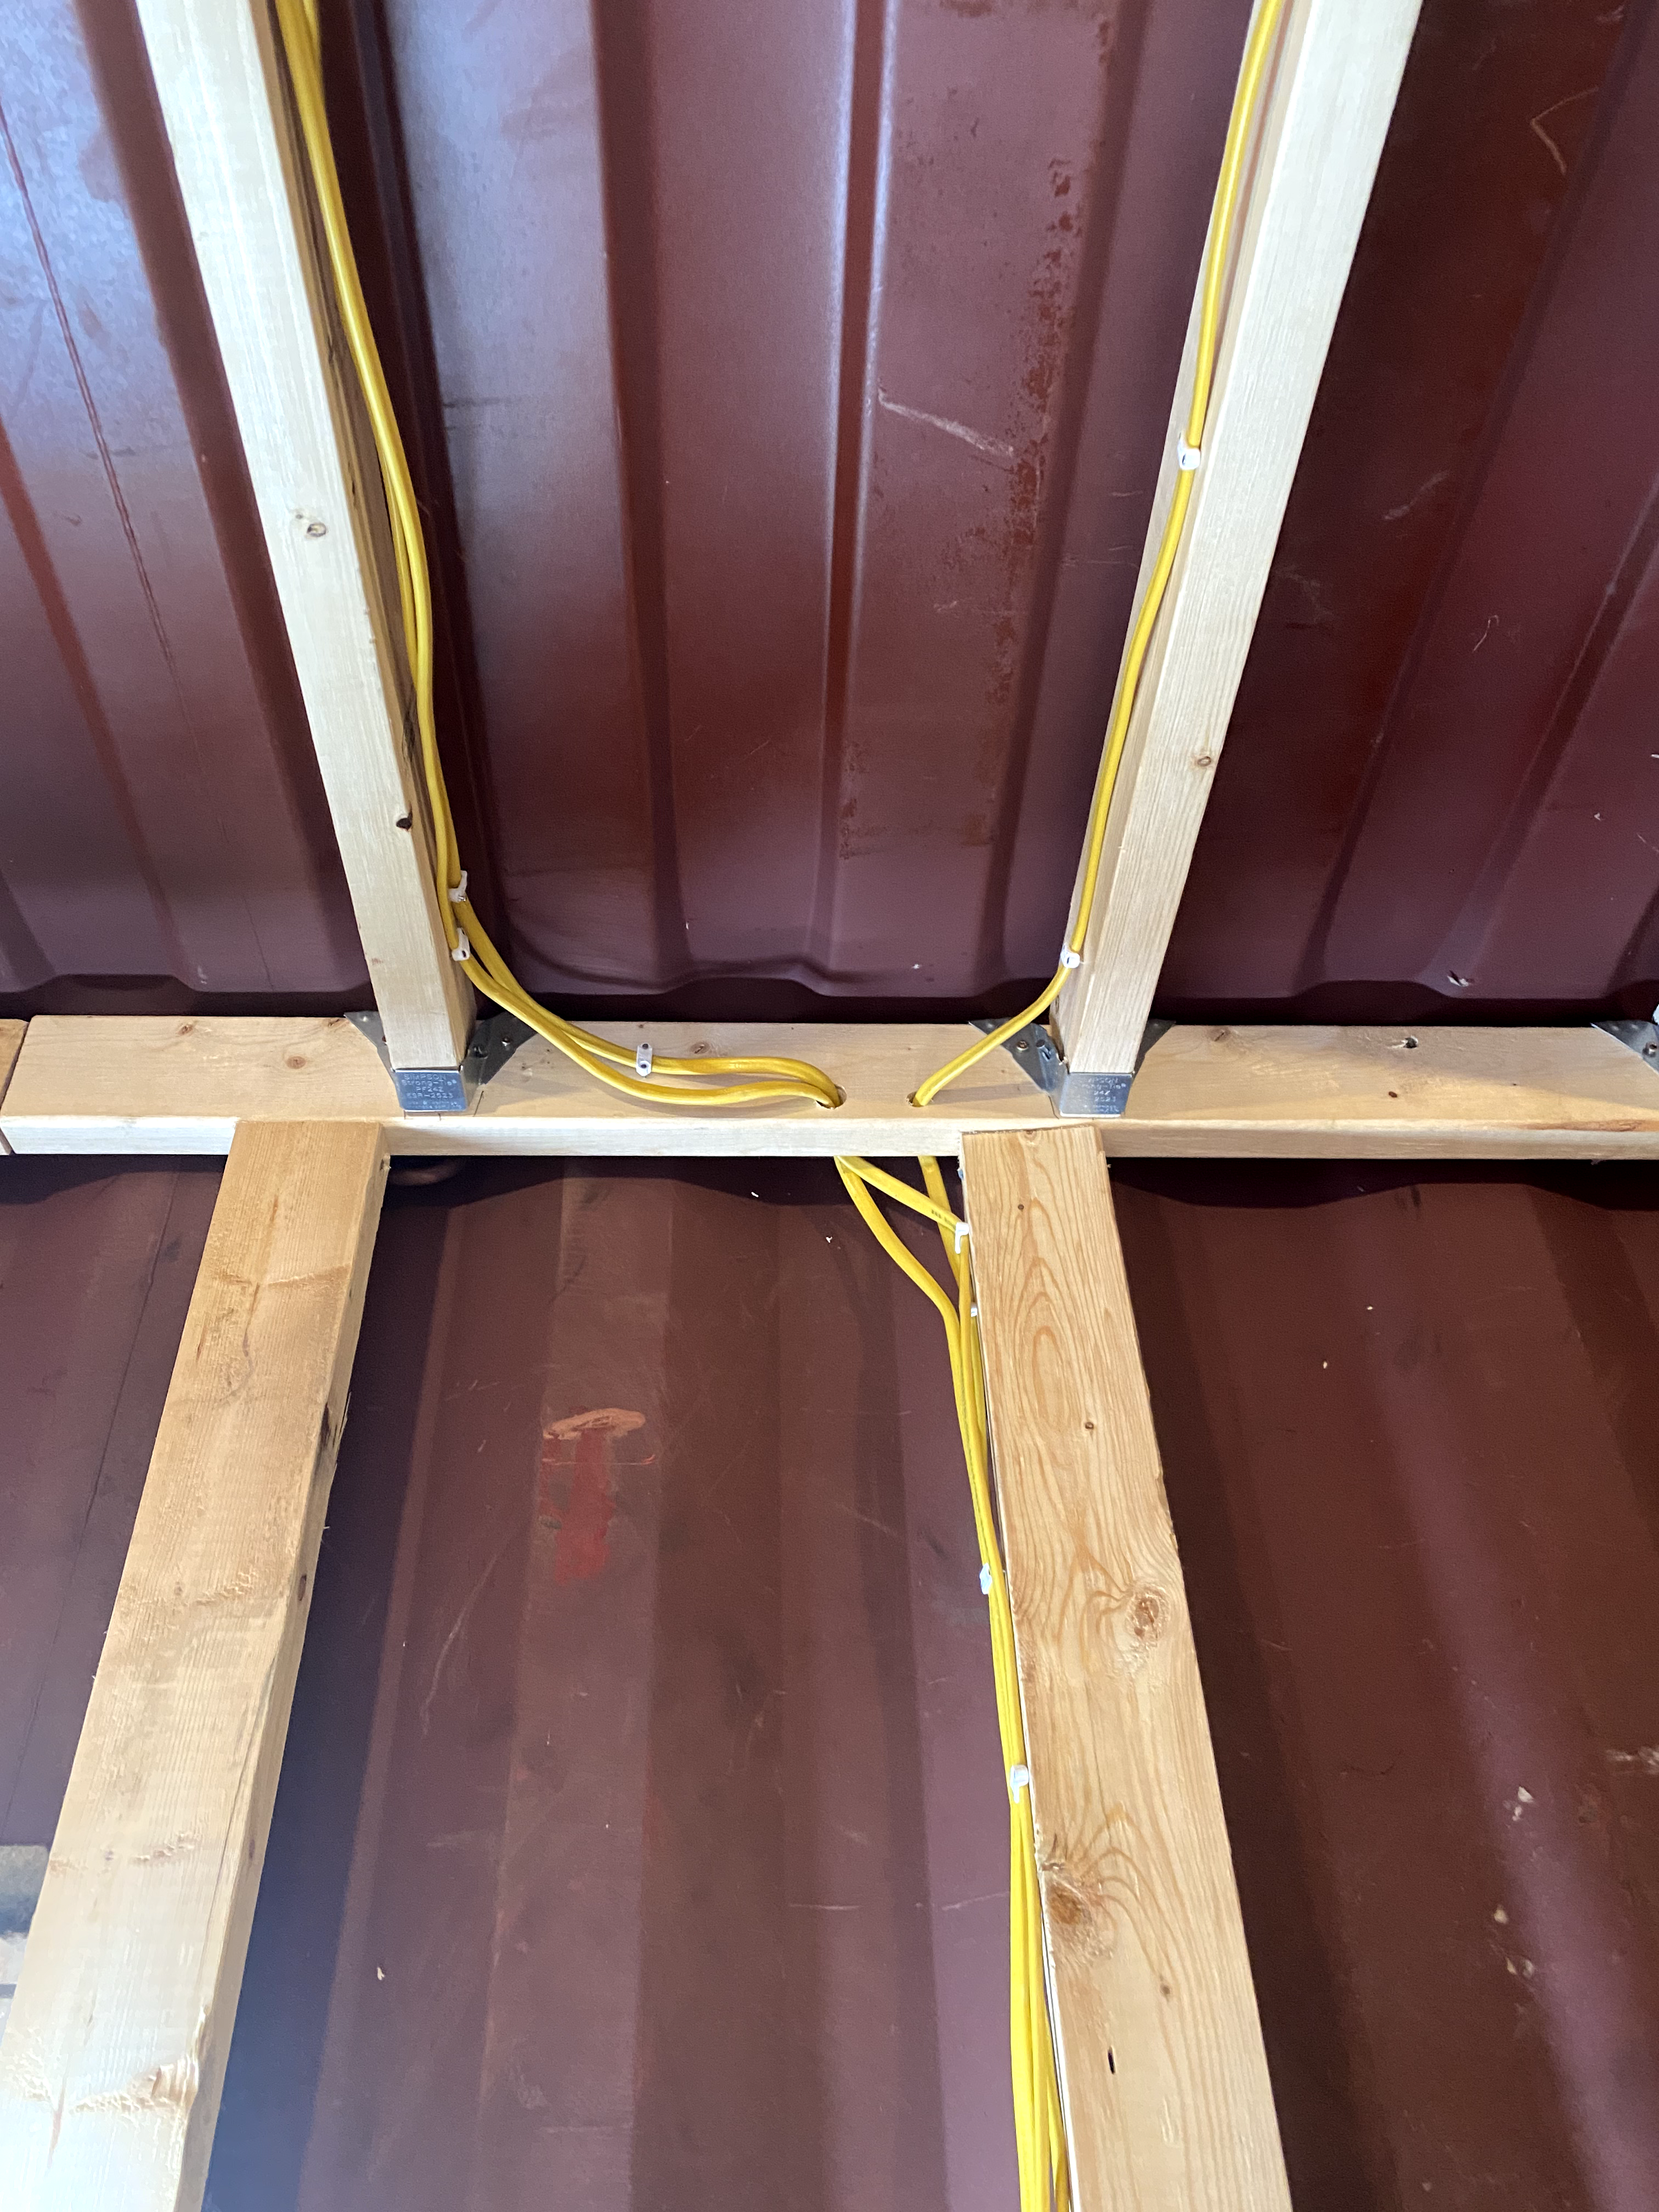
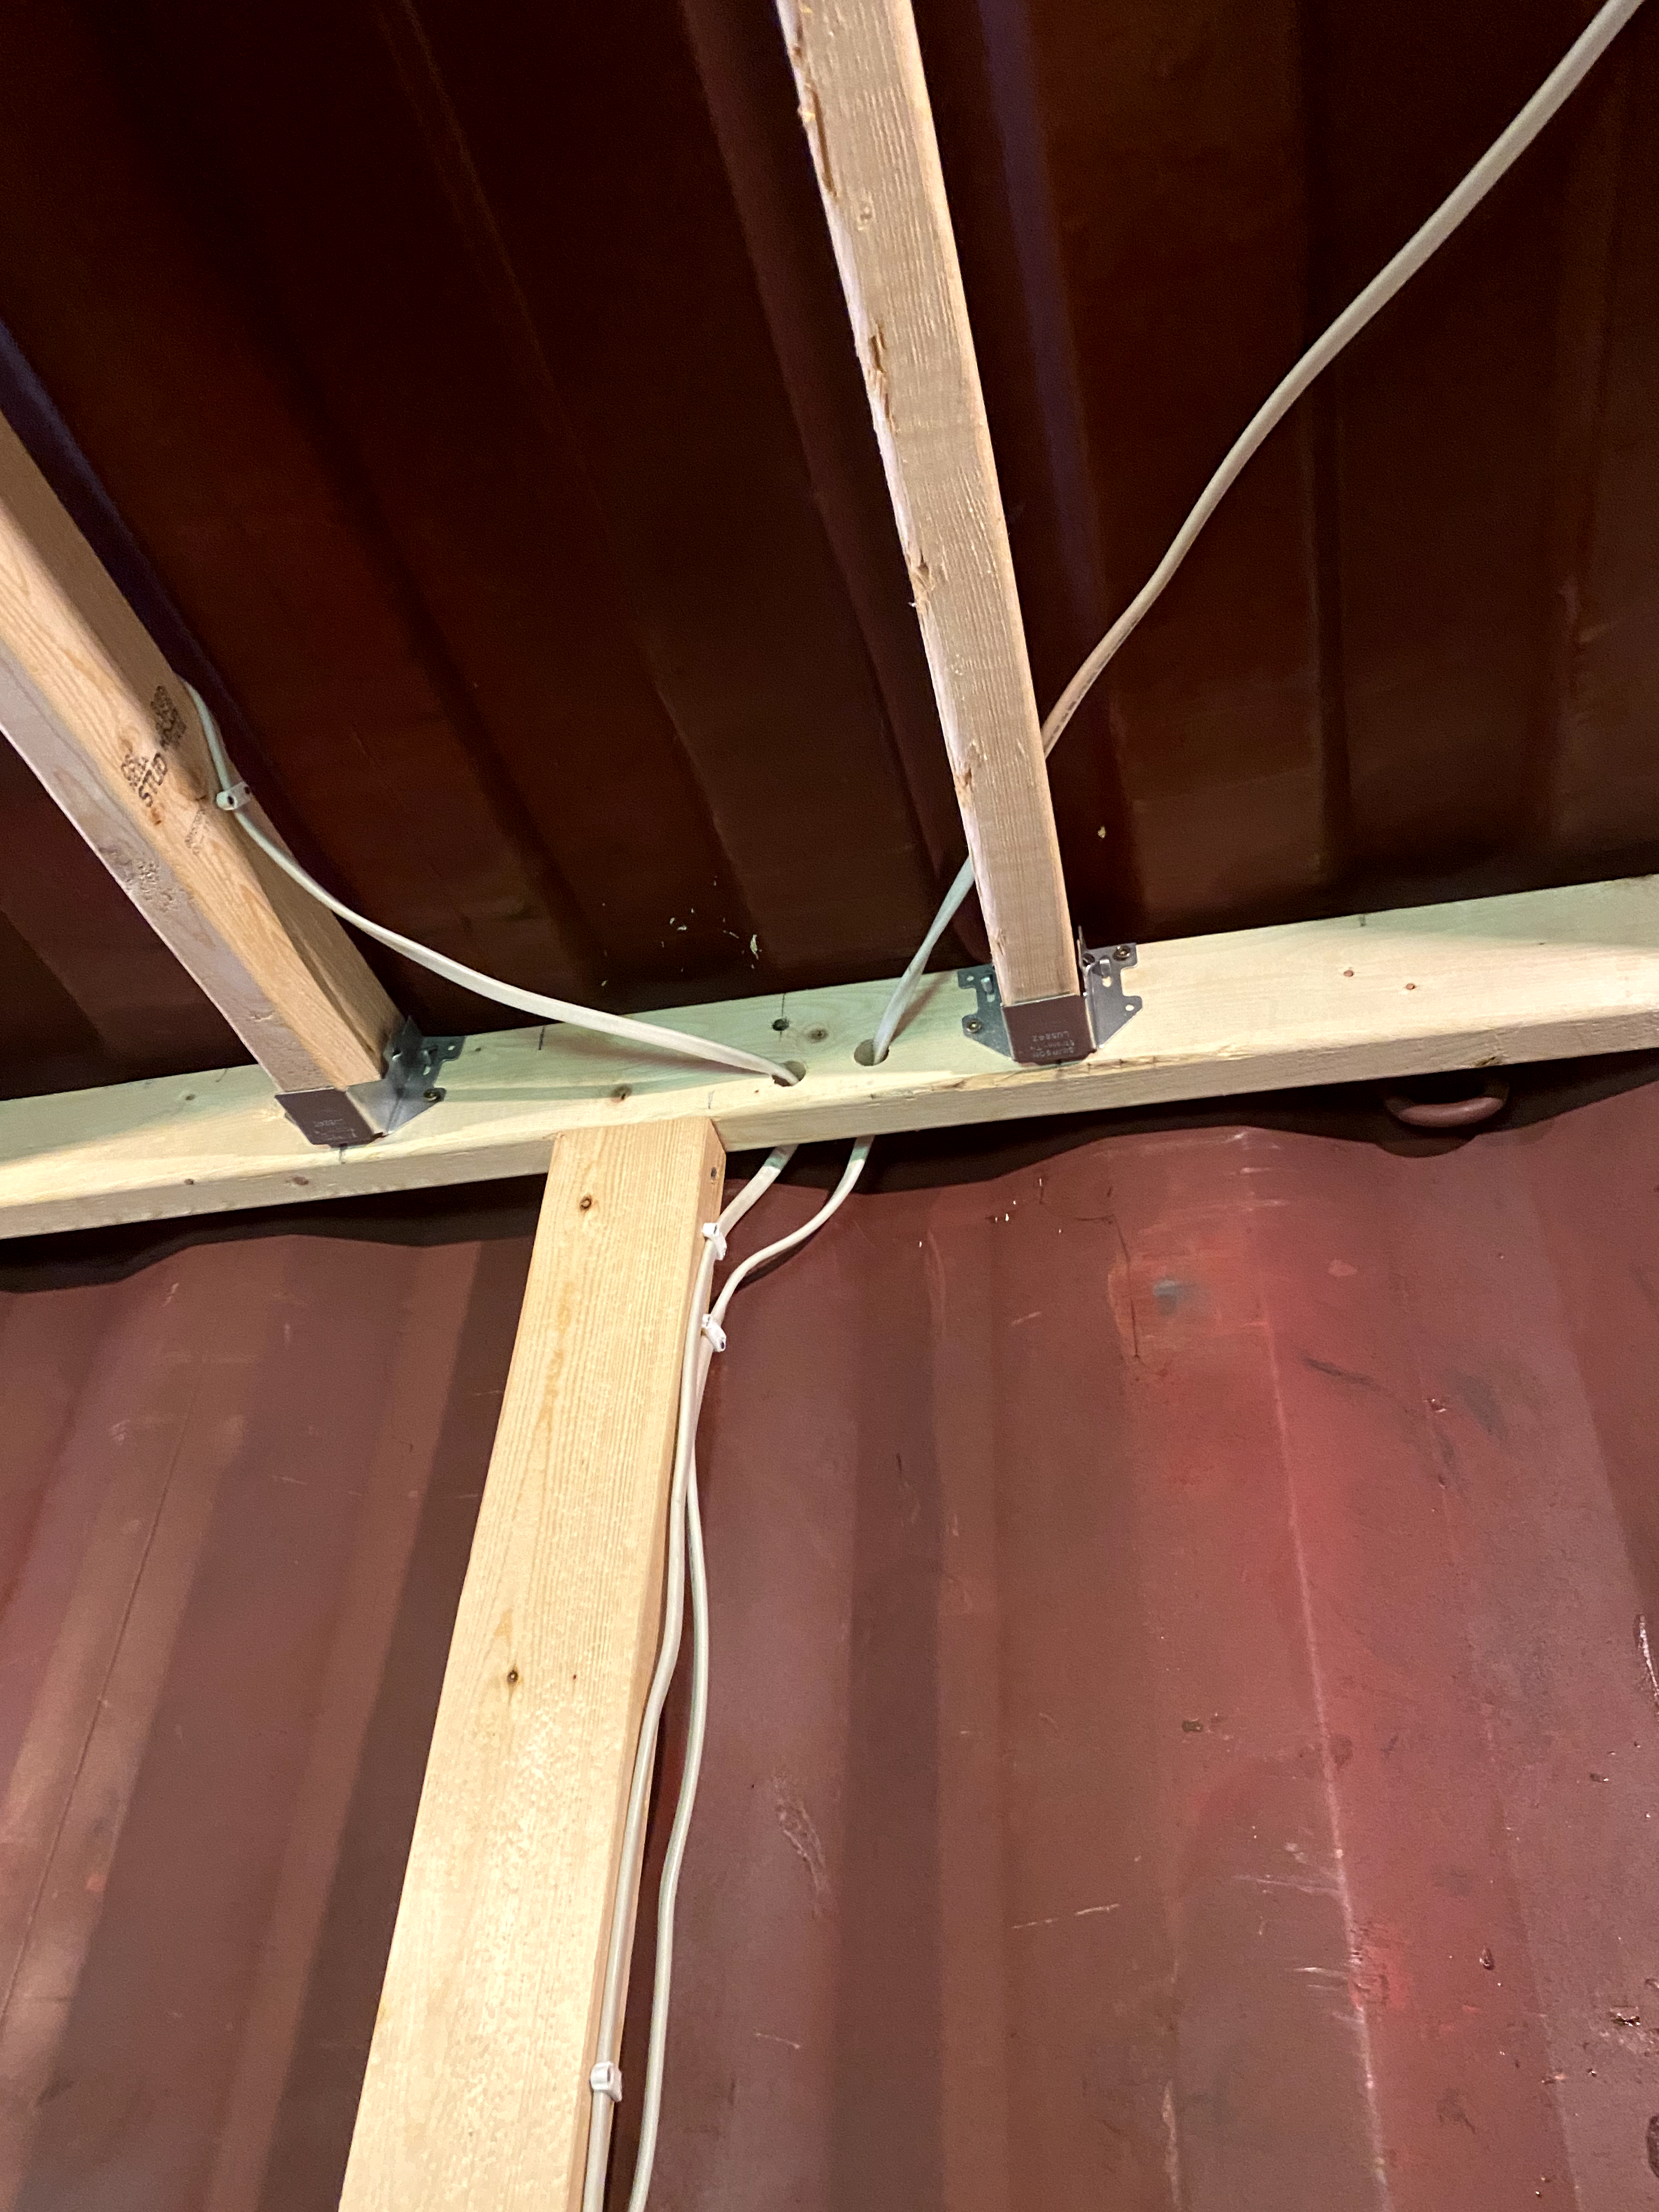
We began placing boxes for the receptacles and switches. This went along by mostly normal means, with a couple of exceptions. First, remember that the studs on the outside walls are placed flat against the container wall and not perpendicular, as is customary. Fortunately, the built-in nails on the boxes still get into the studs on their narrow edges.
Another issue presented by the corrugated container walls is that there isn’t always enough room behind the studs for an electrical box. This means not being able at times to put boxes exactly where you’d like.

Among the things I quickly learned about wiring is that 12-gauge wire takes up a good deal more space in a box than 14-guage wire does. And even with my not-very-large fingers, it can be a challenge to fold and shove wires into the back of the box when you attach the receptacle or switch. It was a great discovery, therefore, when I came across the Voltclaw Multi-Gauge tool.
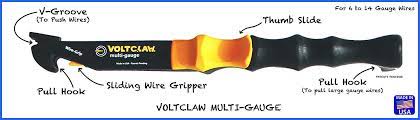
The little notch at the end makes that shoving-in a whole lot easier, and it was the best 20 bucks we’ve spent on the entire project.
I referred in an earlier post to the container walls being bowed outward. This became an advantage here, in that we could run electrical wires behind them. In a traditional stud wall you’d just run the wires through holes drilled in the studs, but with the studs flat against the container walls, that wasn’t possible.
In interior walls, such as between the living room and bedroom closet, and between the bedroom and storage area, we used traditional construction, which allowed us to drill holes and run the wires as usual.
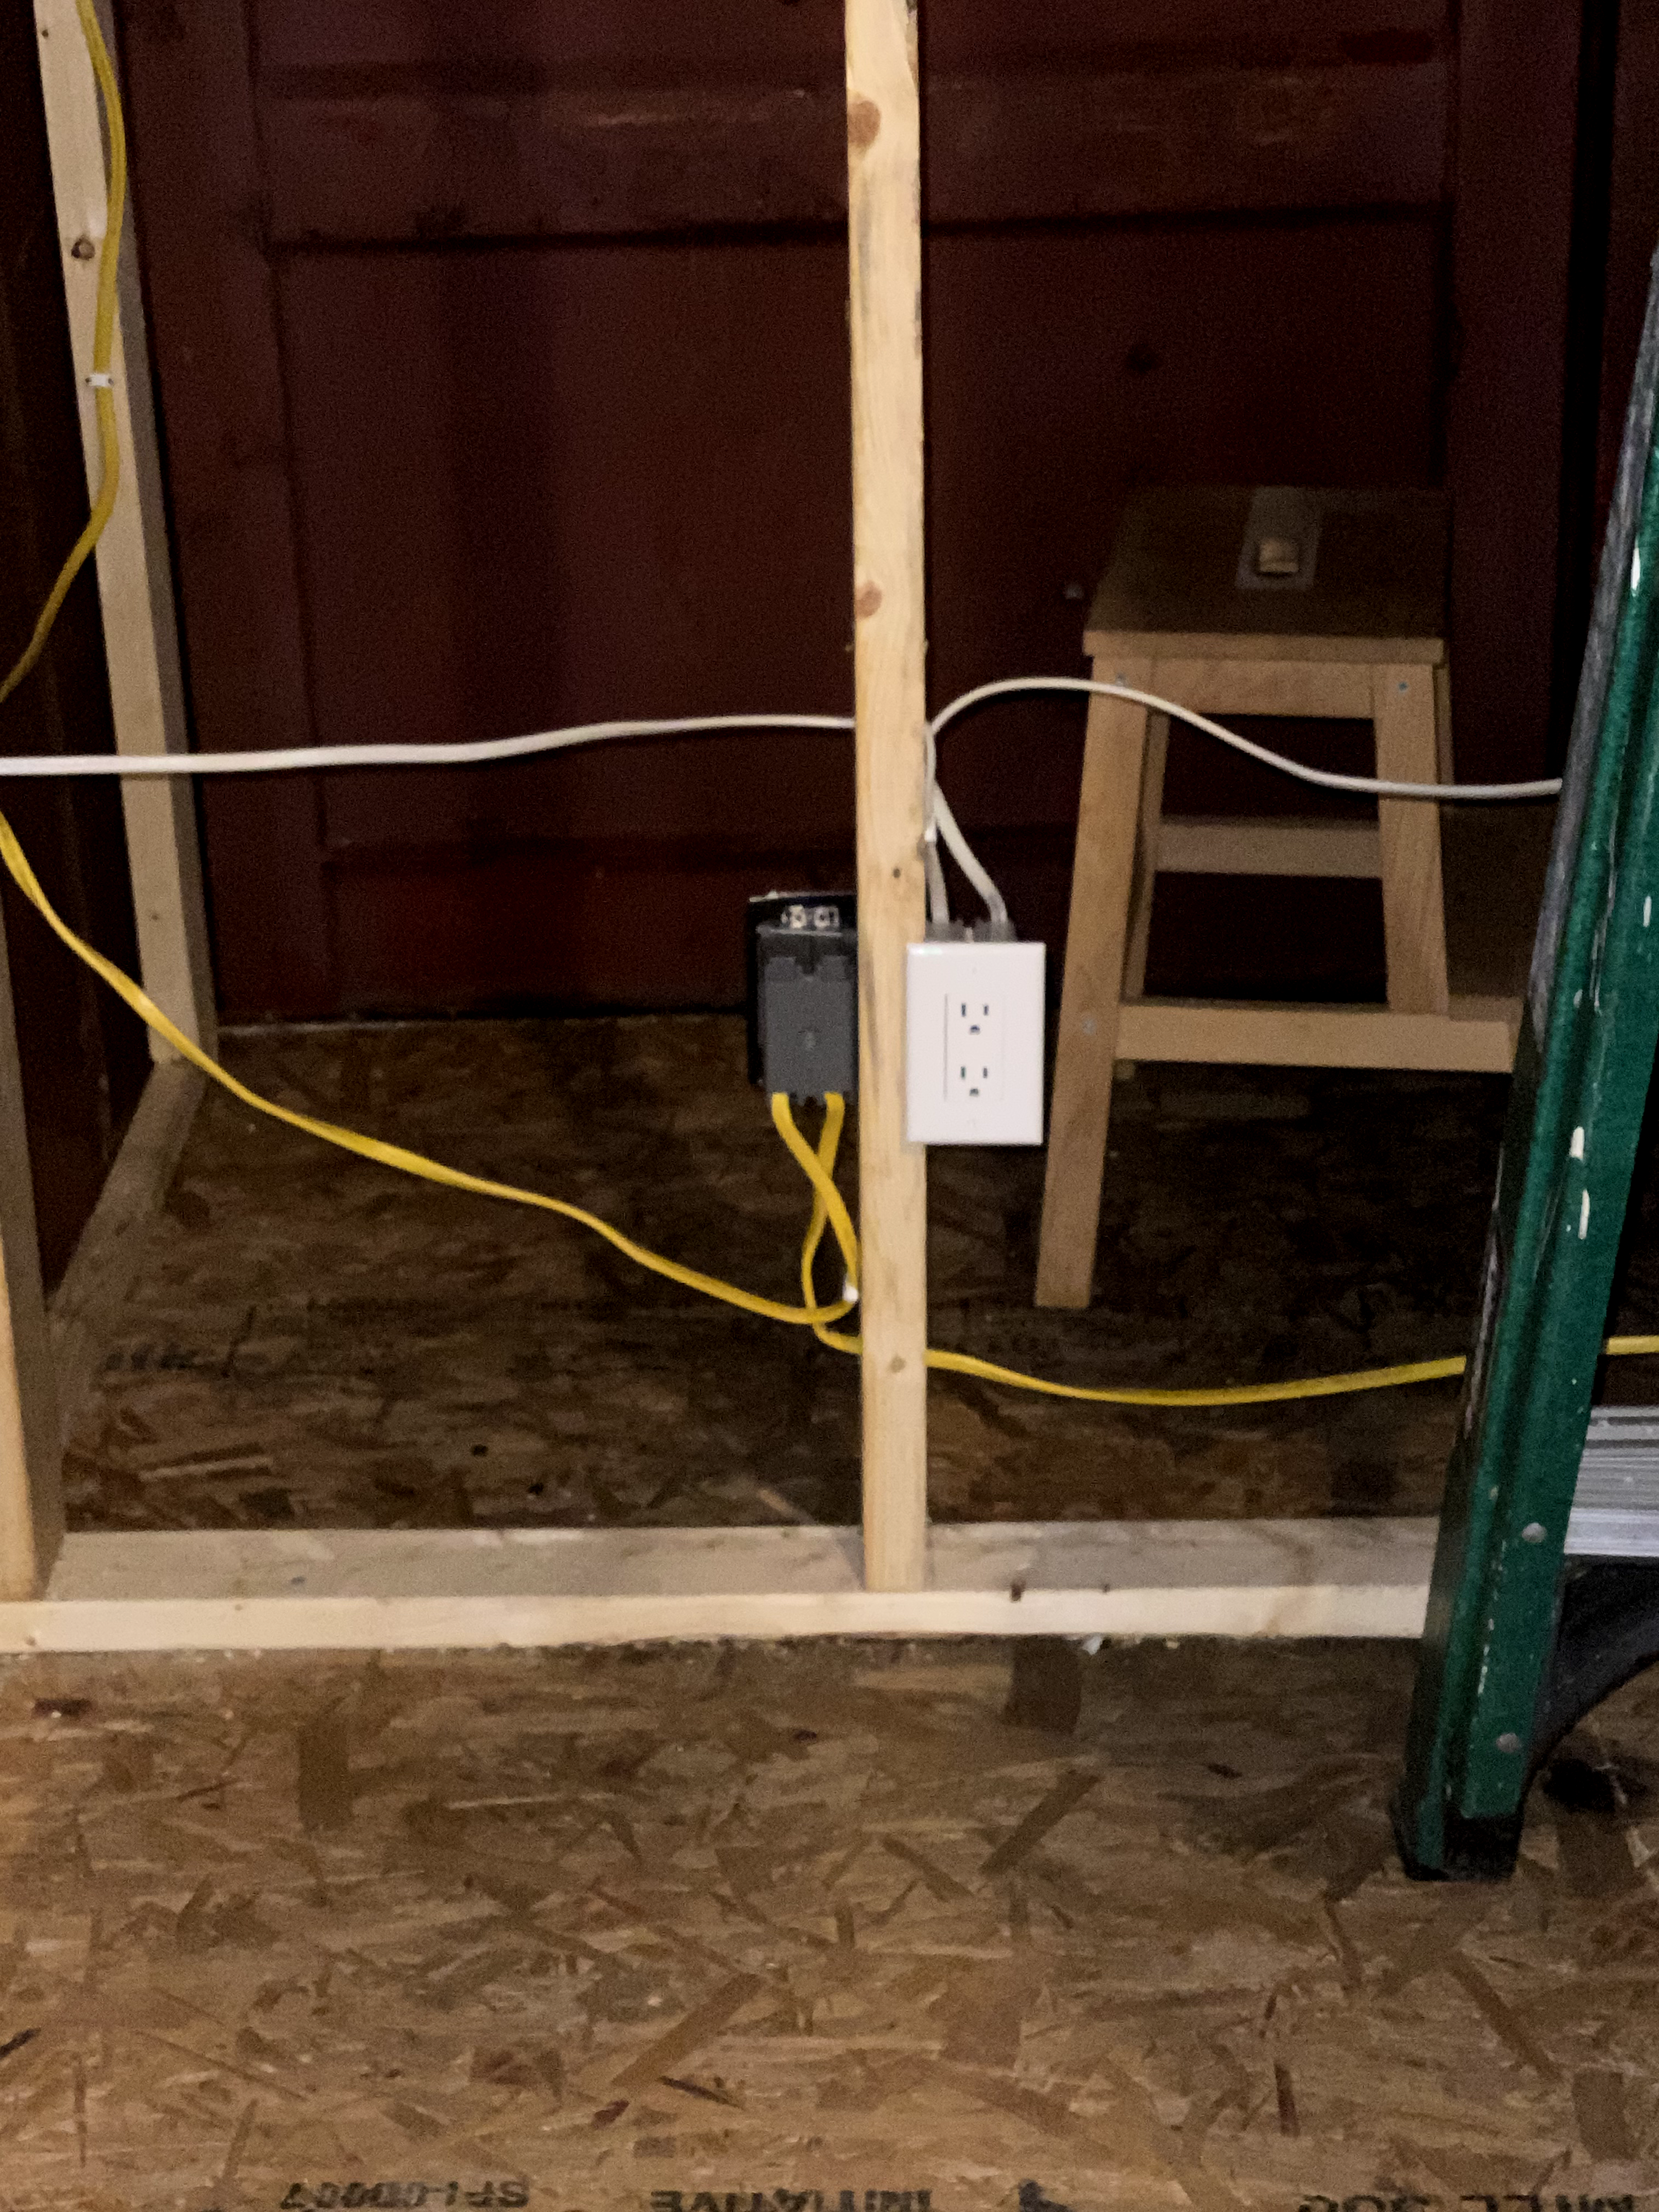

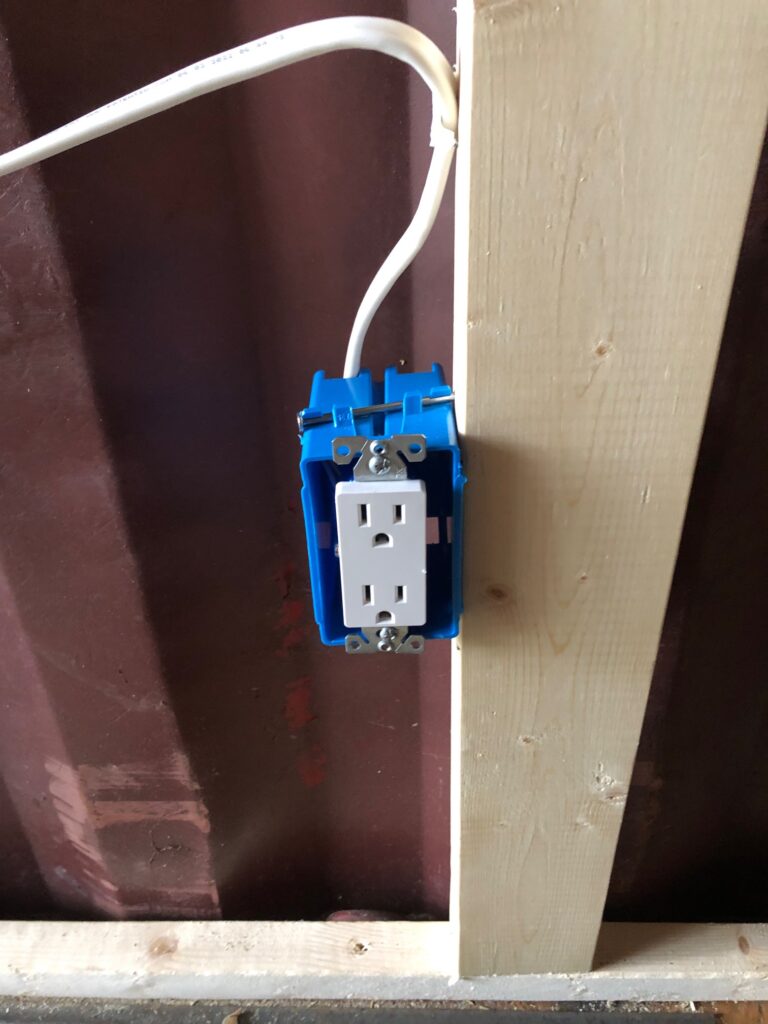
Sometimes the unusual nature of building in a shipping container means snaking wire wherever you can.

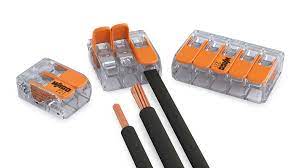
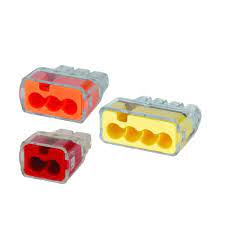
In studying all of this before the work began—in my crash course in residential wiring—I learned about options for wire connectors other than the twist-on variety, and I tried them both. For the sake of saved space in the boxes and ease of use, I used both Wago and Ideal connectors. I’ll leave it to you to do your own research but will say that these things are a breeze to use and seem to hold the wires very securely. And they take up almost no space.
One type of circuit I had trouble getting my head around was one that includes A) overhead lights controlled by a switch, and B) wall outlets independent of the switch. I didn’t know how the keep the outlets powered when the light switch was turned off. It turned out not to be complicated at all, and the answer was in one of Ben Sahlstrom’s great videos, linked here.
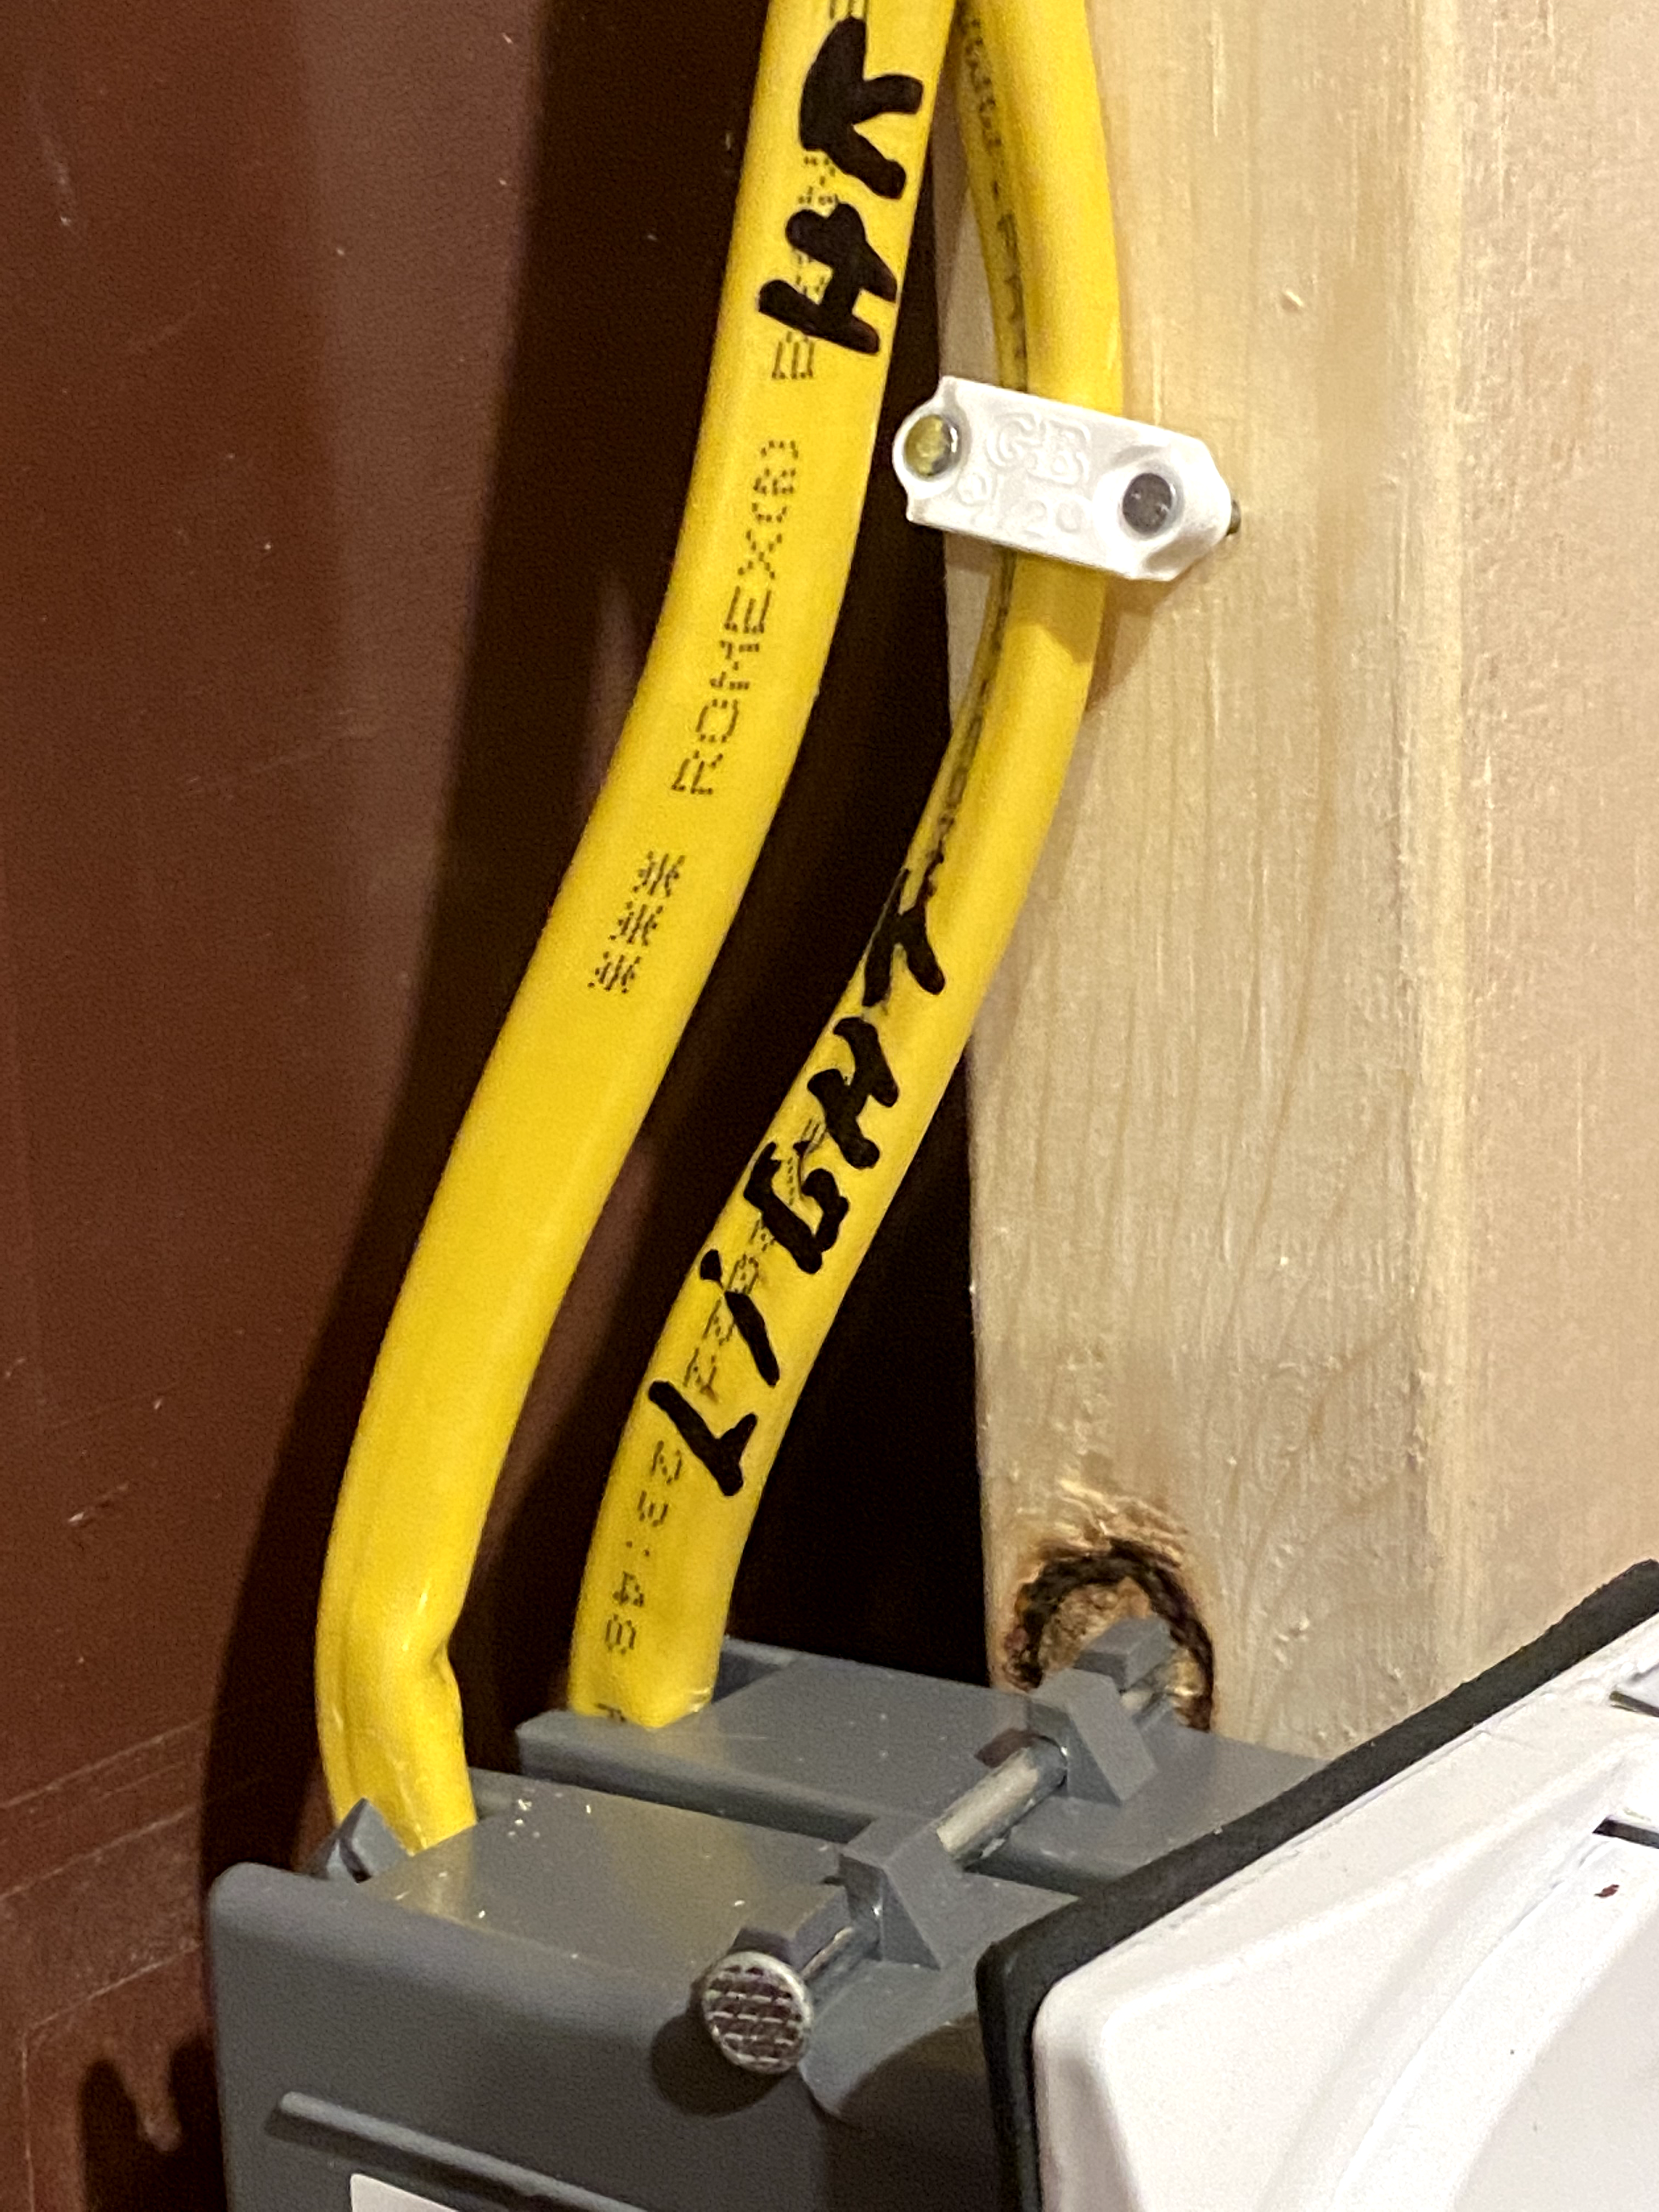
Having all the circuits in place on this container, it was time to bring the wires into the panel. You better believe I checked three times that the master breaker outside was turned off before I went poking around in the interior panel. There’s also a main breaker inside the panel, and I turned that off, too. Anything that could be switched off, I switched off. And then I tapped the leads to my little voltage tester to every surface in the panel, in every combination.
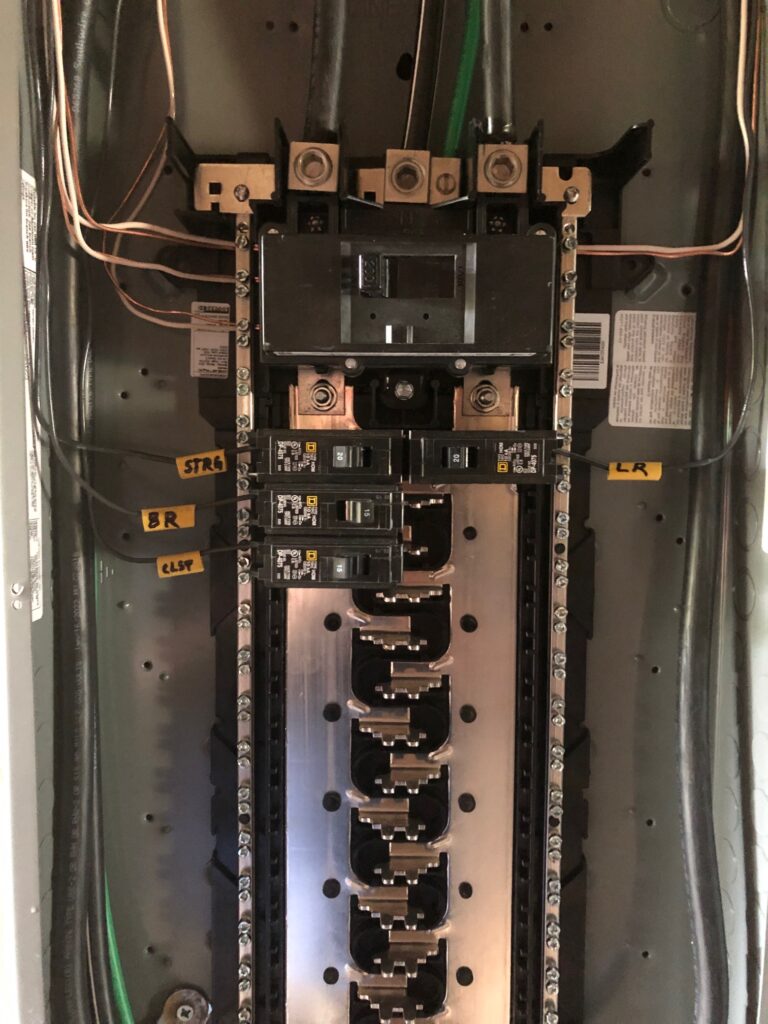
The plug-on neutral feature for this panel made breaker installation a breeze, and the finished product for this round of work looked nice, if I do say so.
Now about those circuits for the closet and porch…
My plan was for one circuit to include the living room receptacles, switches and overhead lights, and the porch light and receptacle. But figuring out how to do the living room part pretty much wore me out, and I decided to leave the porch for its own circuit. It’ll mean more wire, of course, but peace of mind counts for something, too.
The same happened with the closet, where there be a single light and nothing else. I told Calvin I bet we’d have the only house in the county with a closet light getting its own electrical circuit.
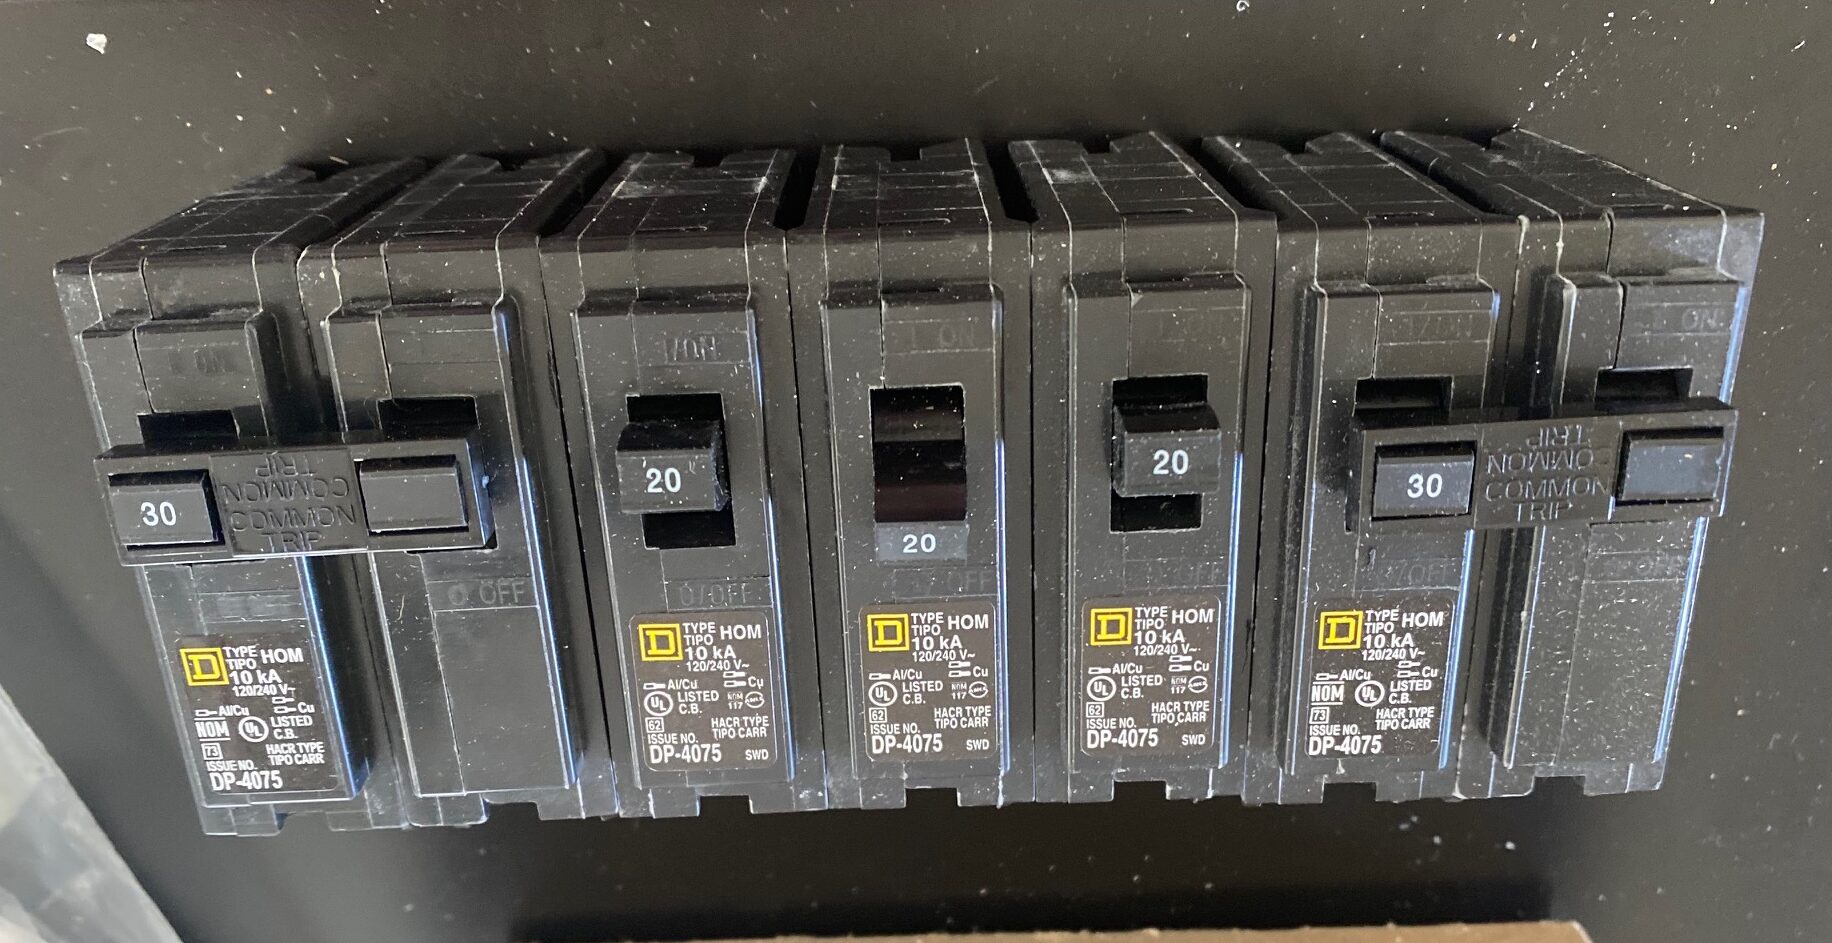
In the end, here’s what went to each circuit:
- STORAGE AREA (behind the bedroom, accessible through the original container doors): 20 amps/12-gauge wire. It might be overkill but I went with 20 amps so I could be sure of using power tools plugged in back there without issue.
- BEDROOM: 15 amps/14-gauge wire
- LIVING ROOM: 15 amps/14-gauge wire
- CLOSET: 15 amps/14-gauge wire (No chance of blowing a fuse on this one!)
(I’ve mentioned my brother-in-law George before. As with the framing, his help was invaluable with the wiring. You can’t beat nice relatives. He worked for free but happily accepted several Popeye’s lunches and about 20 gallons of Gatorade.)