Something I had to decide before pouring concrete was how to connect the containers to the piers. A 40-foot high-cube container weighs a bit under 9,000 pounds empty—lots more with framing, flooring, drywall and furnishings—and it would be unlikely to slide around on its own. And then when a second container is set in place and welded to the first, and then the third to the second, we’re going to have a massive hunk of steel (and other stuff). Still, the elements are a consideration with any structure, and in our part of the country that means tornadoes and hurricanes.


Hurricane Ida, 2021
The anchoring method I chose was to attach a piece of steel to the concrete pier, and then weld the container to the steel plate. And here comes the first instance of…
THINGS WE’LL DO DIFFERENTLY NEXT TIME.
My plan was to buy 12-by-12-inch pieces of steel, with a hole drilled in the center of each. A single piece of rebar, curved into an L-shape at the bottom, would be inserted in the wet concrete, emerging from the surface of the pier, and once the concrete was set the steel plate would be set over the rebar and welded into place. This system would, theoretically, make for a strong connection between the pier and the steel, and then, when the container was set down and welded to the steel plate, everything would connect solidly to the earth.

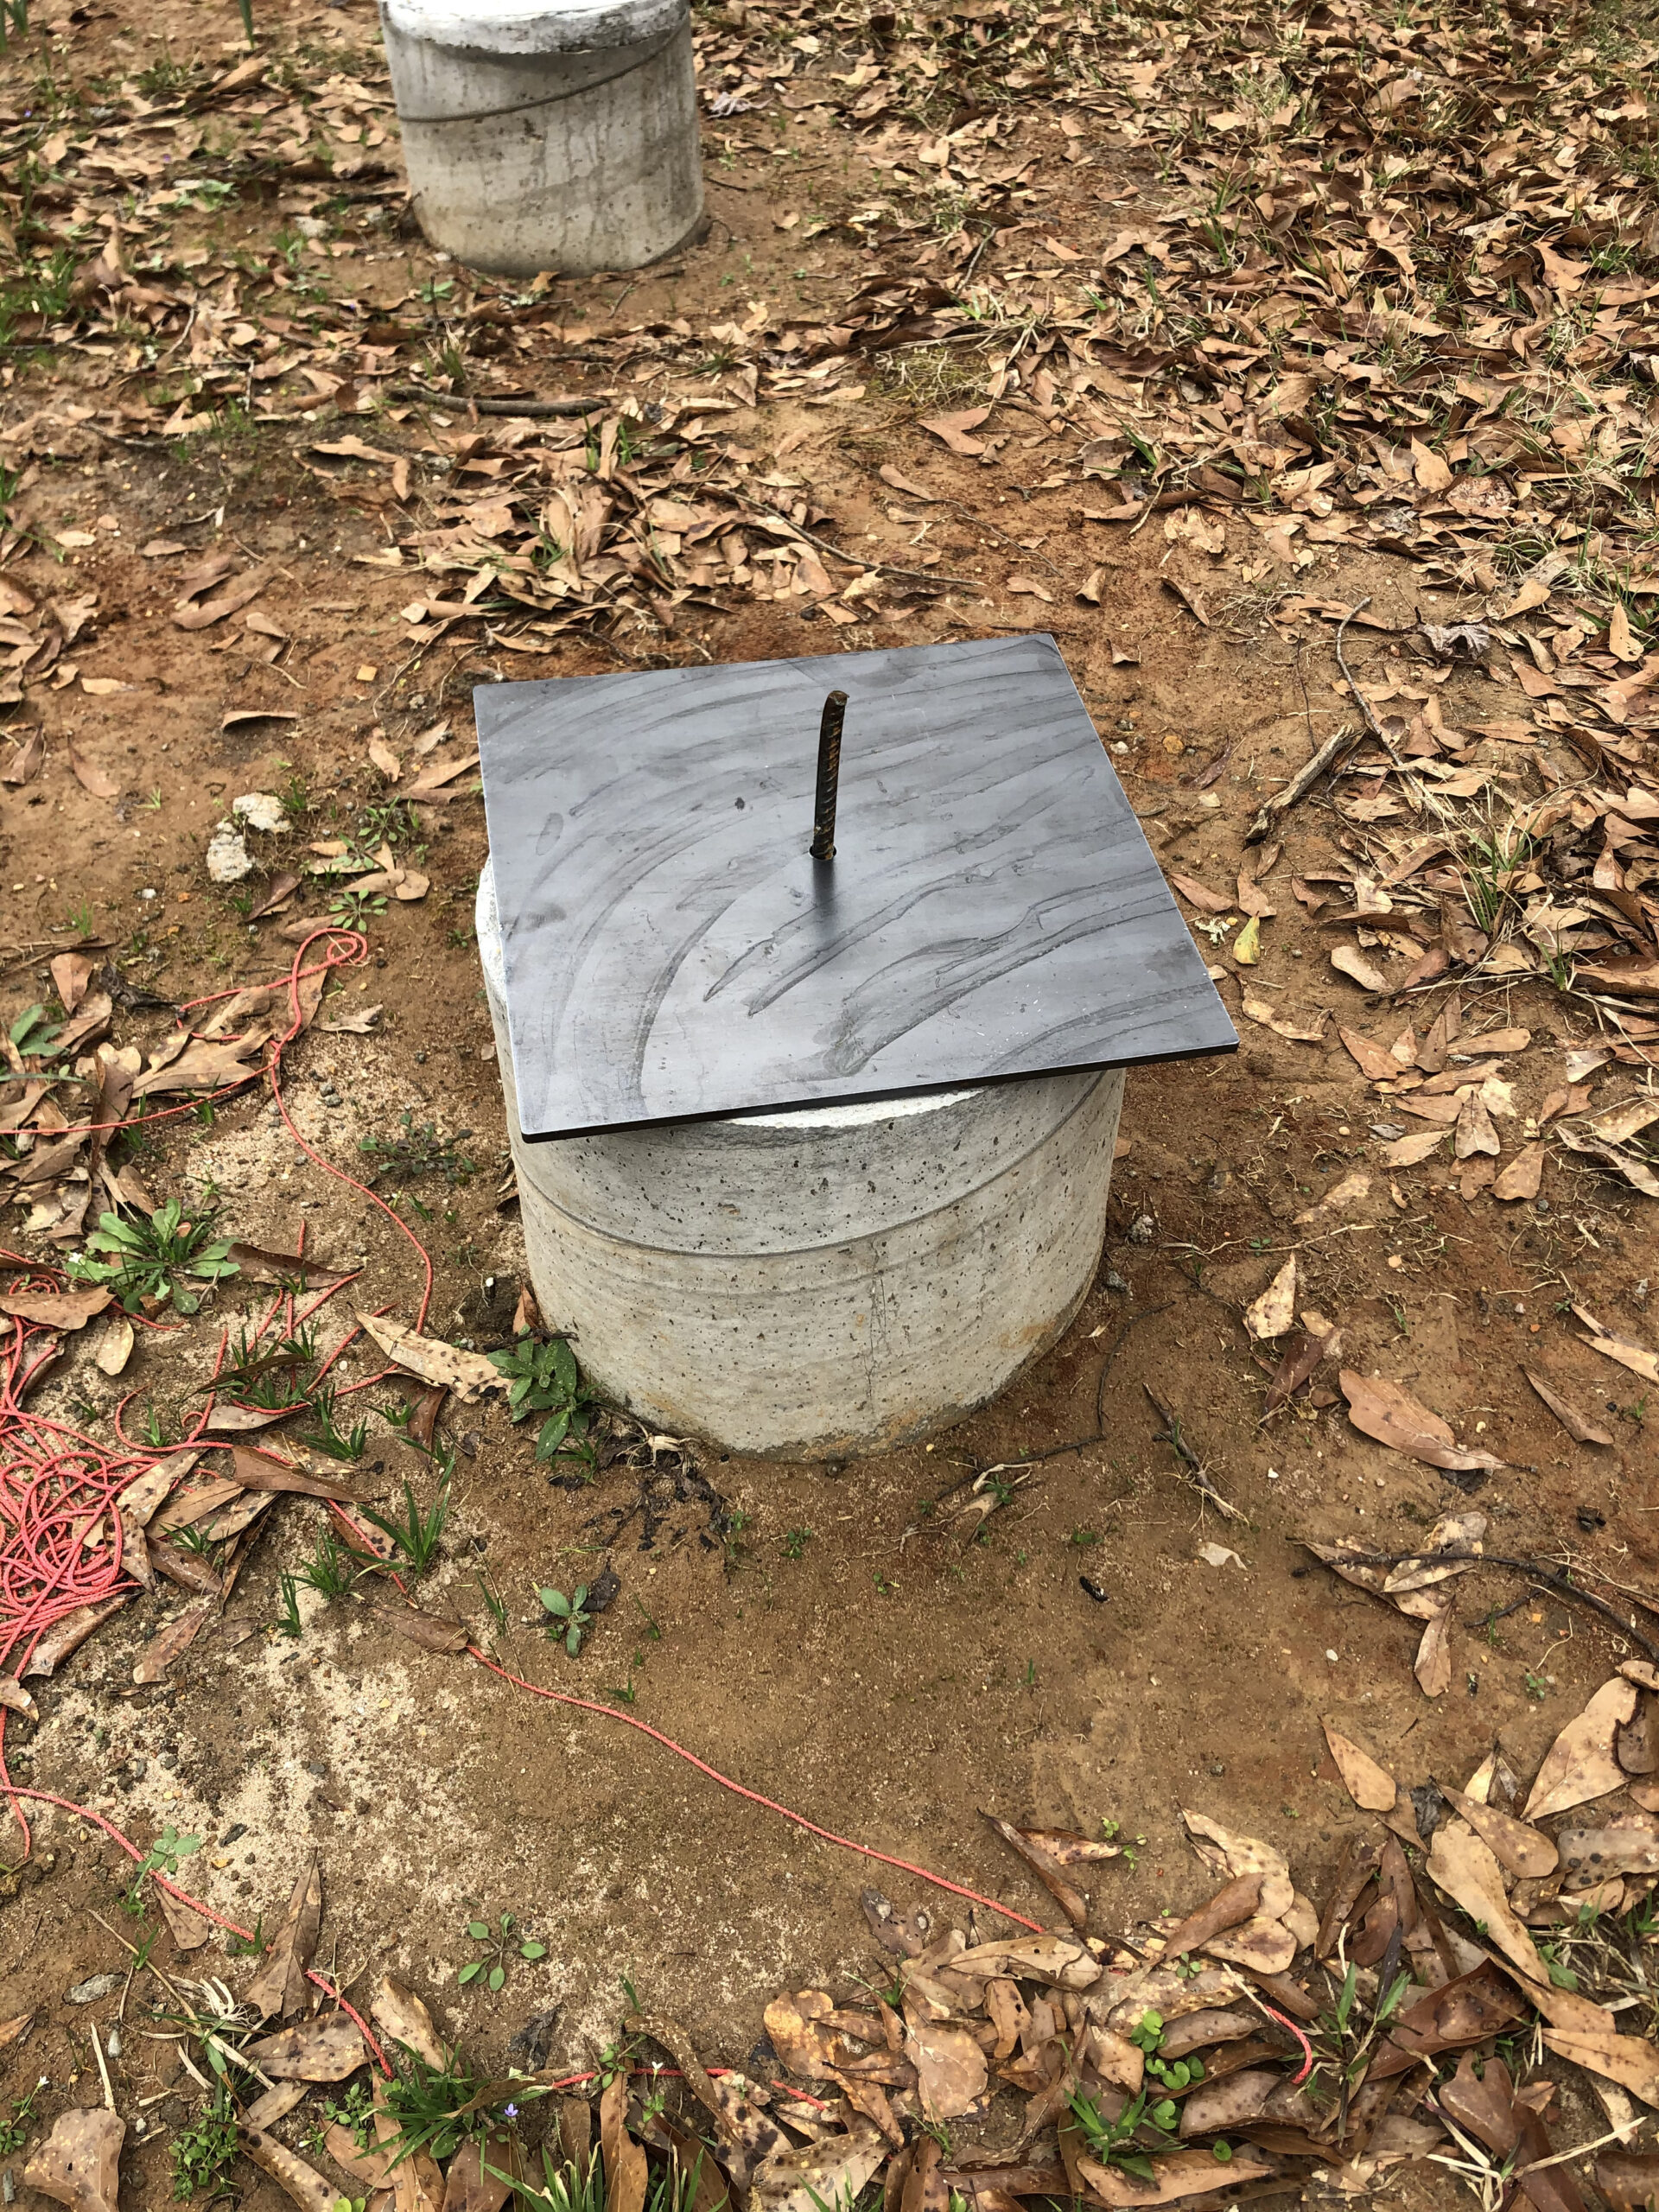
In practice, however, there was a problem. The steel plates fit properly over the rebar—so far, so good. And considering this was my very first crack at welding (more about that in a future post), the plates and rebar seemed to stick to each other. But where I goofed was in anticipating how much of that welded connection would remain after the rebar was ground off to make a level surface. The answer was…not much.


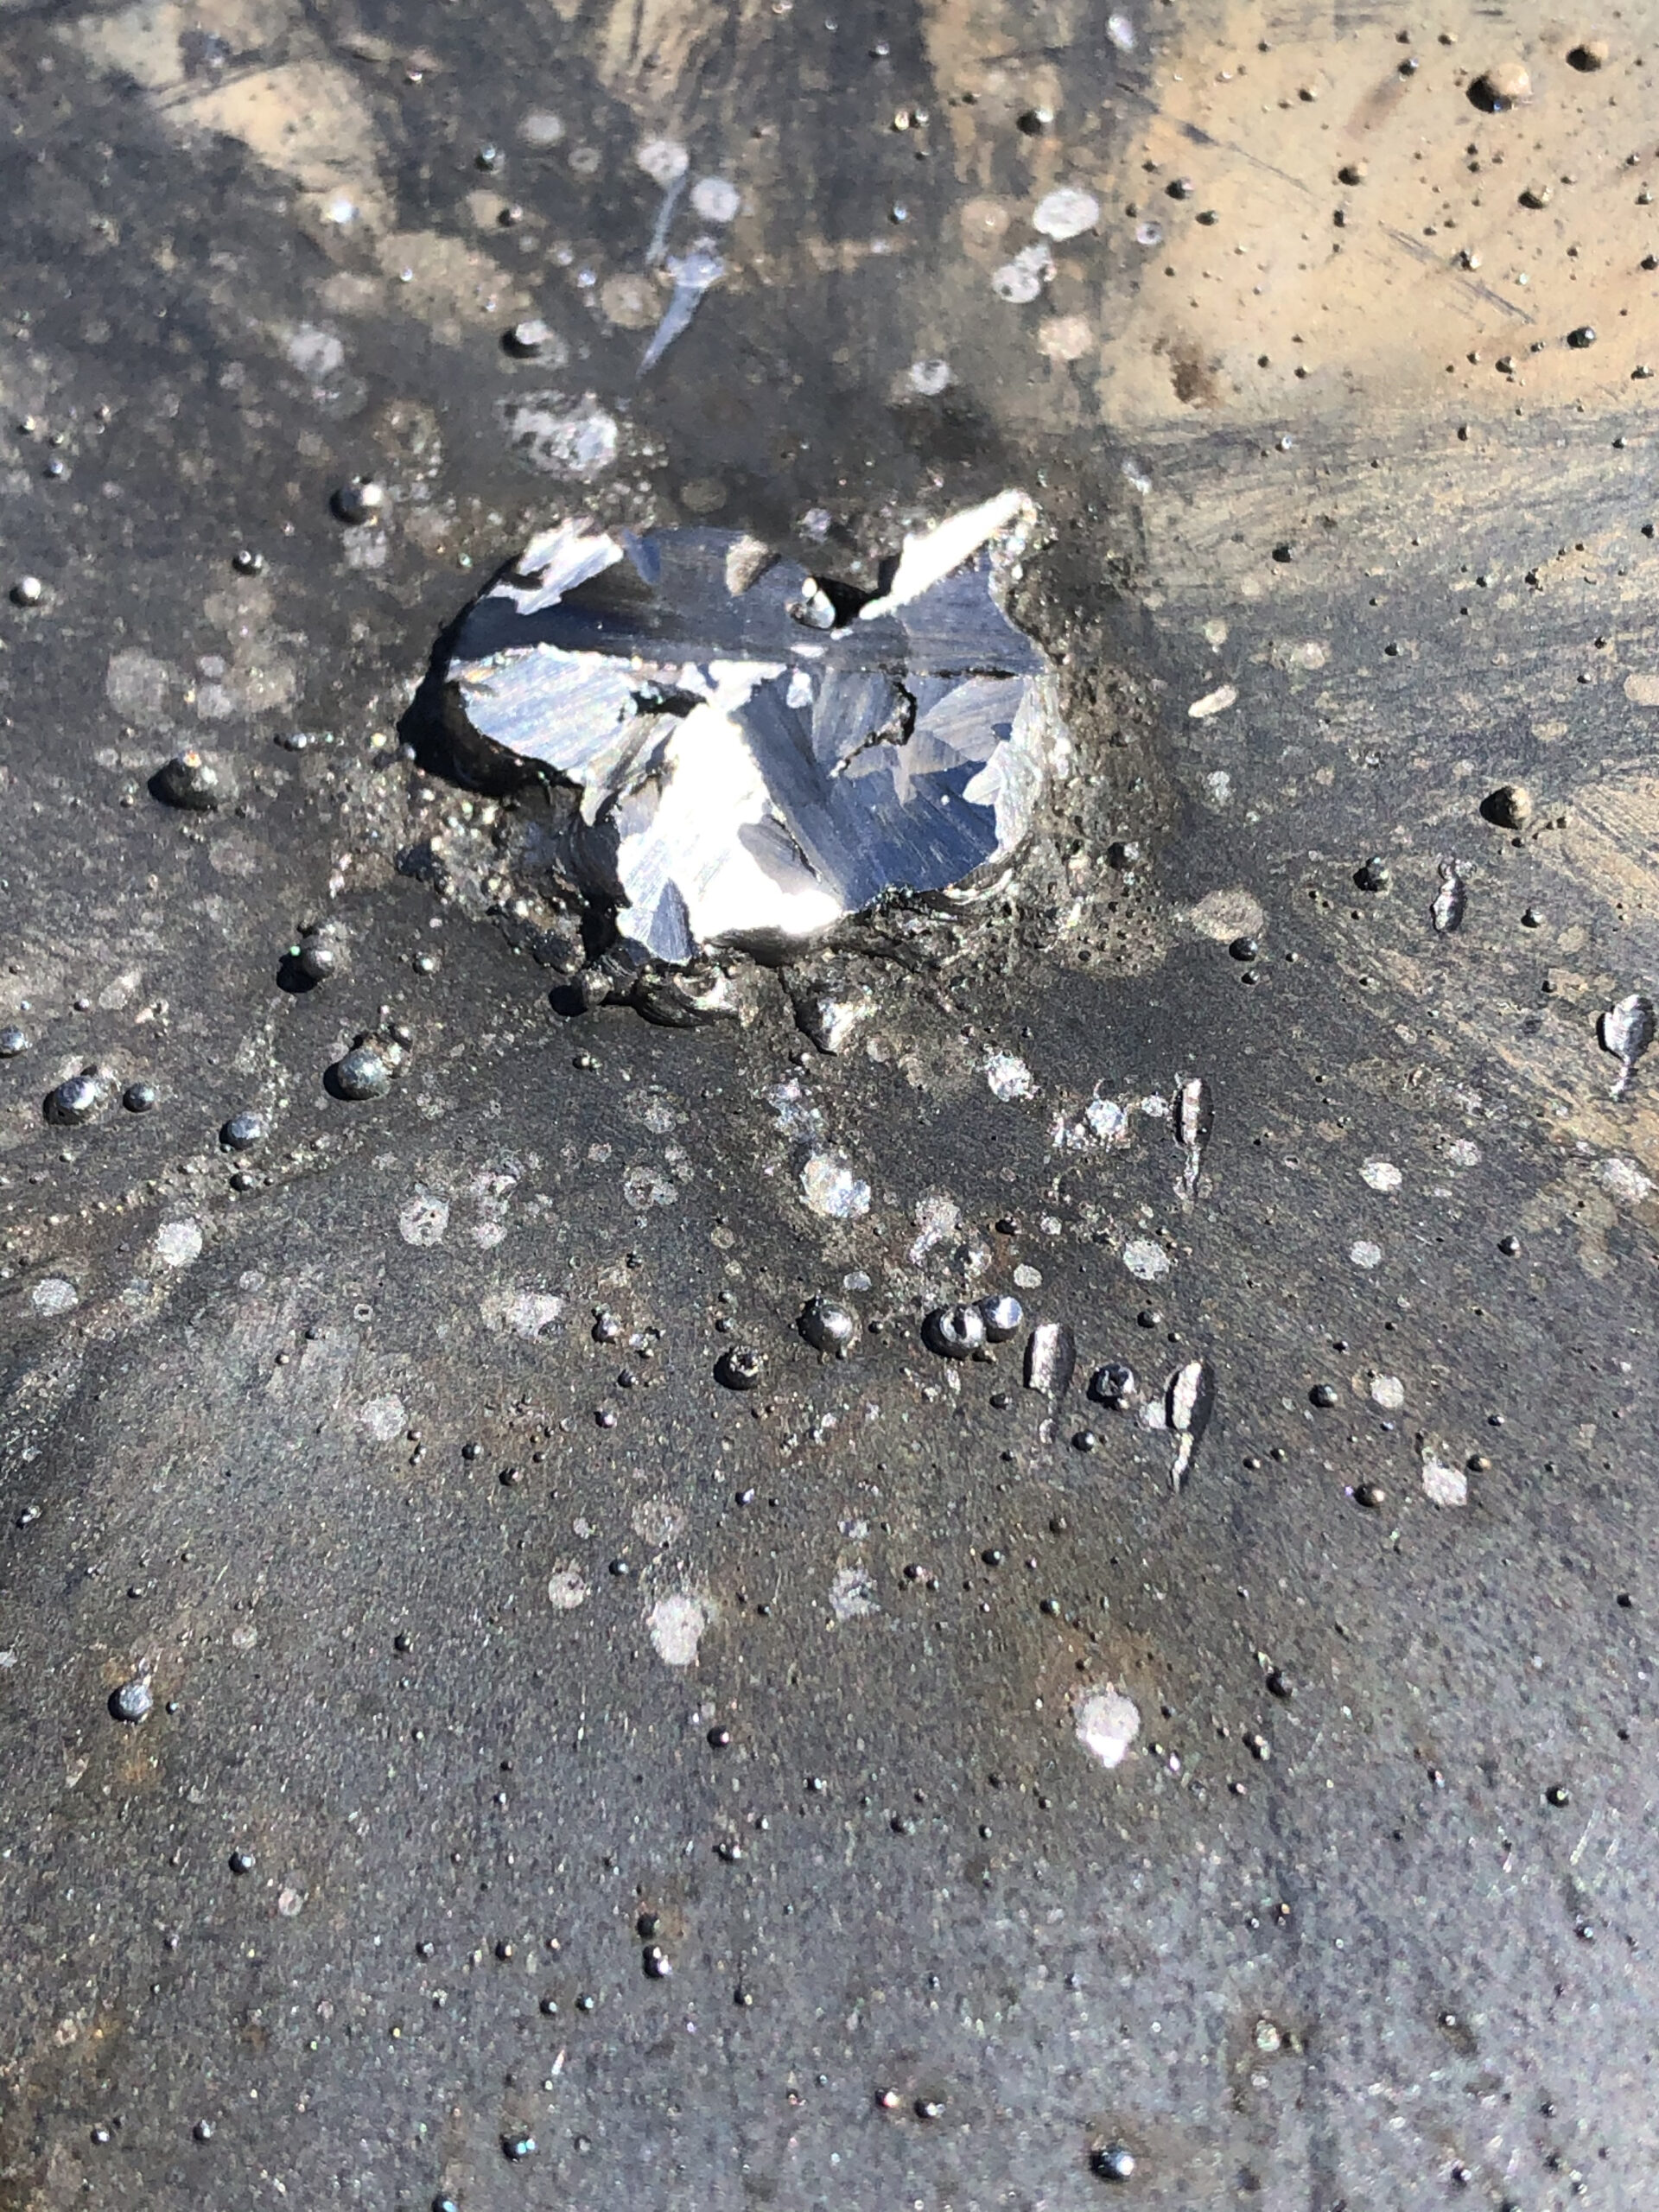
After grinding off the rebar 
Re-welded
After the rebar was ground down, I welded again and made a stronger joint, but I’m still not too confident in its strength. I won’t do it this way again.
And keep in mind, please, that these were the very first welds of my life. I know that the splatter isn’t supposed to happen.
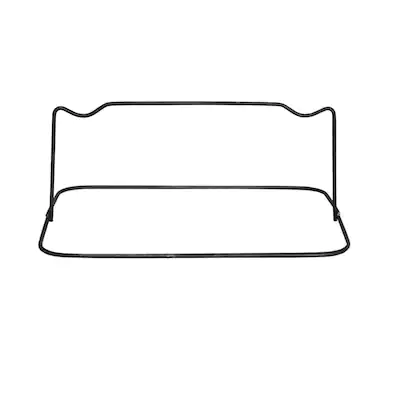
What I came up with for the next round of piers is this:

I welded three pieces of rebar to the bottom of the steel plate. And when the concrete is poured, I’ll set the rebar down into it, leaving the smooth steel surface on top. This will give a much stronger joint than in my first go-round.
In addition to the connection between the concrete and the flat steel plate, reinforcement is also important for the strength of the concrete pier itself. The short piers—those at the front of the container rising only a foot or less above ground—needed no reinforcement within them. For the taller piers, I devised an ingenious (I’m writing the story; if I say it’s ingenious, it’s ingenious) way of reinforcing them.
I bought some 98-cent rebar “chairs” at Lowe’s, and then cut some rebar (3/8”, I think, but on this scale it doesn’t matter much) to reach to within six or eight inches from the top of the pier. I affixed the rebar to the chairs with wire, then lowered the assembly into the empty sonotube. To keep the rebar roughly centered, I drilled small holes in opposite sides of the sonotube, ran wire through them and around the rebar, then made small knots on the outside so the rebar wouldn’t move to the sides of the sonotube.
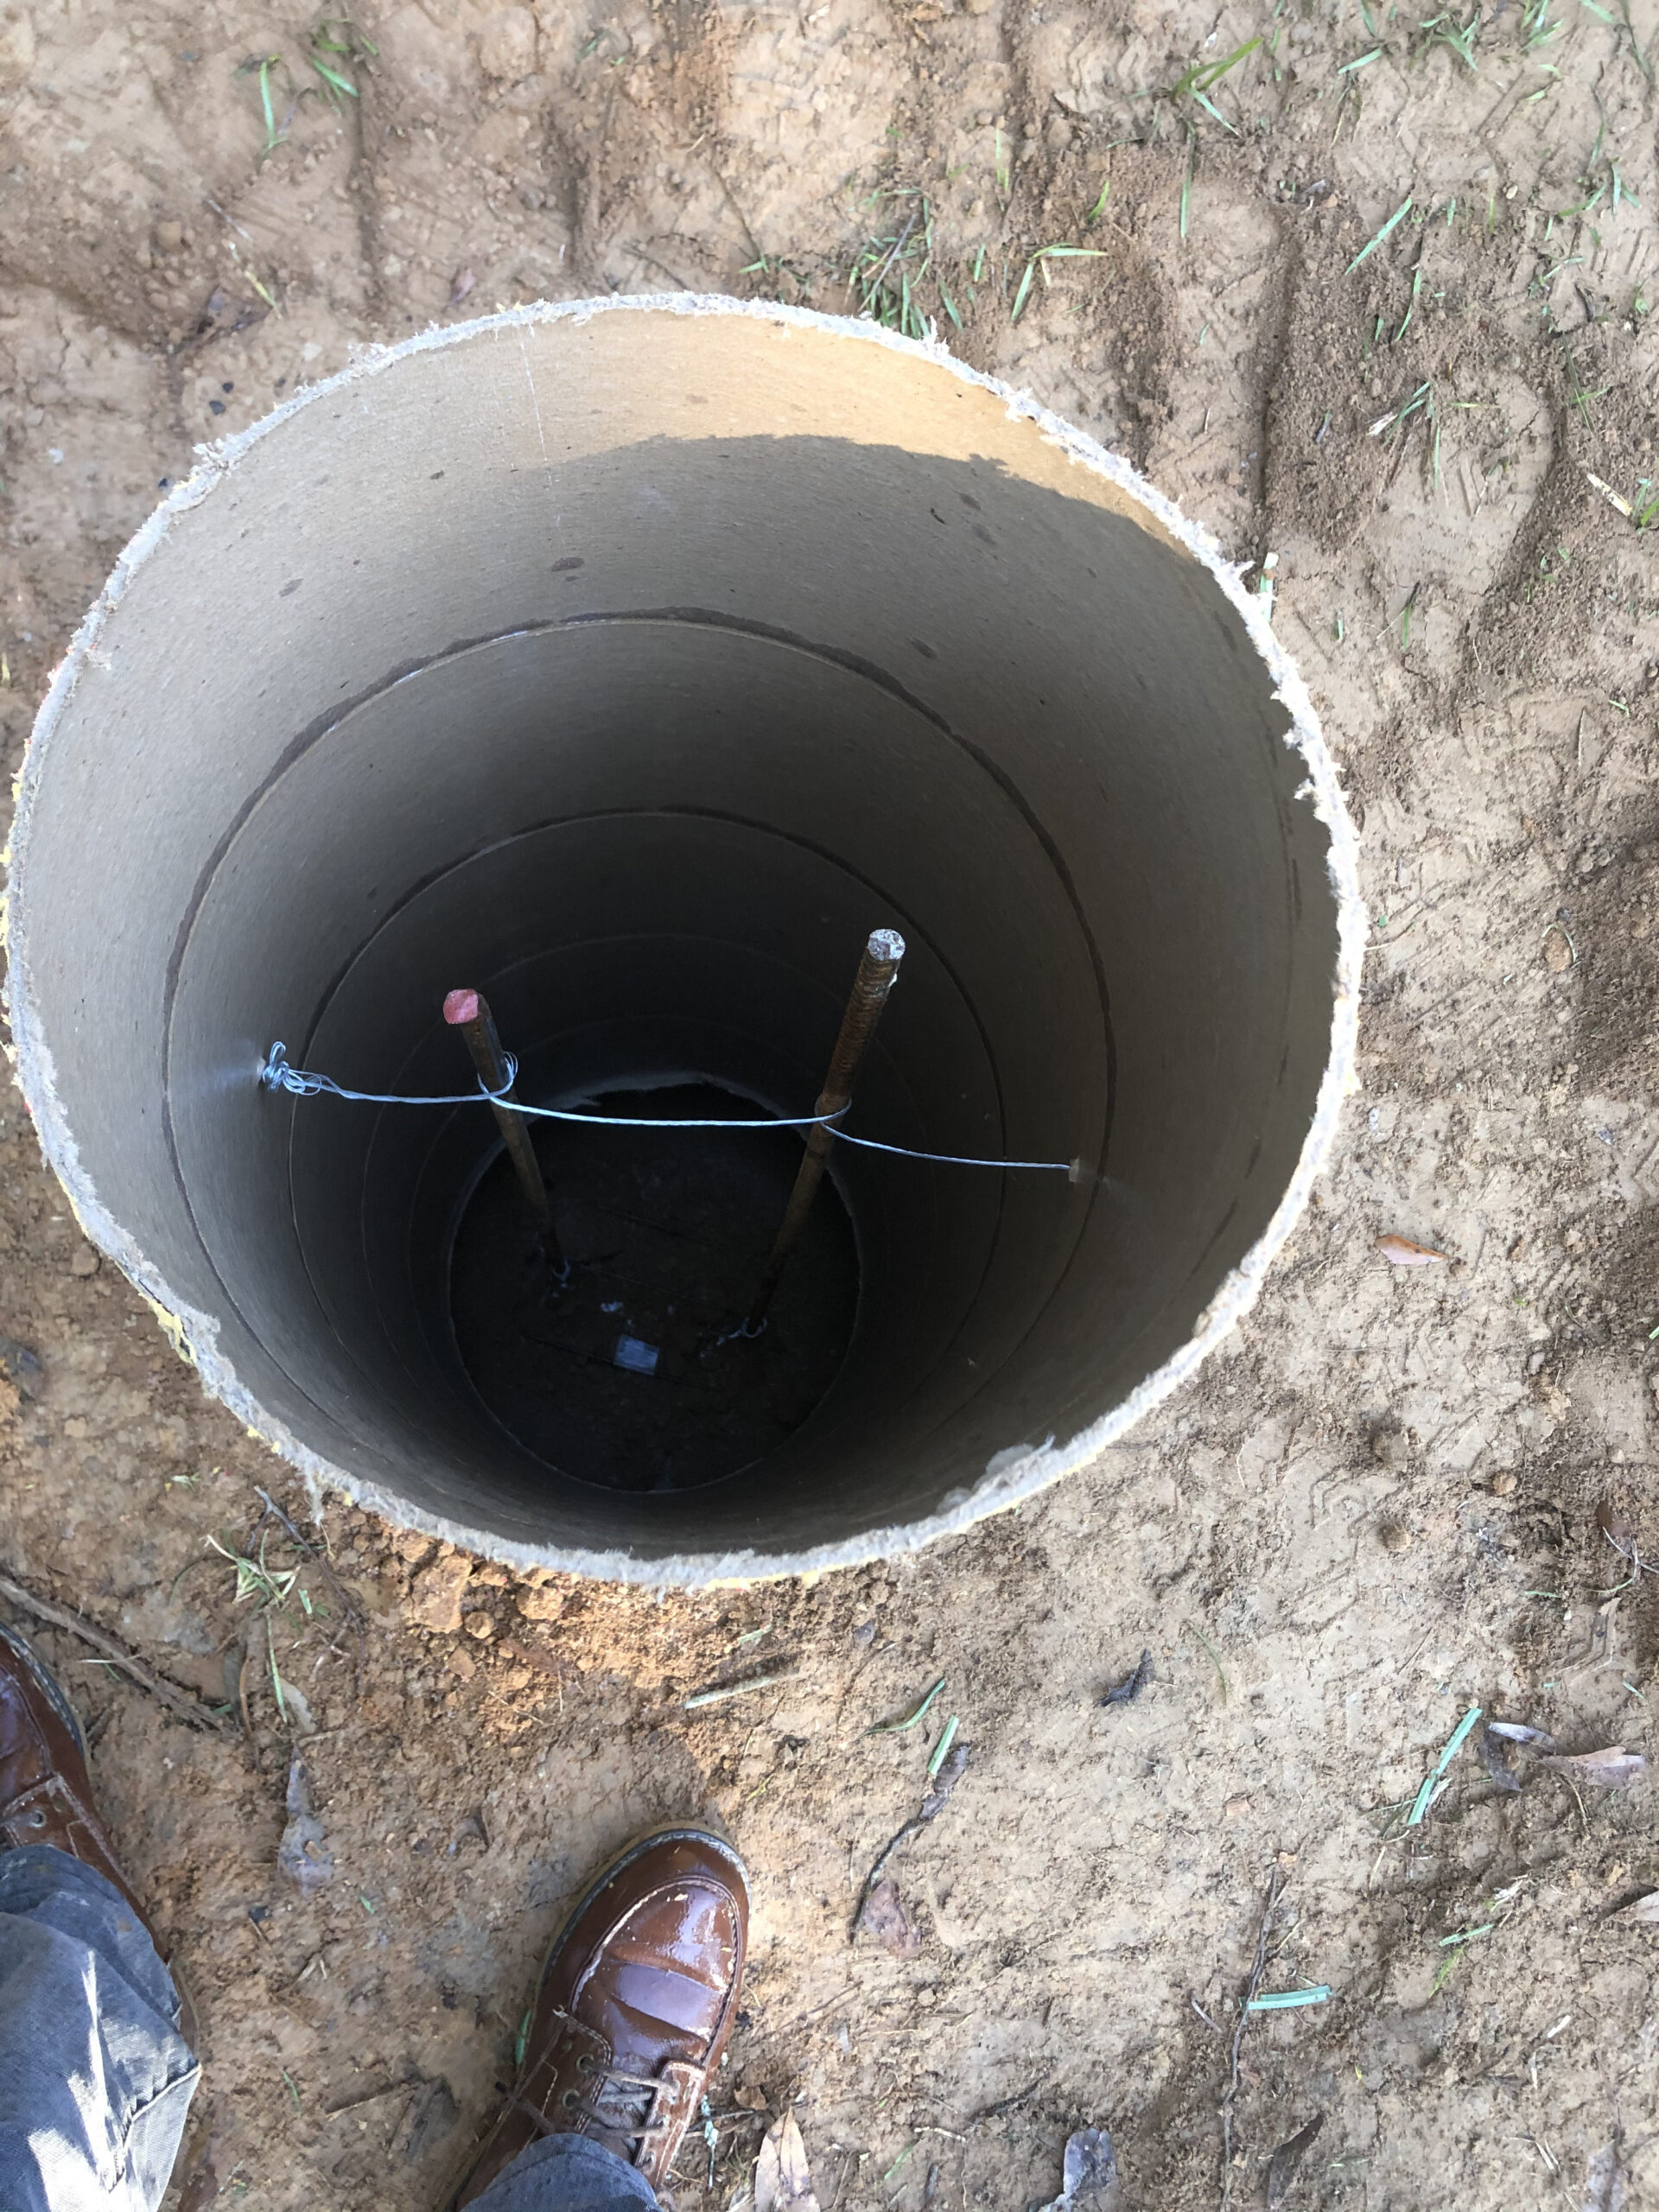
The sonotubes were then ready for the concrete, EXCEPT…
How high should they be?
To be continued…
Pingback: PIER CONSTRUCTION (PART 3) – Our Shipping Container House
Pingback: FIRST WELDS – Our Shipping Container House
Apple bistro will never be the same. Good luck with your project. Happy New Year.
Pingback: Attaching the Containers to the Piers – Our Shipping Container House