The primary purpose of framing in a shipping-container house is supporting drywall. That, and having something to attach electrical boxes to. So we aren’t burdened by the need actually to hold heavy things up.
We realized quickly that the traditional method of stud-wall construction using two-by-fours didn’t make much sense. For one thing, the framing has to be connected somehow to the container itself. For another, positioning studs perpendicular to the container walls eats into precious interior space. For this second reason, we decided early on that the studs around our exterior walls would be flat against the container walls, thereby giving us three-and-a-half extra inches of floor space. That might not sound like a lot, but when a container is eight feet across on the outside, and you factor in the corrugation of the steel and the stud walls and drywall, every inch matters.
Metal studs are an option, by the way, but we dismissed that idea for the same reason as above: they eat up valuable floor space throughout the house.
We saw online that some people had managed to glue their studs to the container walls and we considered doing so, but this turned out not to be feasible for us as the container walls were bowed and too irregular. Aside from that problem, we’d have to place the studs only where the walls’ corrugation curved inward, which would make for untraditional spacing and therefore more drywall-cutting come drywall time.
We saw other people use framing that didn’t connect to the container much at all except at the floor. In this system, the ceiling cross-pieces hold the walls apart and it’s in effect a freestanding box, at least until insulation and drywall are added. This seemed unstable, but if it works for you, who are we to stop you?
We decided to find a way to make use of the longitudinal steel framing of the container, itself among the strongest structural elements. These hollow tubes are about two inches square and of steel around an eighth-inch thick and run all the way around the container.
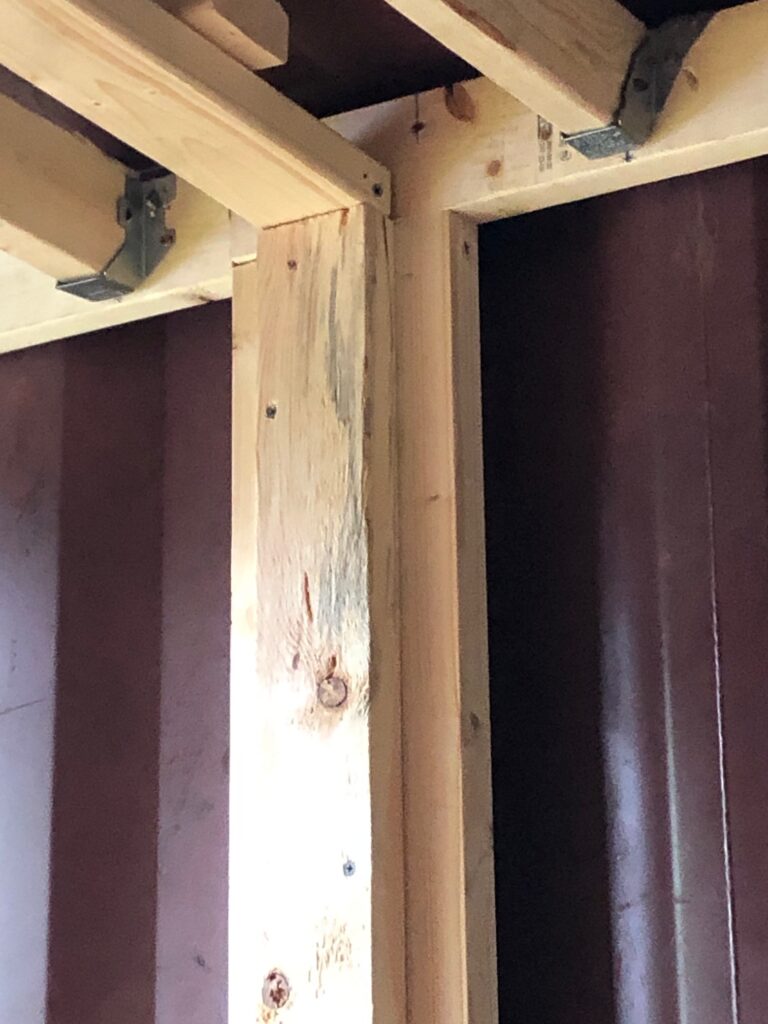
Other people have attached the tops of their walls to these tubes, some of them cutting notches from either the studs or the ceiling joists to fit around them. We tried that at first, for the bedroom closet.
THE WALLS
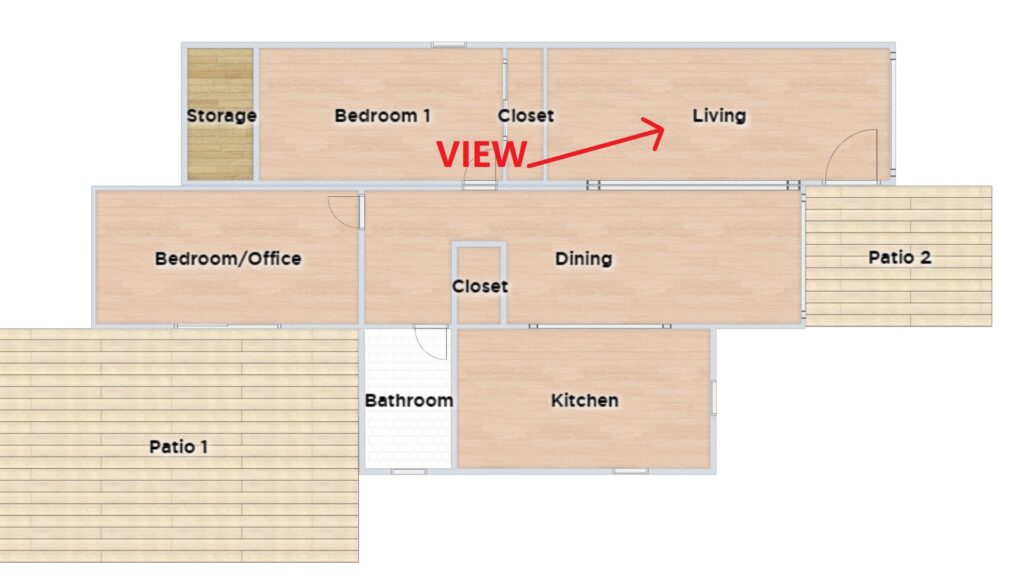
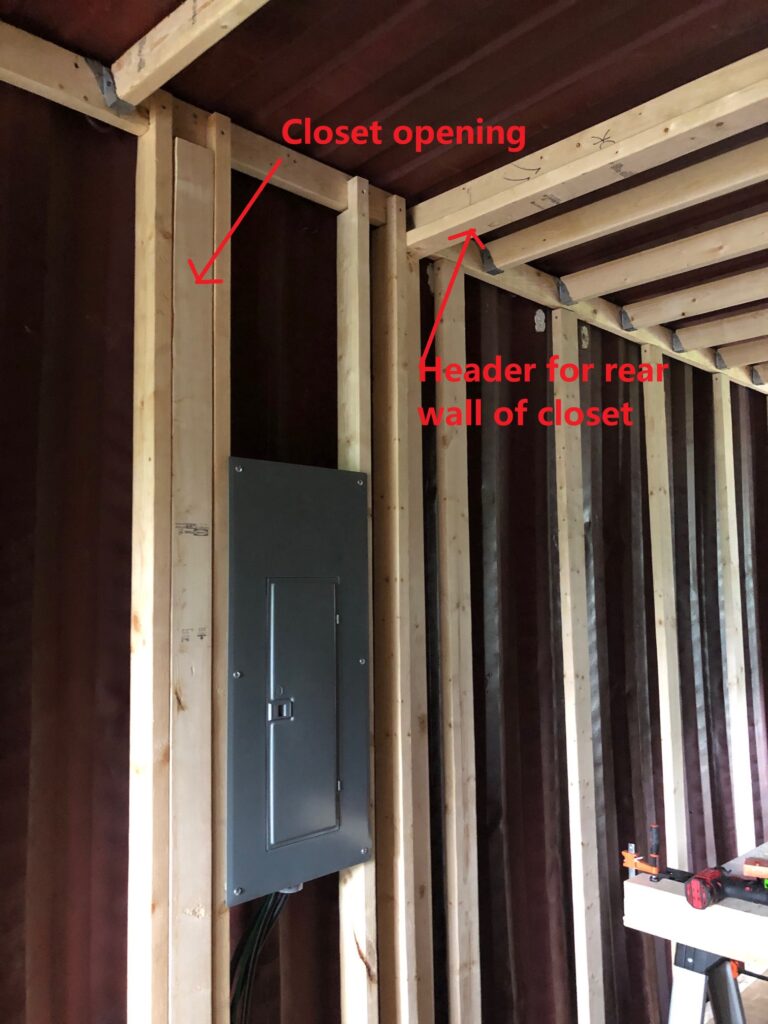
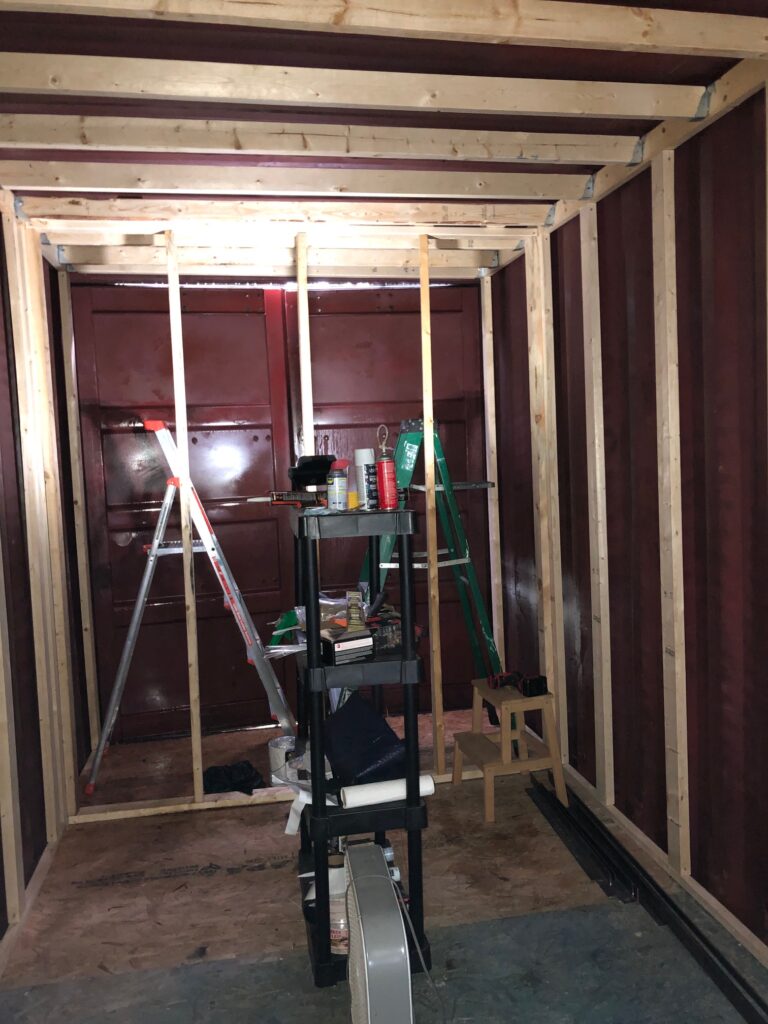
We started with the closet because we needed to mount the electrical panel, and that was where it would go. (“We” at this point was me and Calvin’s brother, George, who had come from central Texas to lend an invaluable hand.)
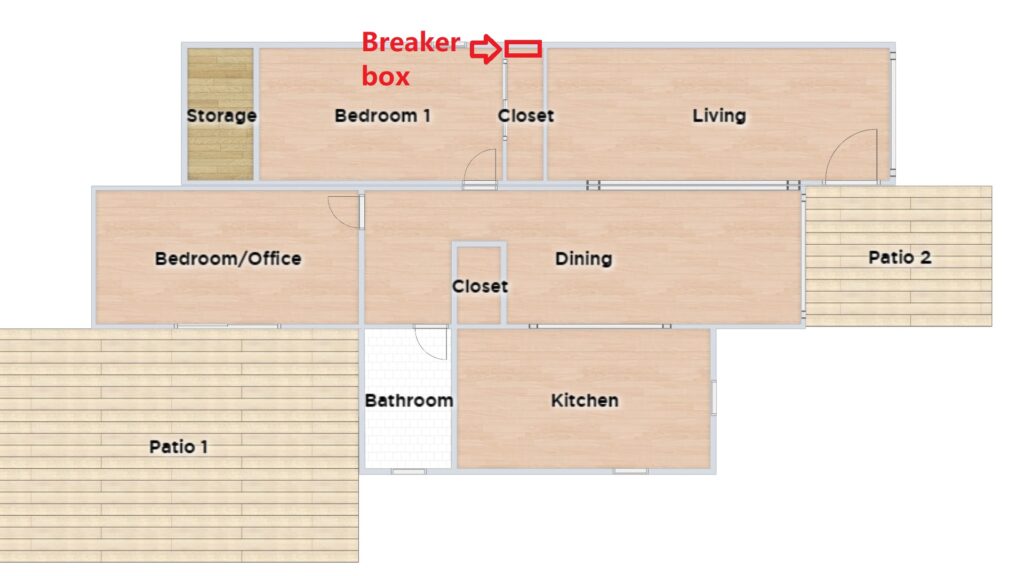
(I know that code says not to put breaker panels in closets, but one of the advantages, depending on how you look at it, of living in unincorporated Pike County, Mississippi, is that there are no building codes.)
Here, so we could mount the panel properly, we used traditional stud framing and tried the notch-at-the-top method. The floor space in the closet is less precious than elsewhere, so having studs fixed perpendicular to the container wall wouldn’t make a big difference, plus we don’t want our electrical panel to be insecure…definitely not.
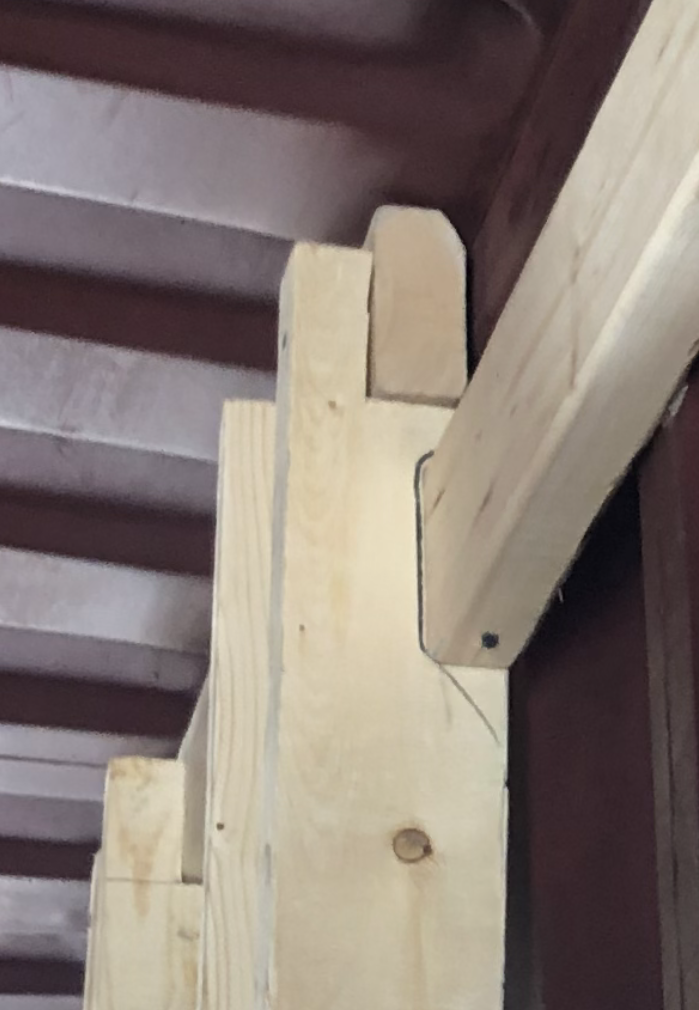
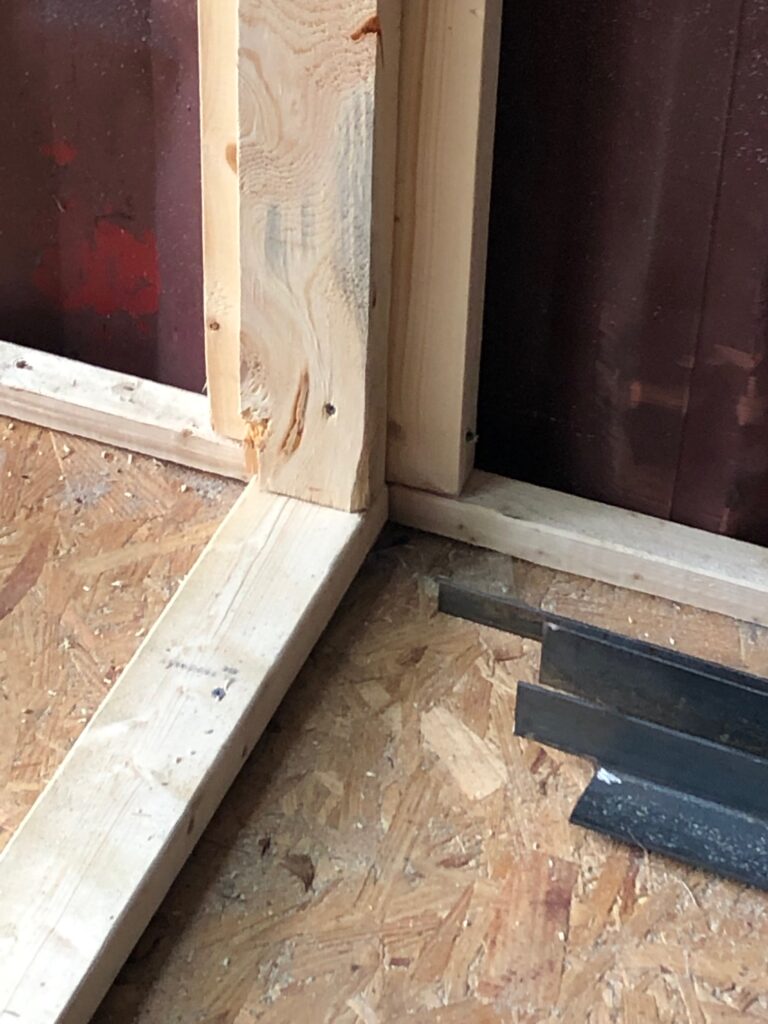
Note the bottom plate—for readers who aren’t experts in carpentry like I am, that’s the lumber on the bottom, thus its name—which is a two-by-four screwed into the floor. We used this technique throughout, only with two-by-twos everywhere else since most studs will be positioned flat against the container walls.
We could have continued the notch-out method into the other rooms, and we fiddled around a while trying to think of options. We briefly had the silly idea of supporting the ceiling cross-pieces with little steel corner braces.

The notch method might have worked—there’s no question it has for other people, based on what’s out there online—but it would have been so much work, what with all the cutting.
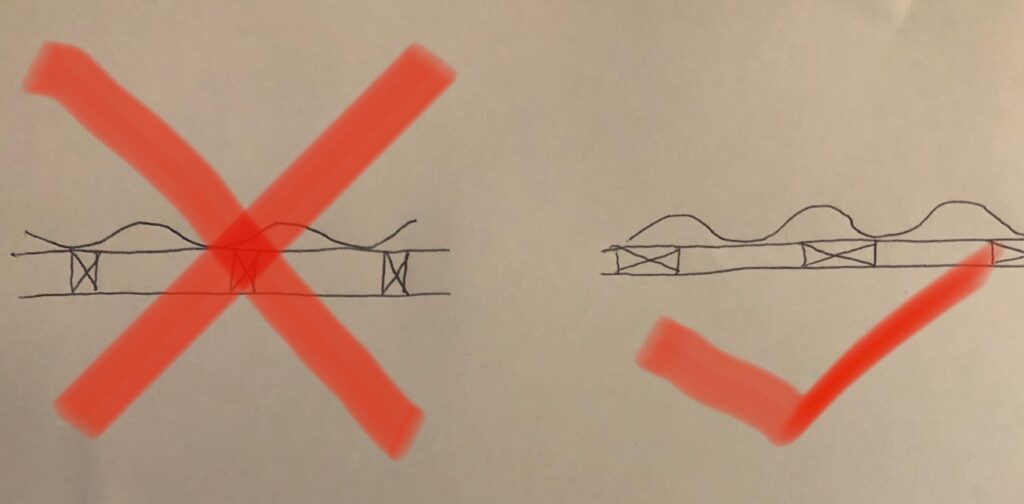
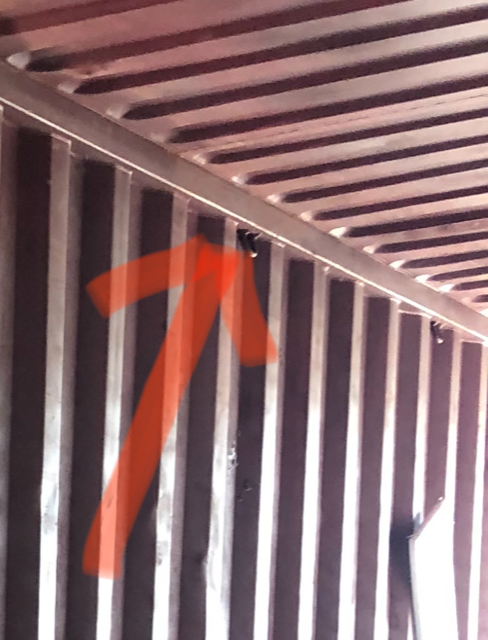
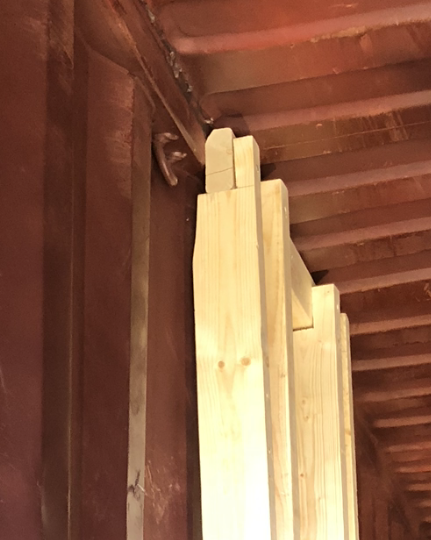
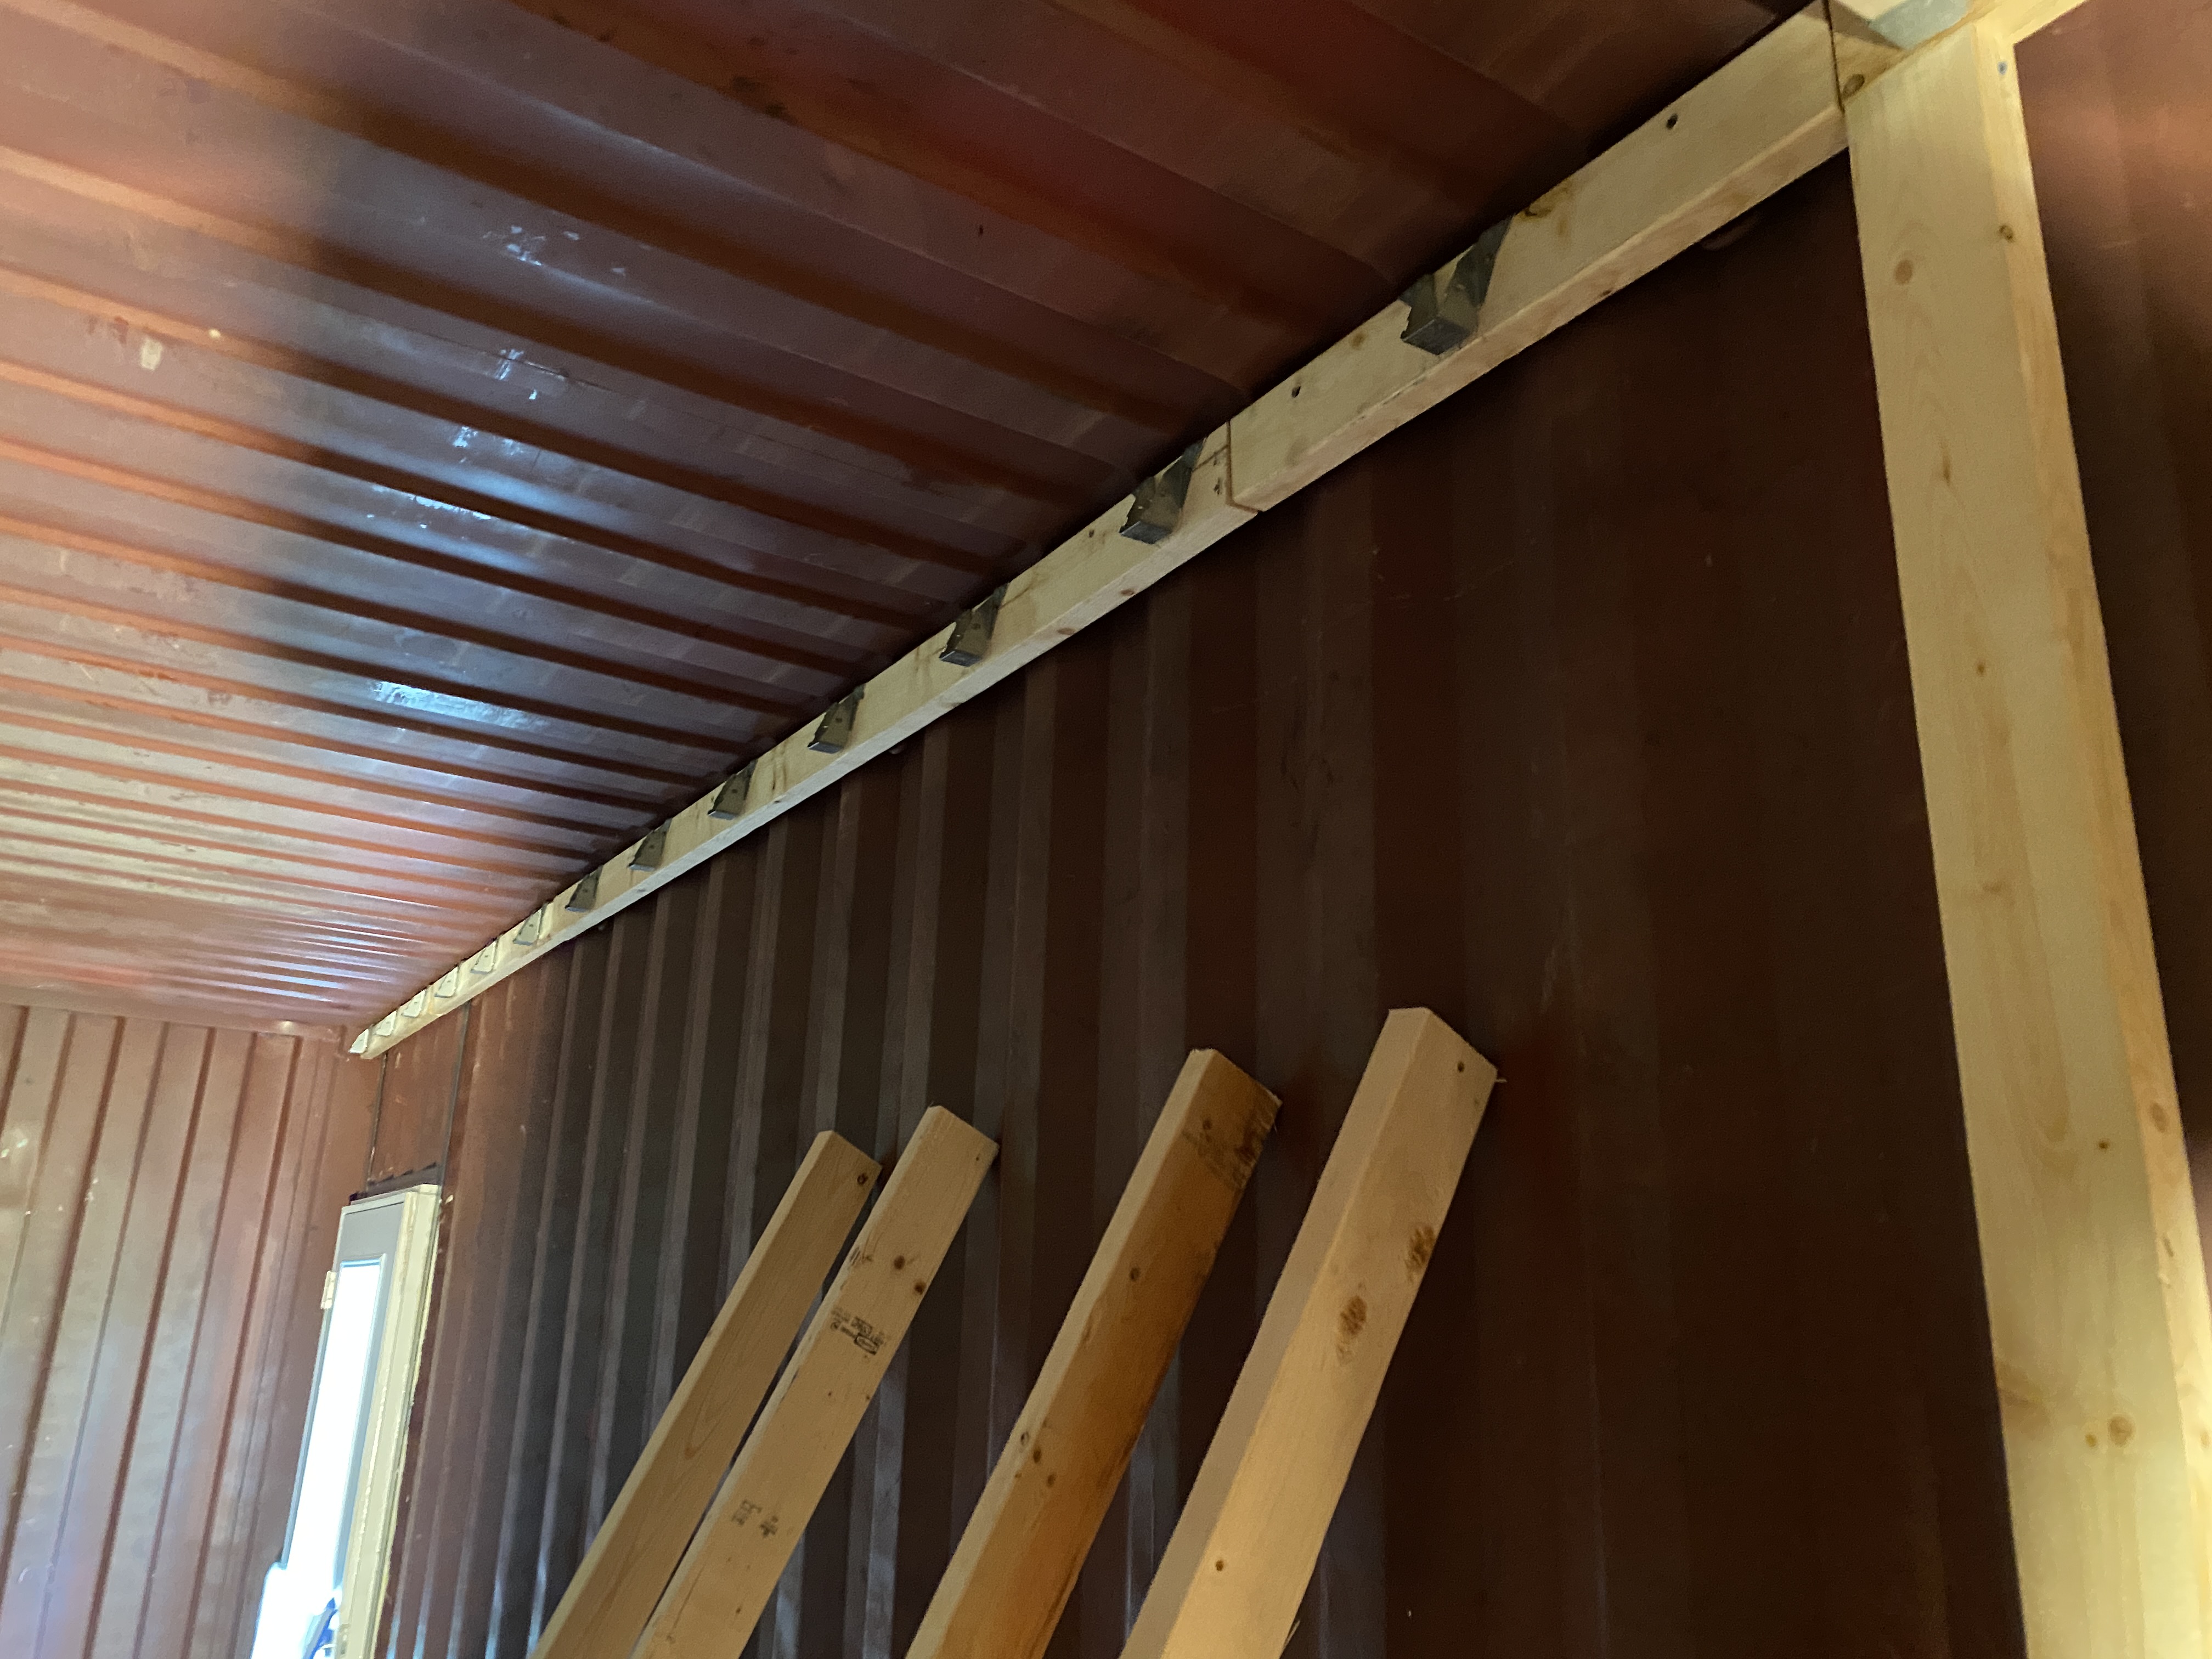
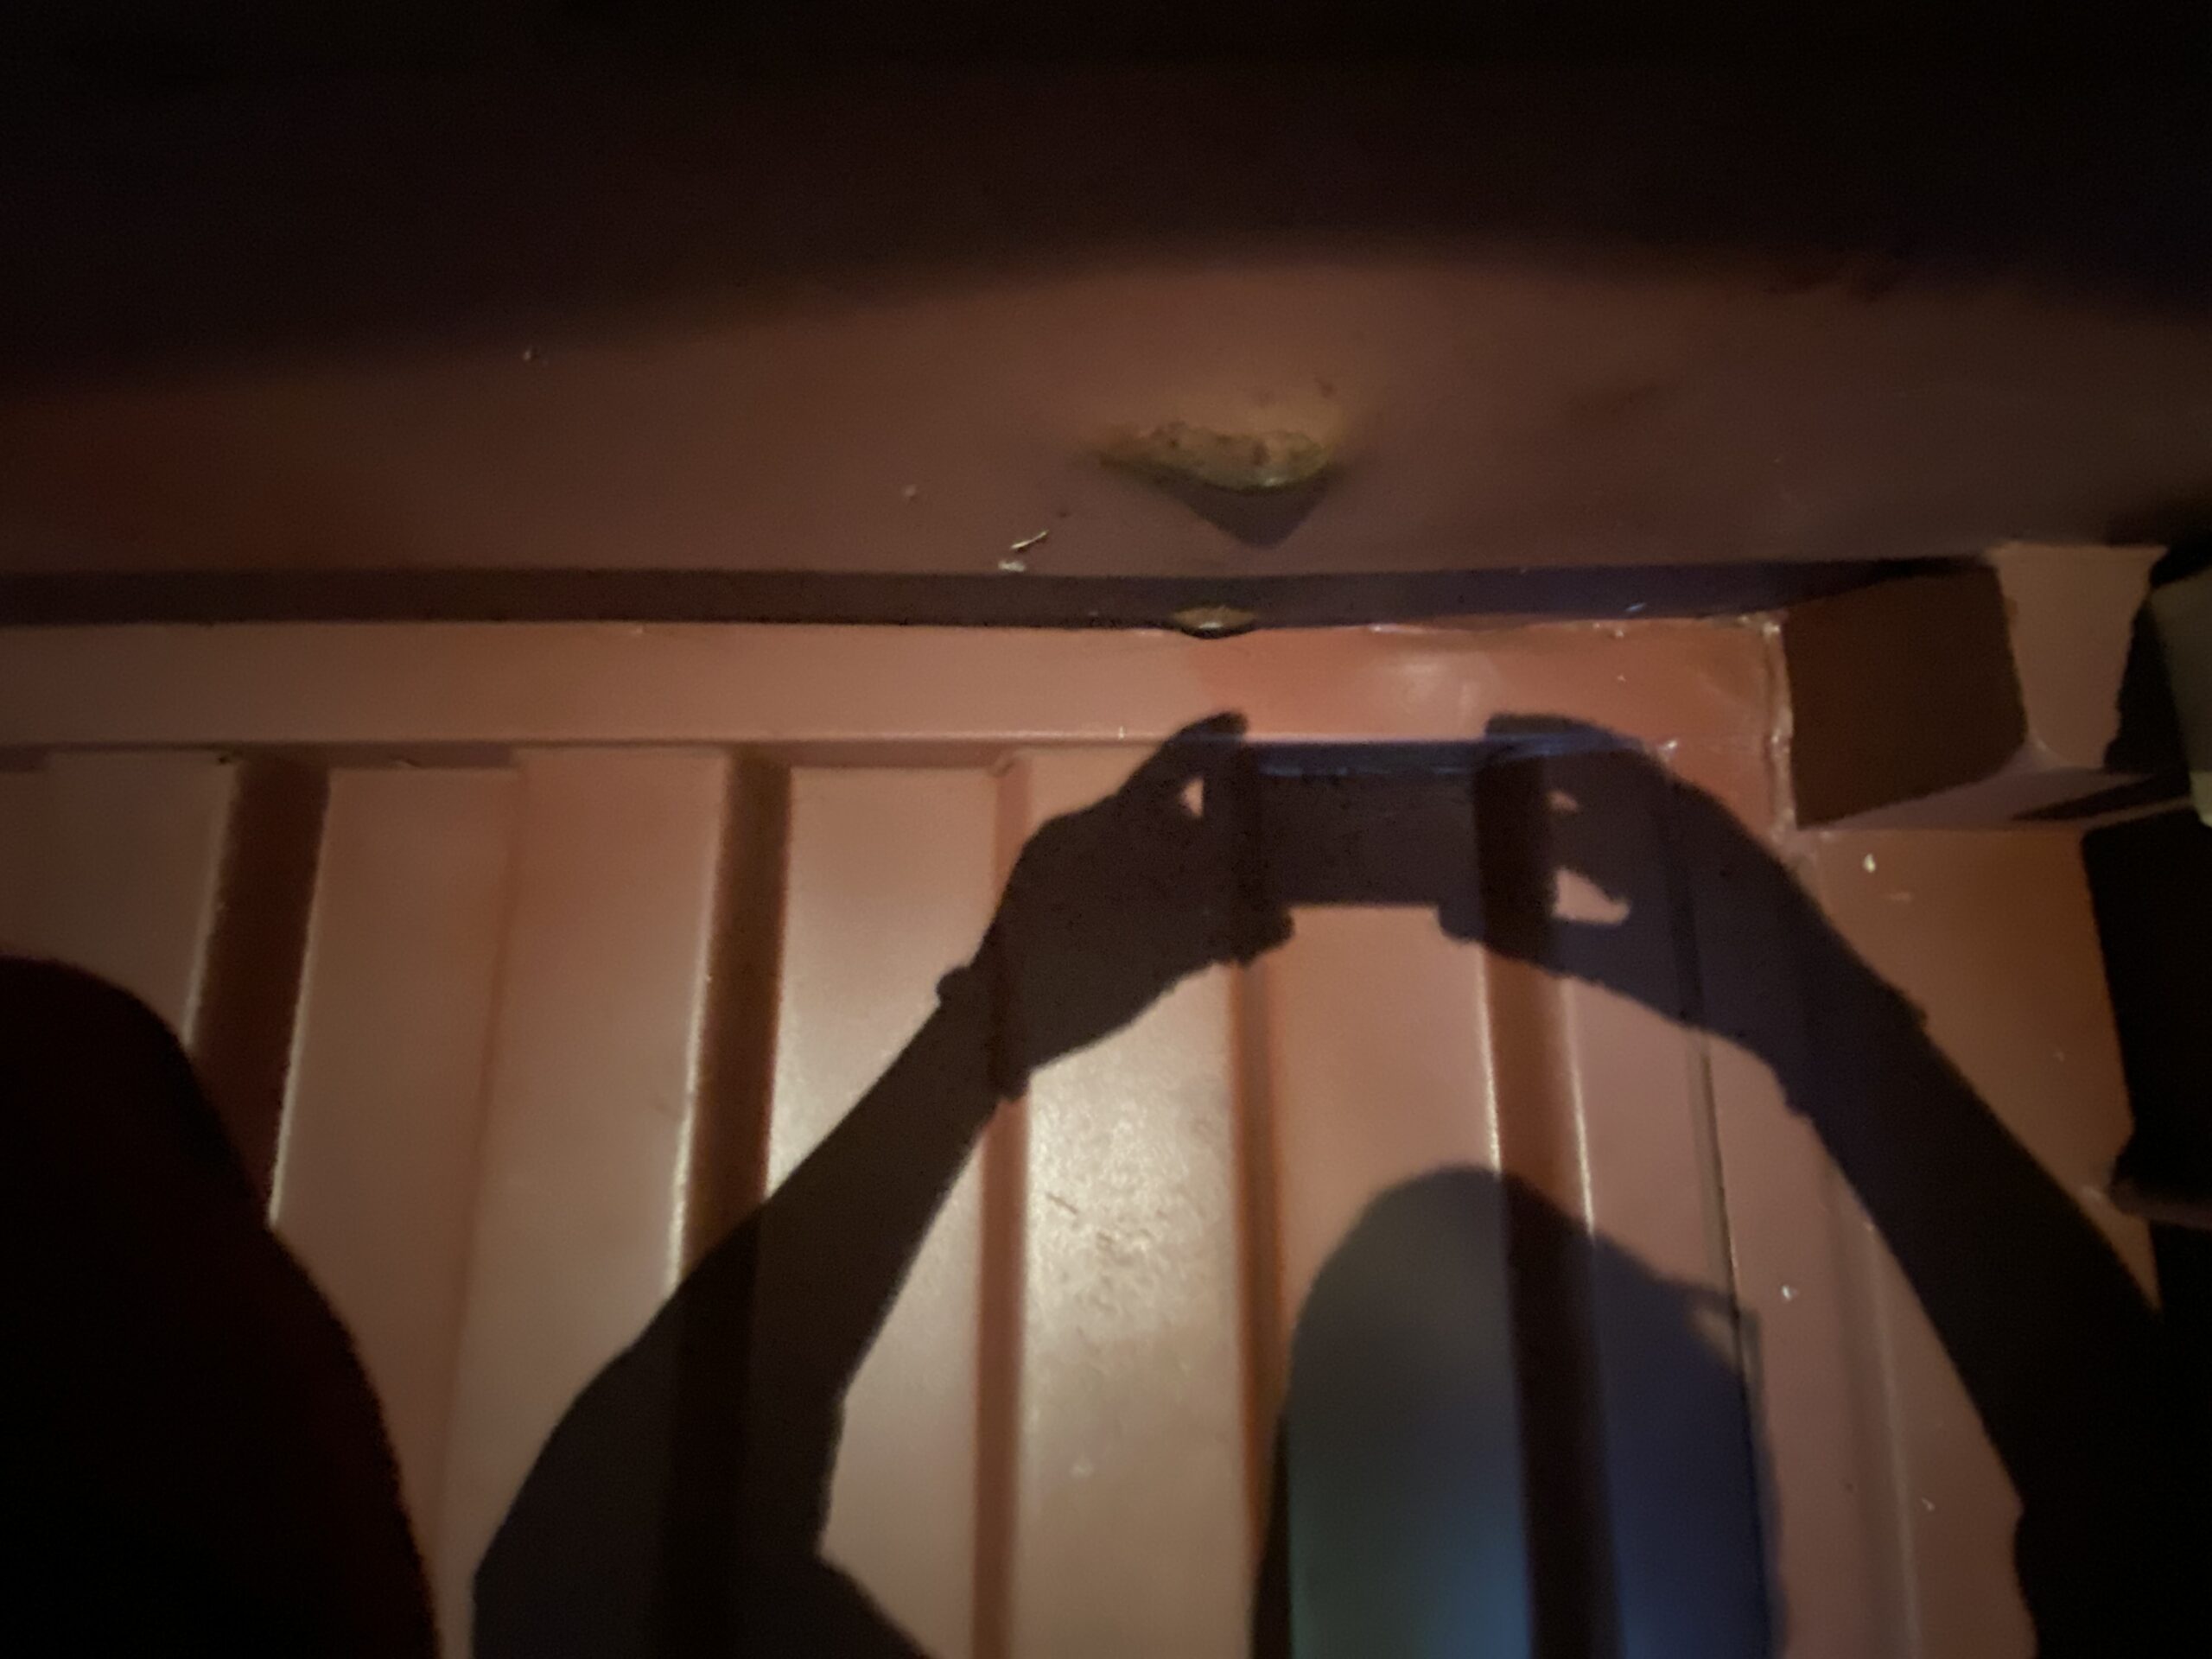
The Eureka! moment then occurred, and we devised a system that would carry us through the entire project. We realized that we could attach two-by-fours solidly and flat against those upper steel tubes, and then use those two-by-fours as top plates for the studs.
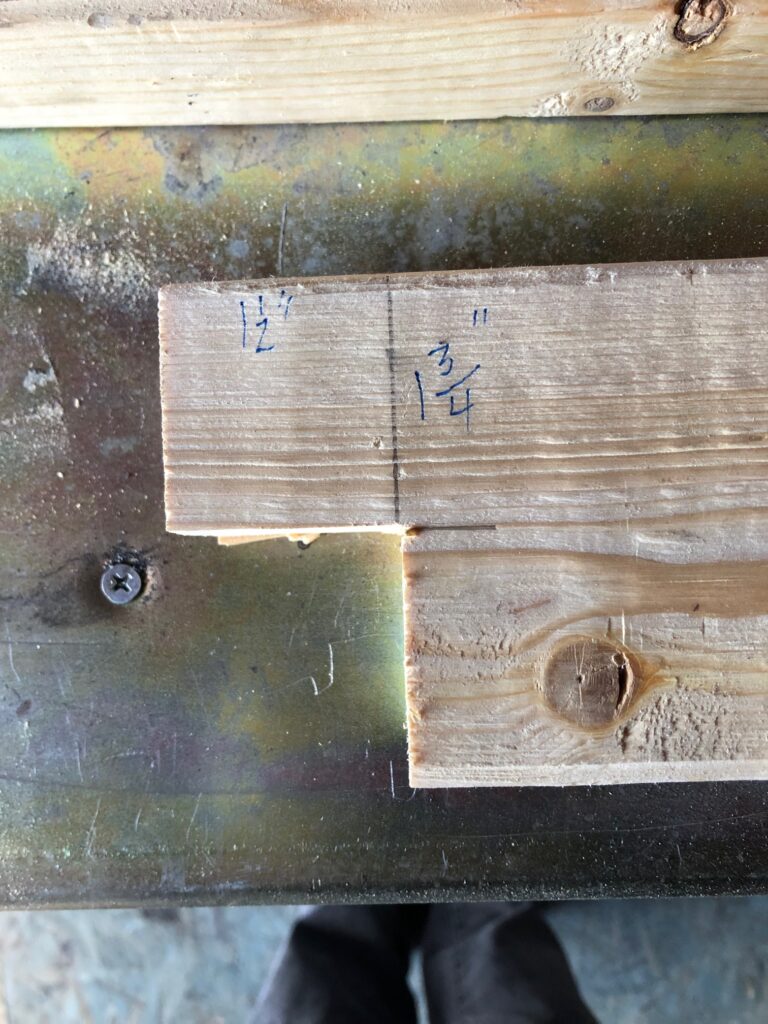
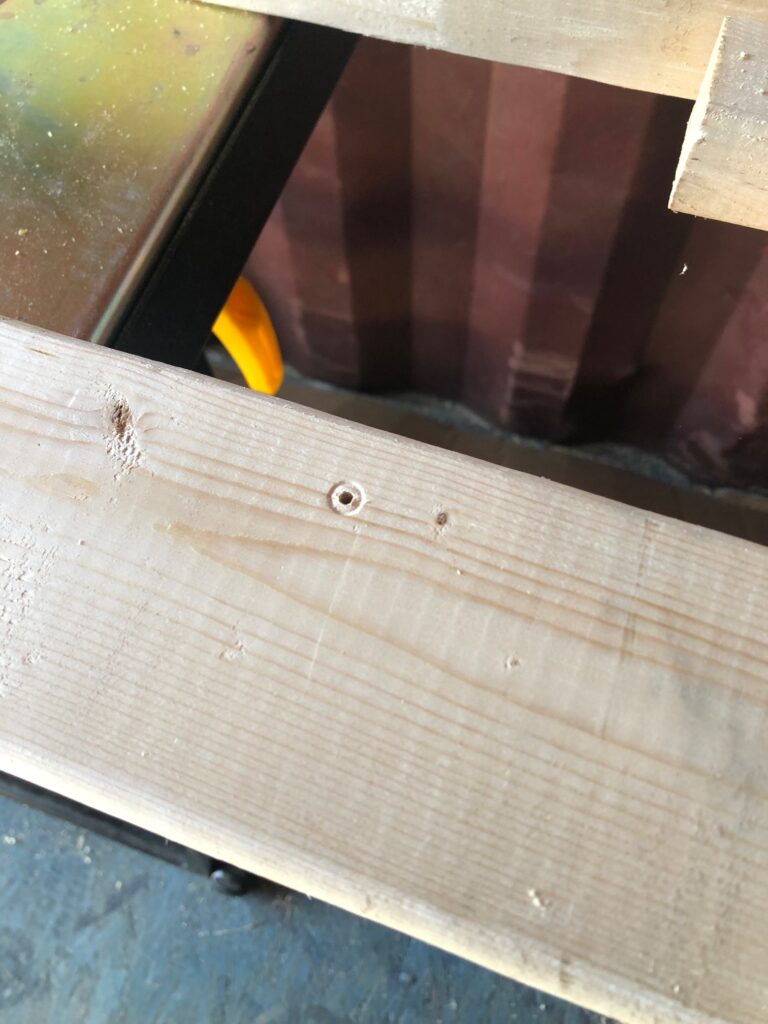
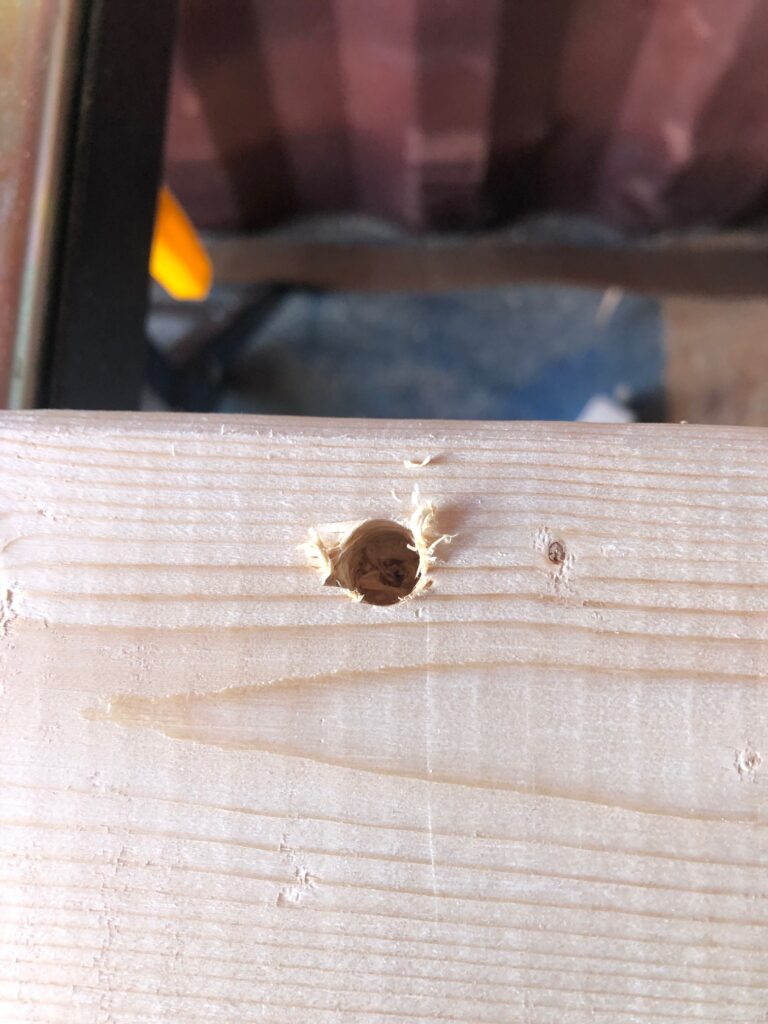
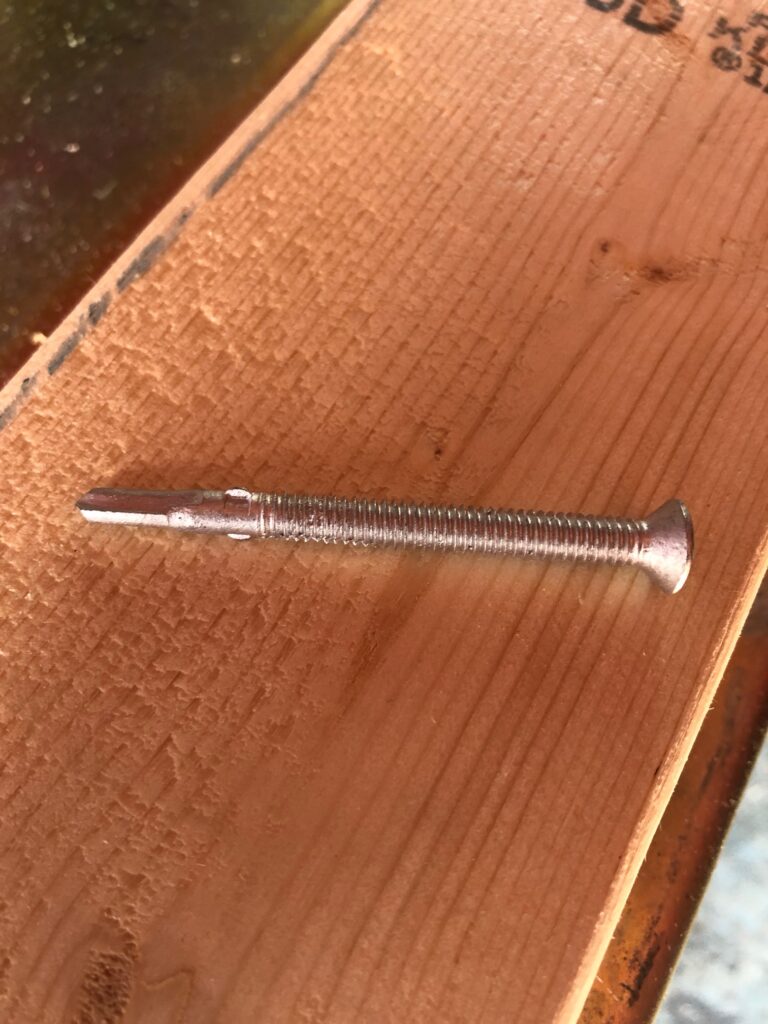
We pre-drilled holes in the lumber, and then countersunk them so no screwheads would stick out, which I suppose is the point of countersinking. The self-tapping screws might have worked on a flimsier metal, but they didn’t make a dent in this eighth-inch-thick steel. So what we did was hold the lumber in place, level it, and drill into the steel just enough to mark the spot. Then we’d remove the wood and drill through the steel. It takes some pressure, and you’ll go through a few drill bits.
The holes are near the upper edge of the two-by-fours for a couple of reasons. First, I wanted there to be some room above the ceiling for electrical wires and therefore didn’t want the top plates all the way up to the roof. Second, the steel tube is narrower than the lumber, so this was how it worked out.
The hardest part is pre-drilling the holes in the steel. Aside from that, the process is a breeze. And man, once you put the screws in, those boards are attached and they’re not going anywhere. You could use them to do pull-ups if you wanted, even if you’re on the husky side.
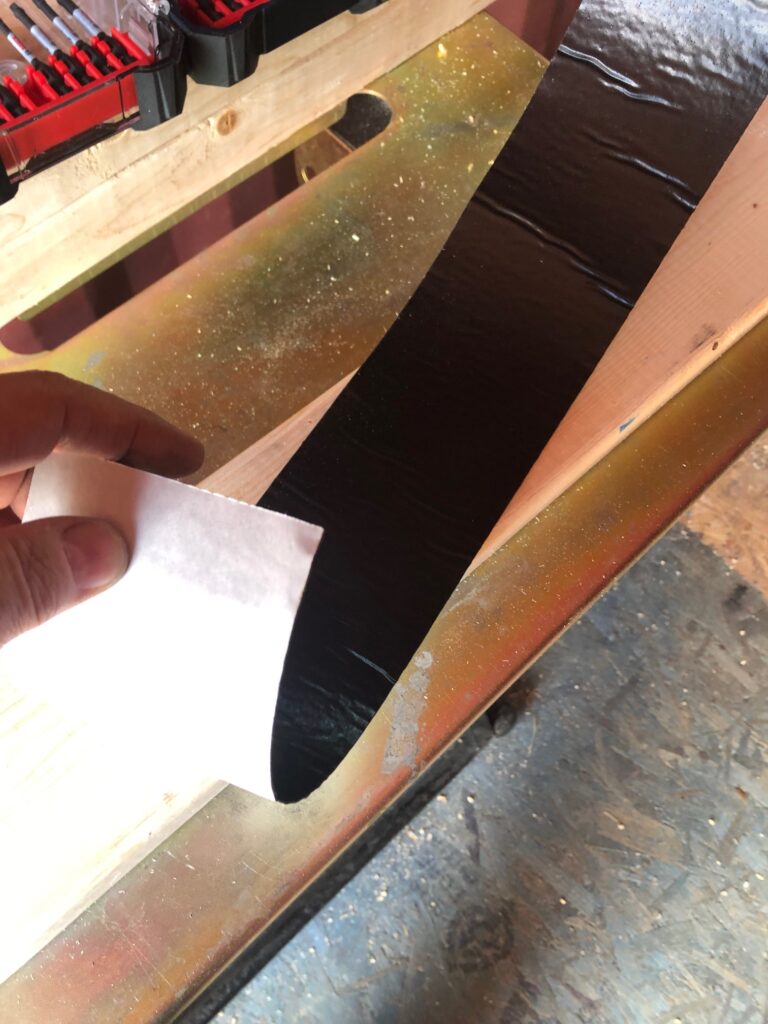
One extra step was to apply Deck Flash brand Self Adhesive Deck Flashing to the back of those top plates. I read somewhere that some kind of barrier is advisable anywhere that wood comes into contact with metal. Something to do with keeping moisture from wicking into the wood, I think. Whatever the reason, it’s what we did. The stuff is black and rubbery and somewhat thicker than electrical tape. One side is already sticky when you unroll it, and you peel off the paper from the other side.
I bought the three-inch-wide flashing and then cut it in half longways since only half of each top plate was in contact with steel. It’s around $25 for 75 feet.

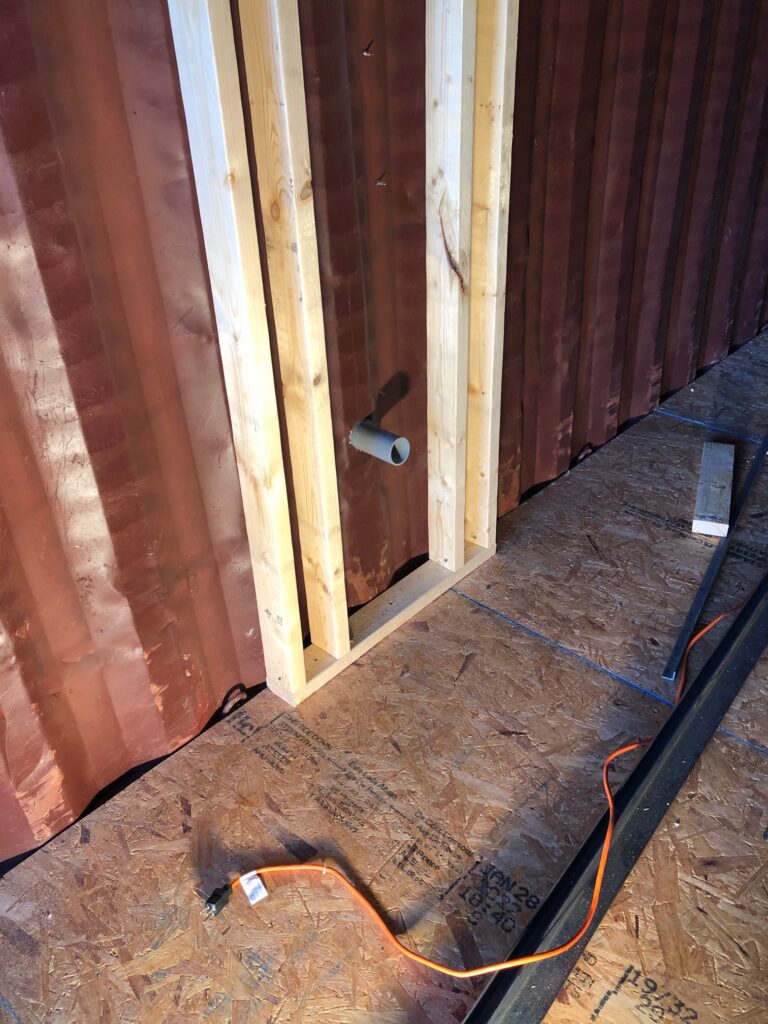
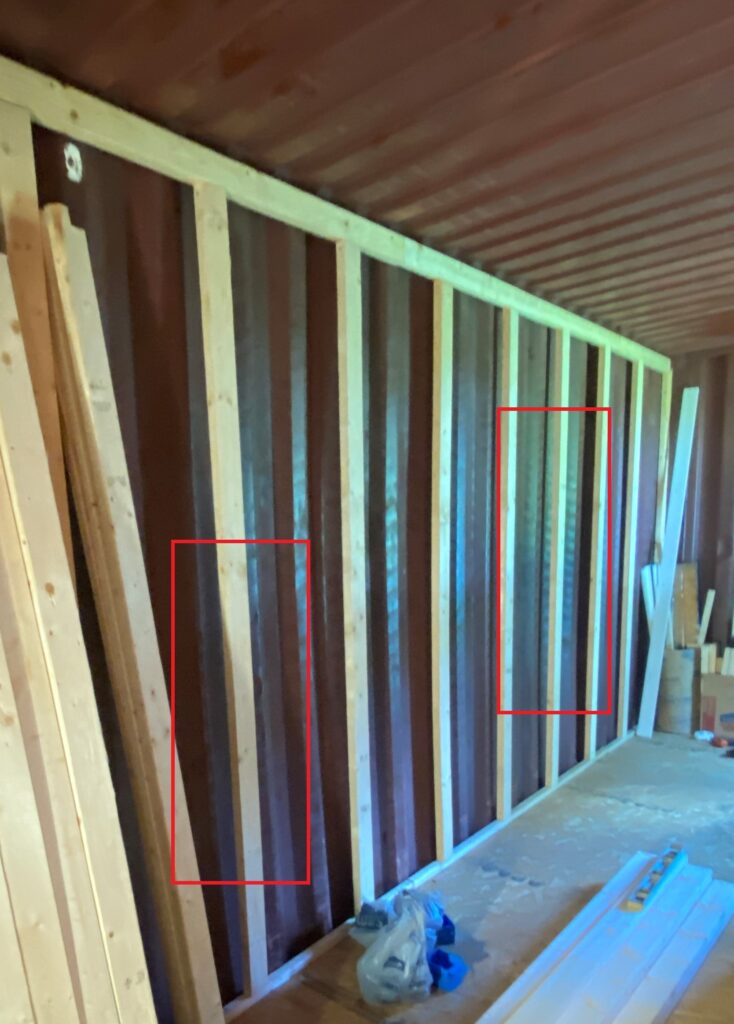
There was nothing unusual about the installation of the studs, except for their flat-against-the-wall orientation. We screwed them to the top and bottom plates, and we set them on 24-inch centers rather than the usual 16. Remember that the walls have to support drywall but nothing else.
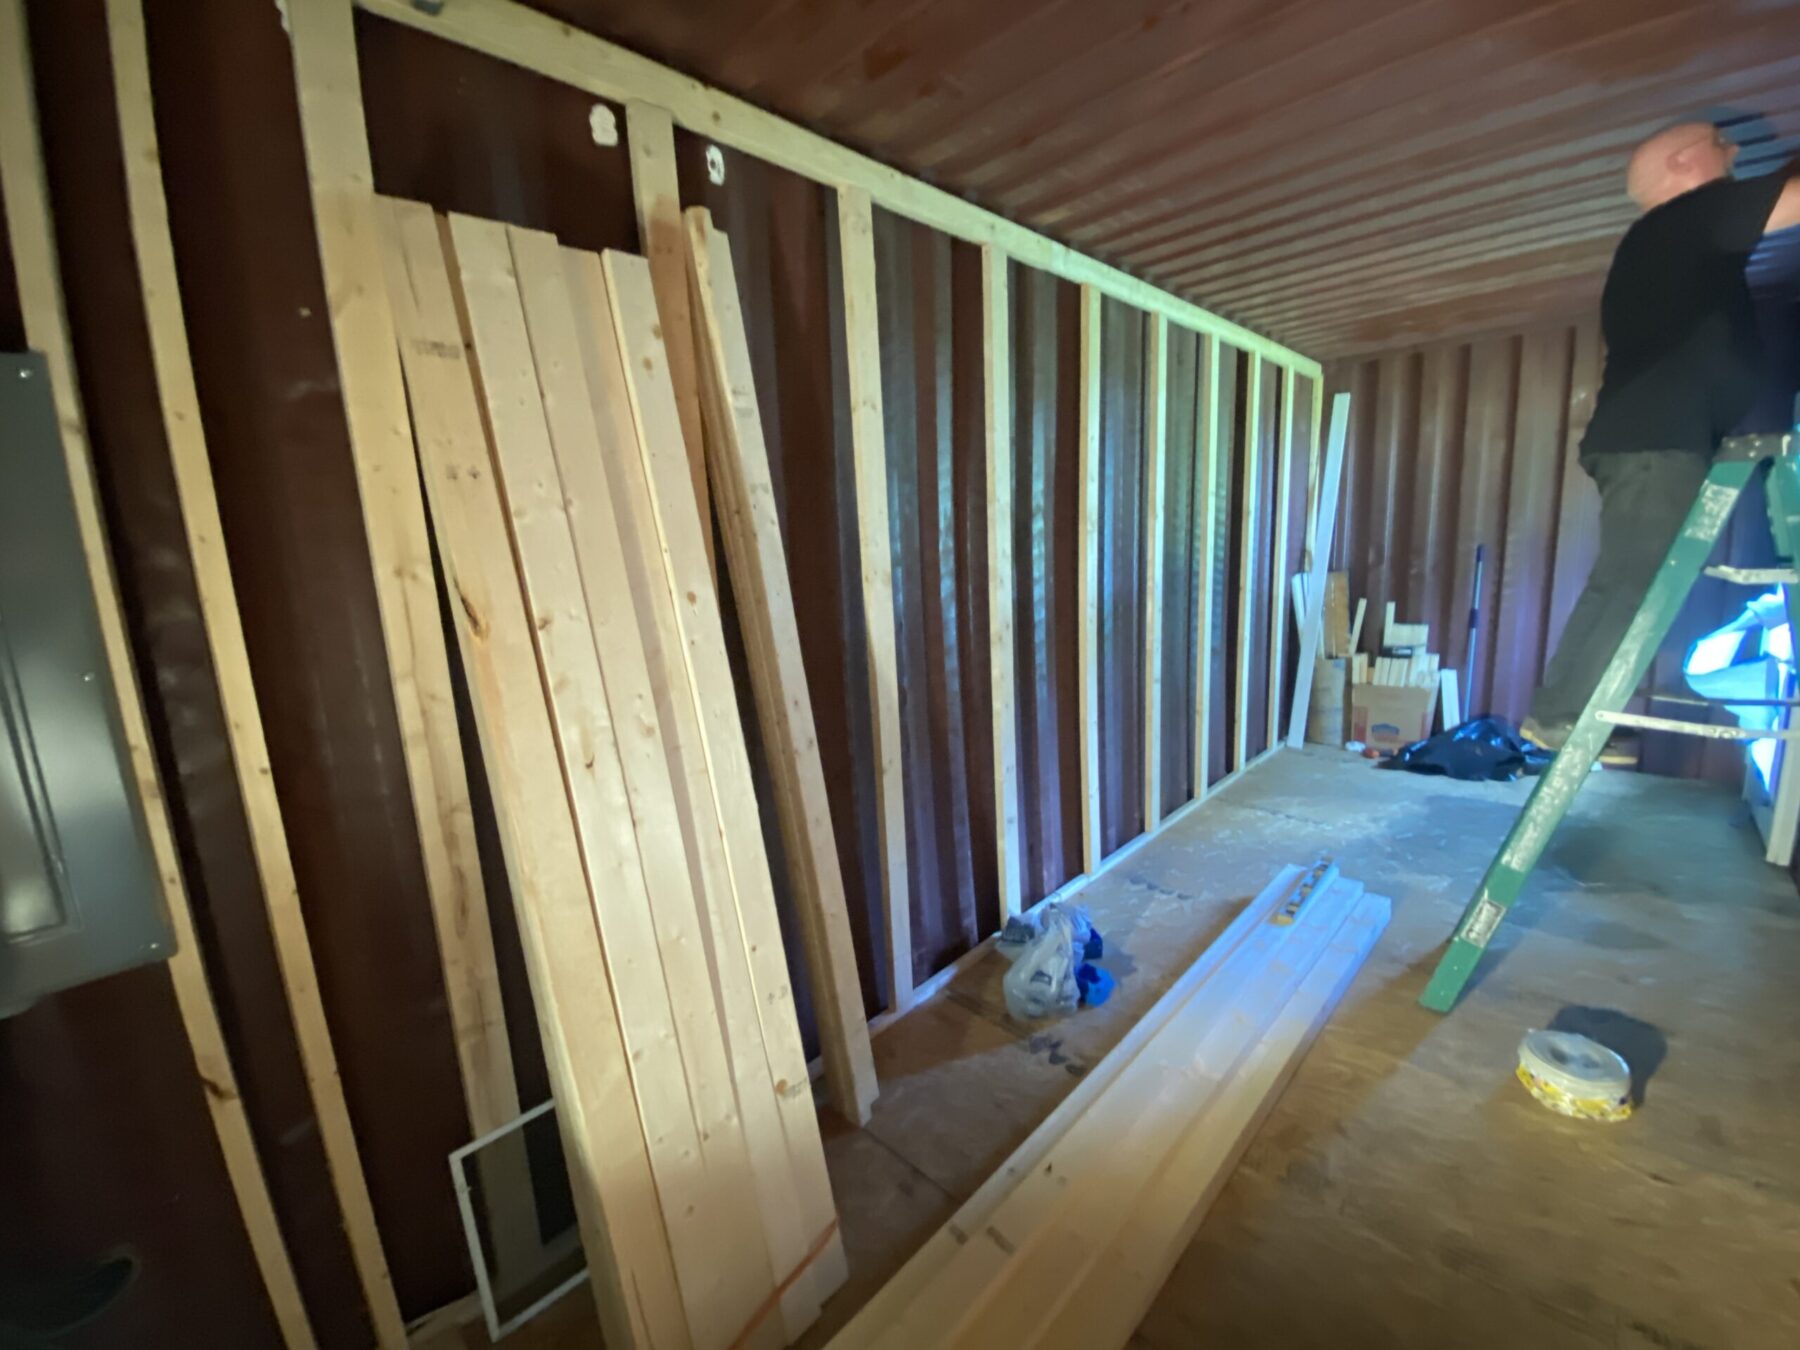
You can kind of see the bowing of the container walls I was talking about earlier. In a few places there’s about two inches of space back there. I guess I didn’t need to buy all that adhesive.
THE CEILING
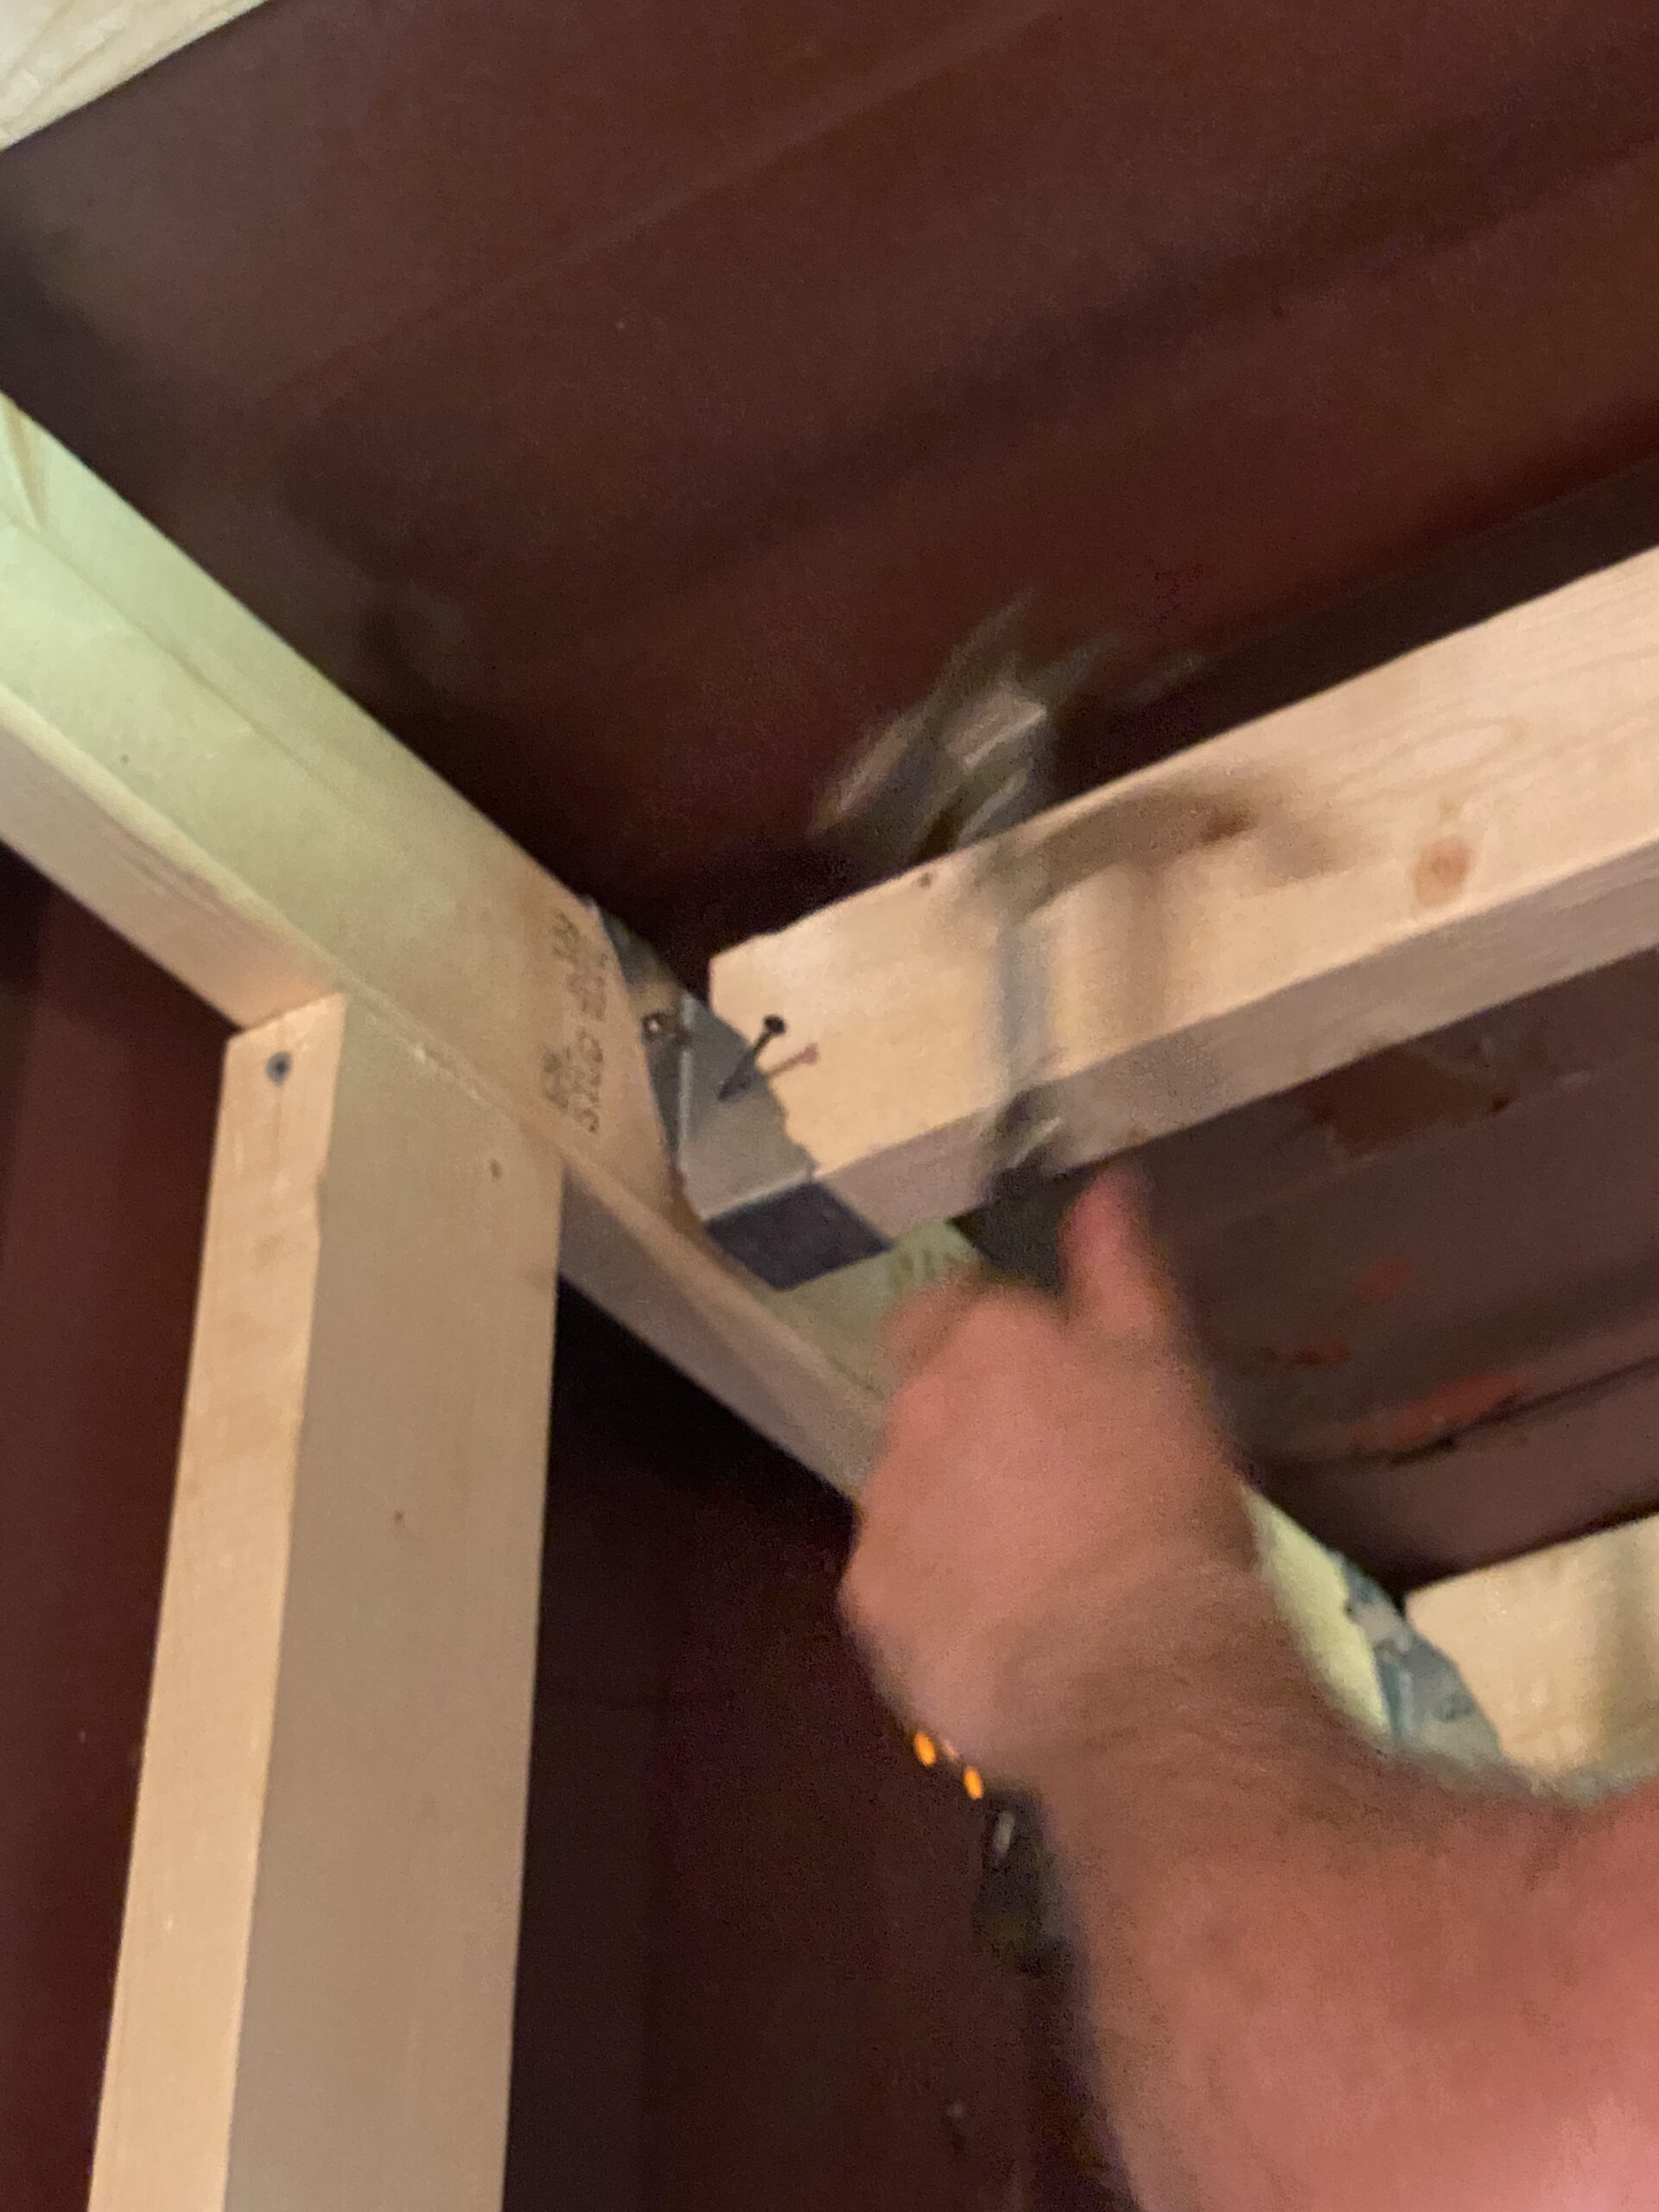
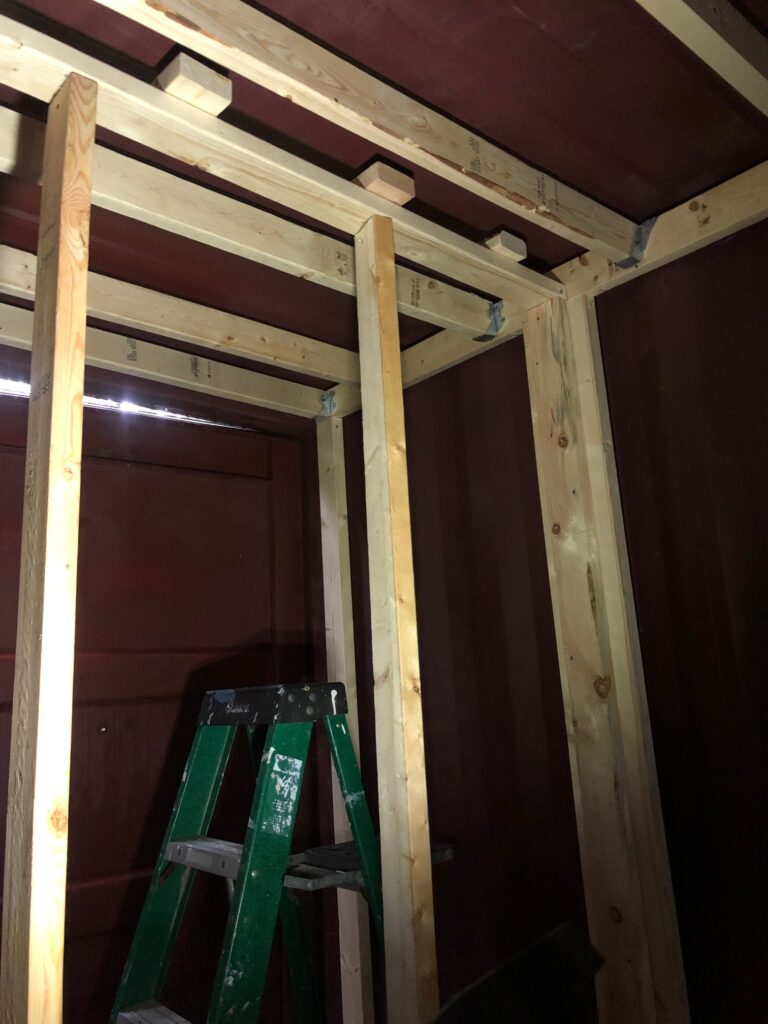
Having moved past the silly notion of cutting notches out of dozens of two-by-fours, we decided on a plan that, in the glare of hindsight, we really should have used from the start: post frame hangers. I thought they were called joist hangers but it seems they’re not.
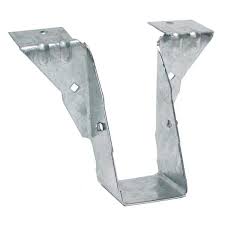

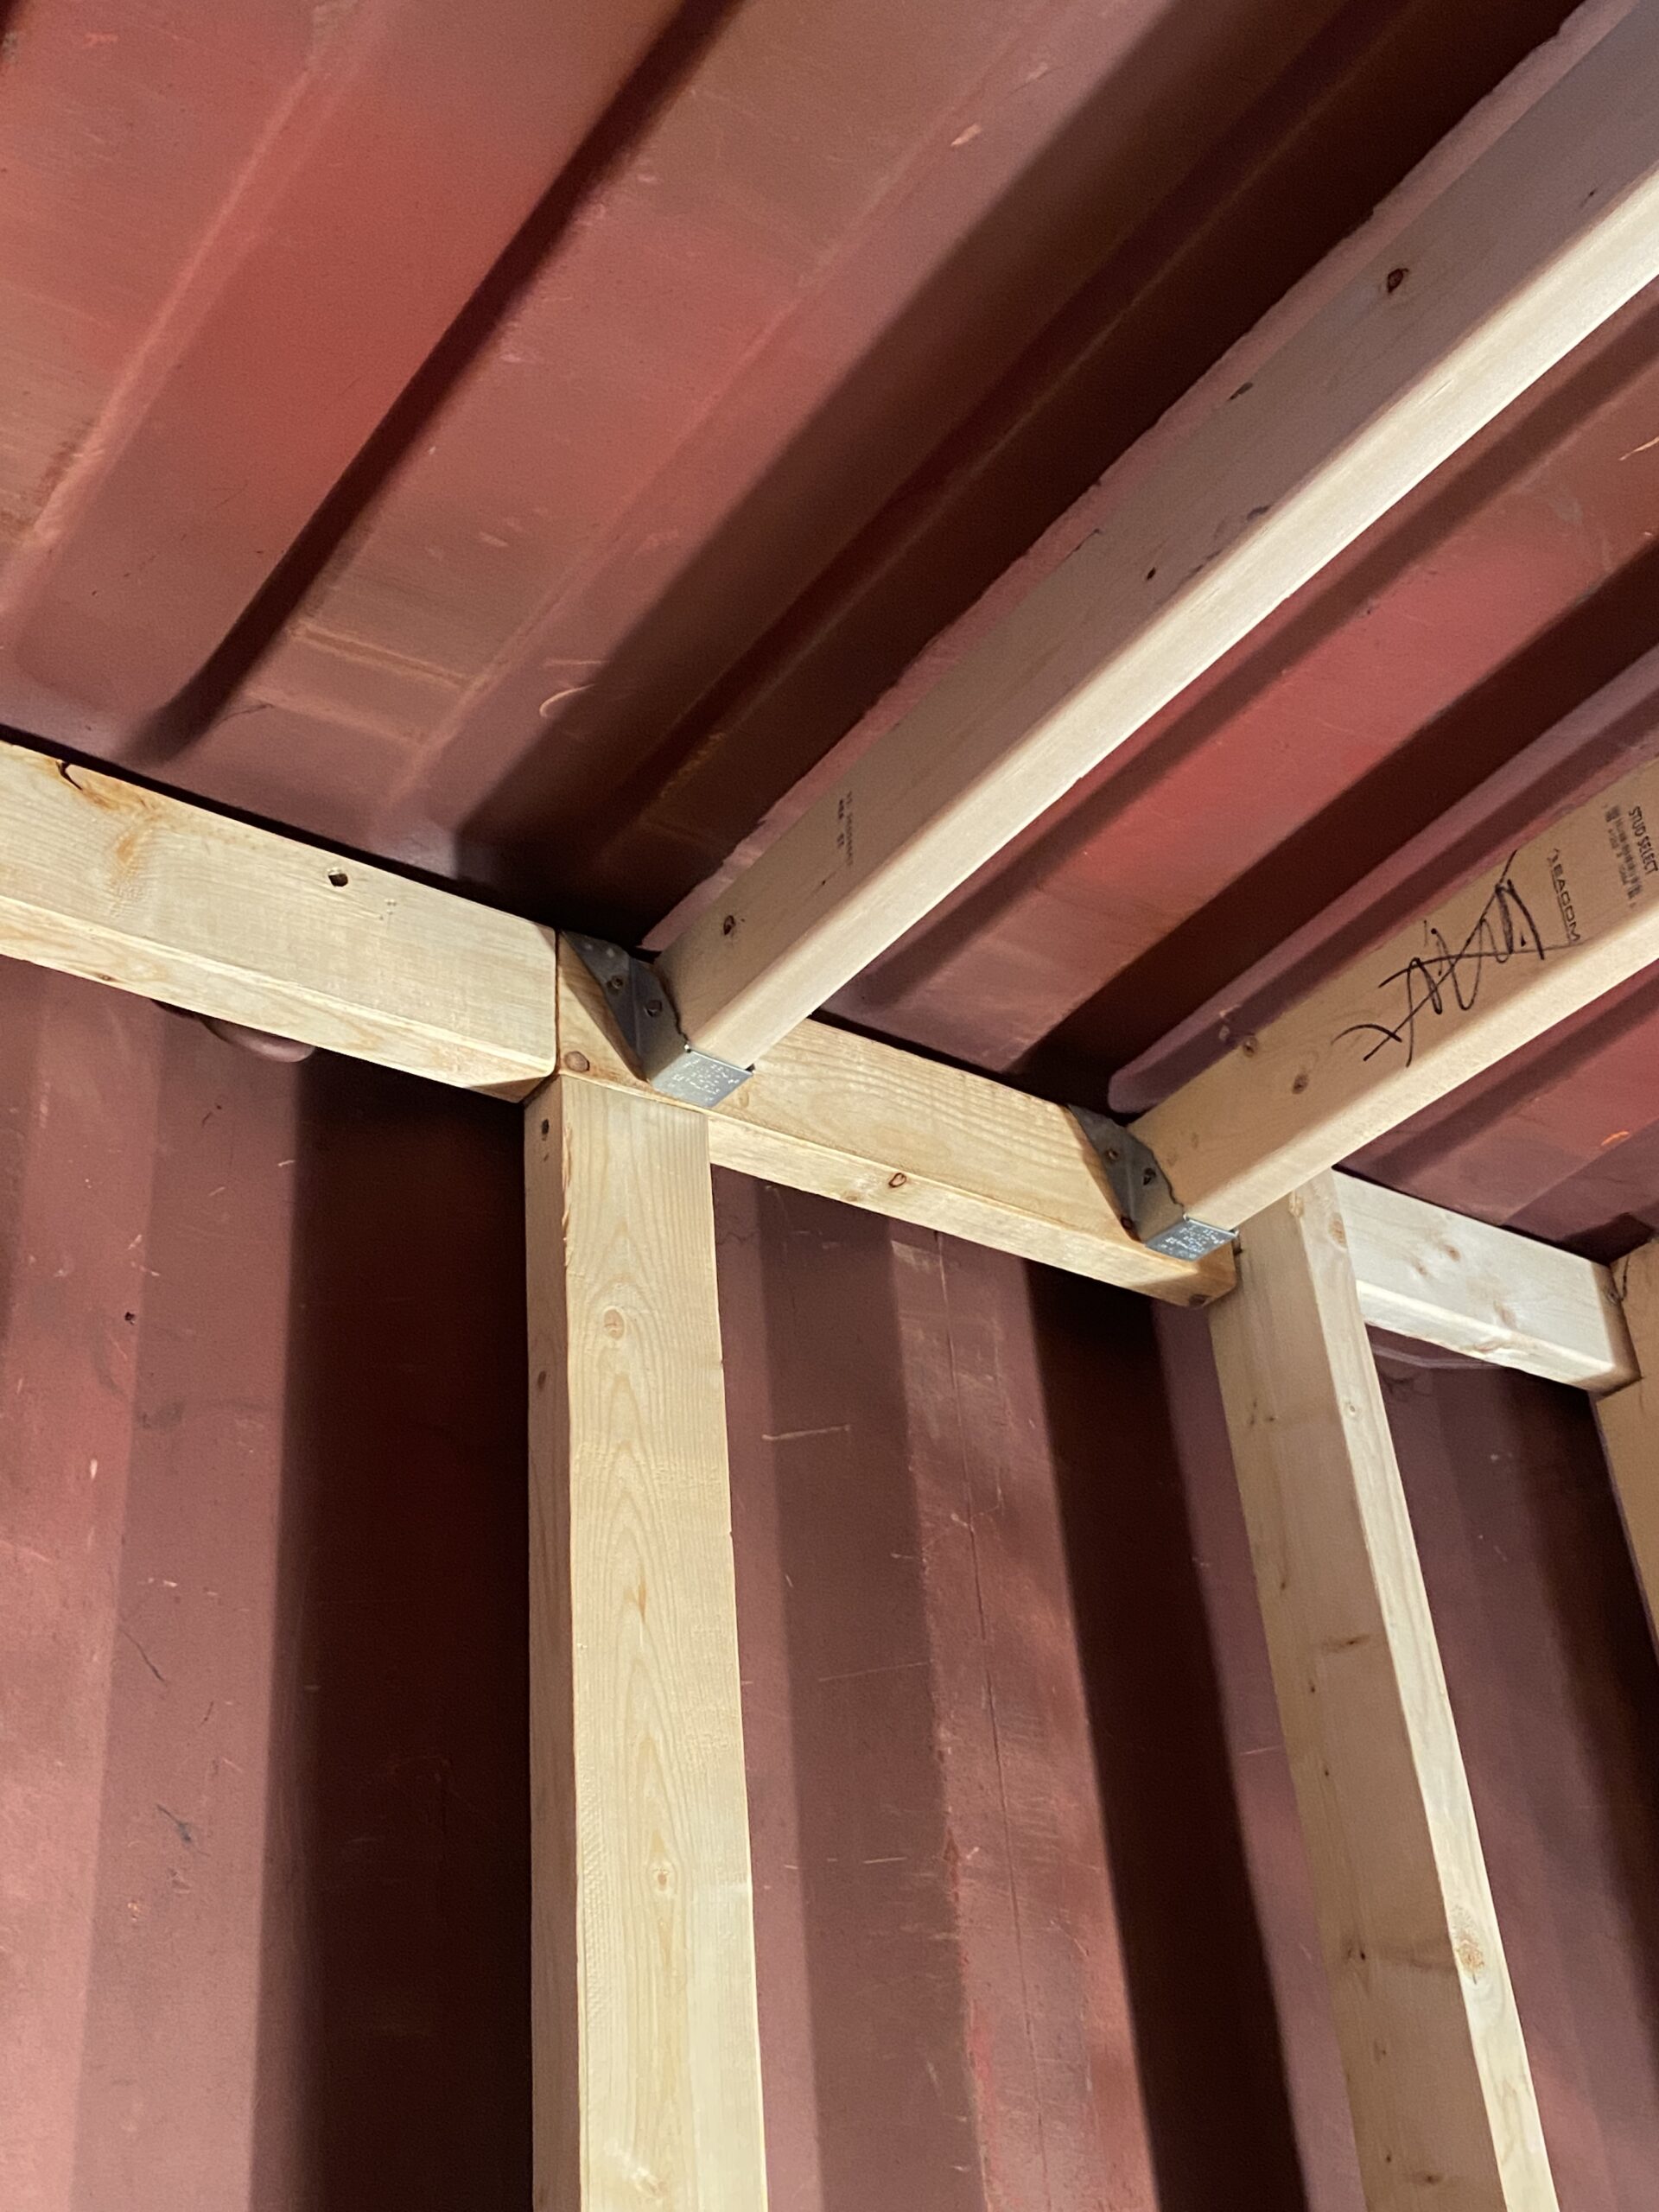
Installing them is a breeze with a screw in each side. Unlike the studs, which were placed every 24 inches, we centered these every 16 inches since drywall will be attached and we would not care to have the ceiling fall on our heads.
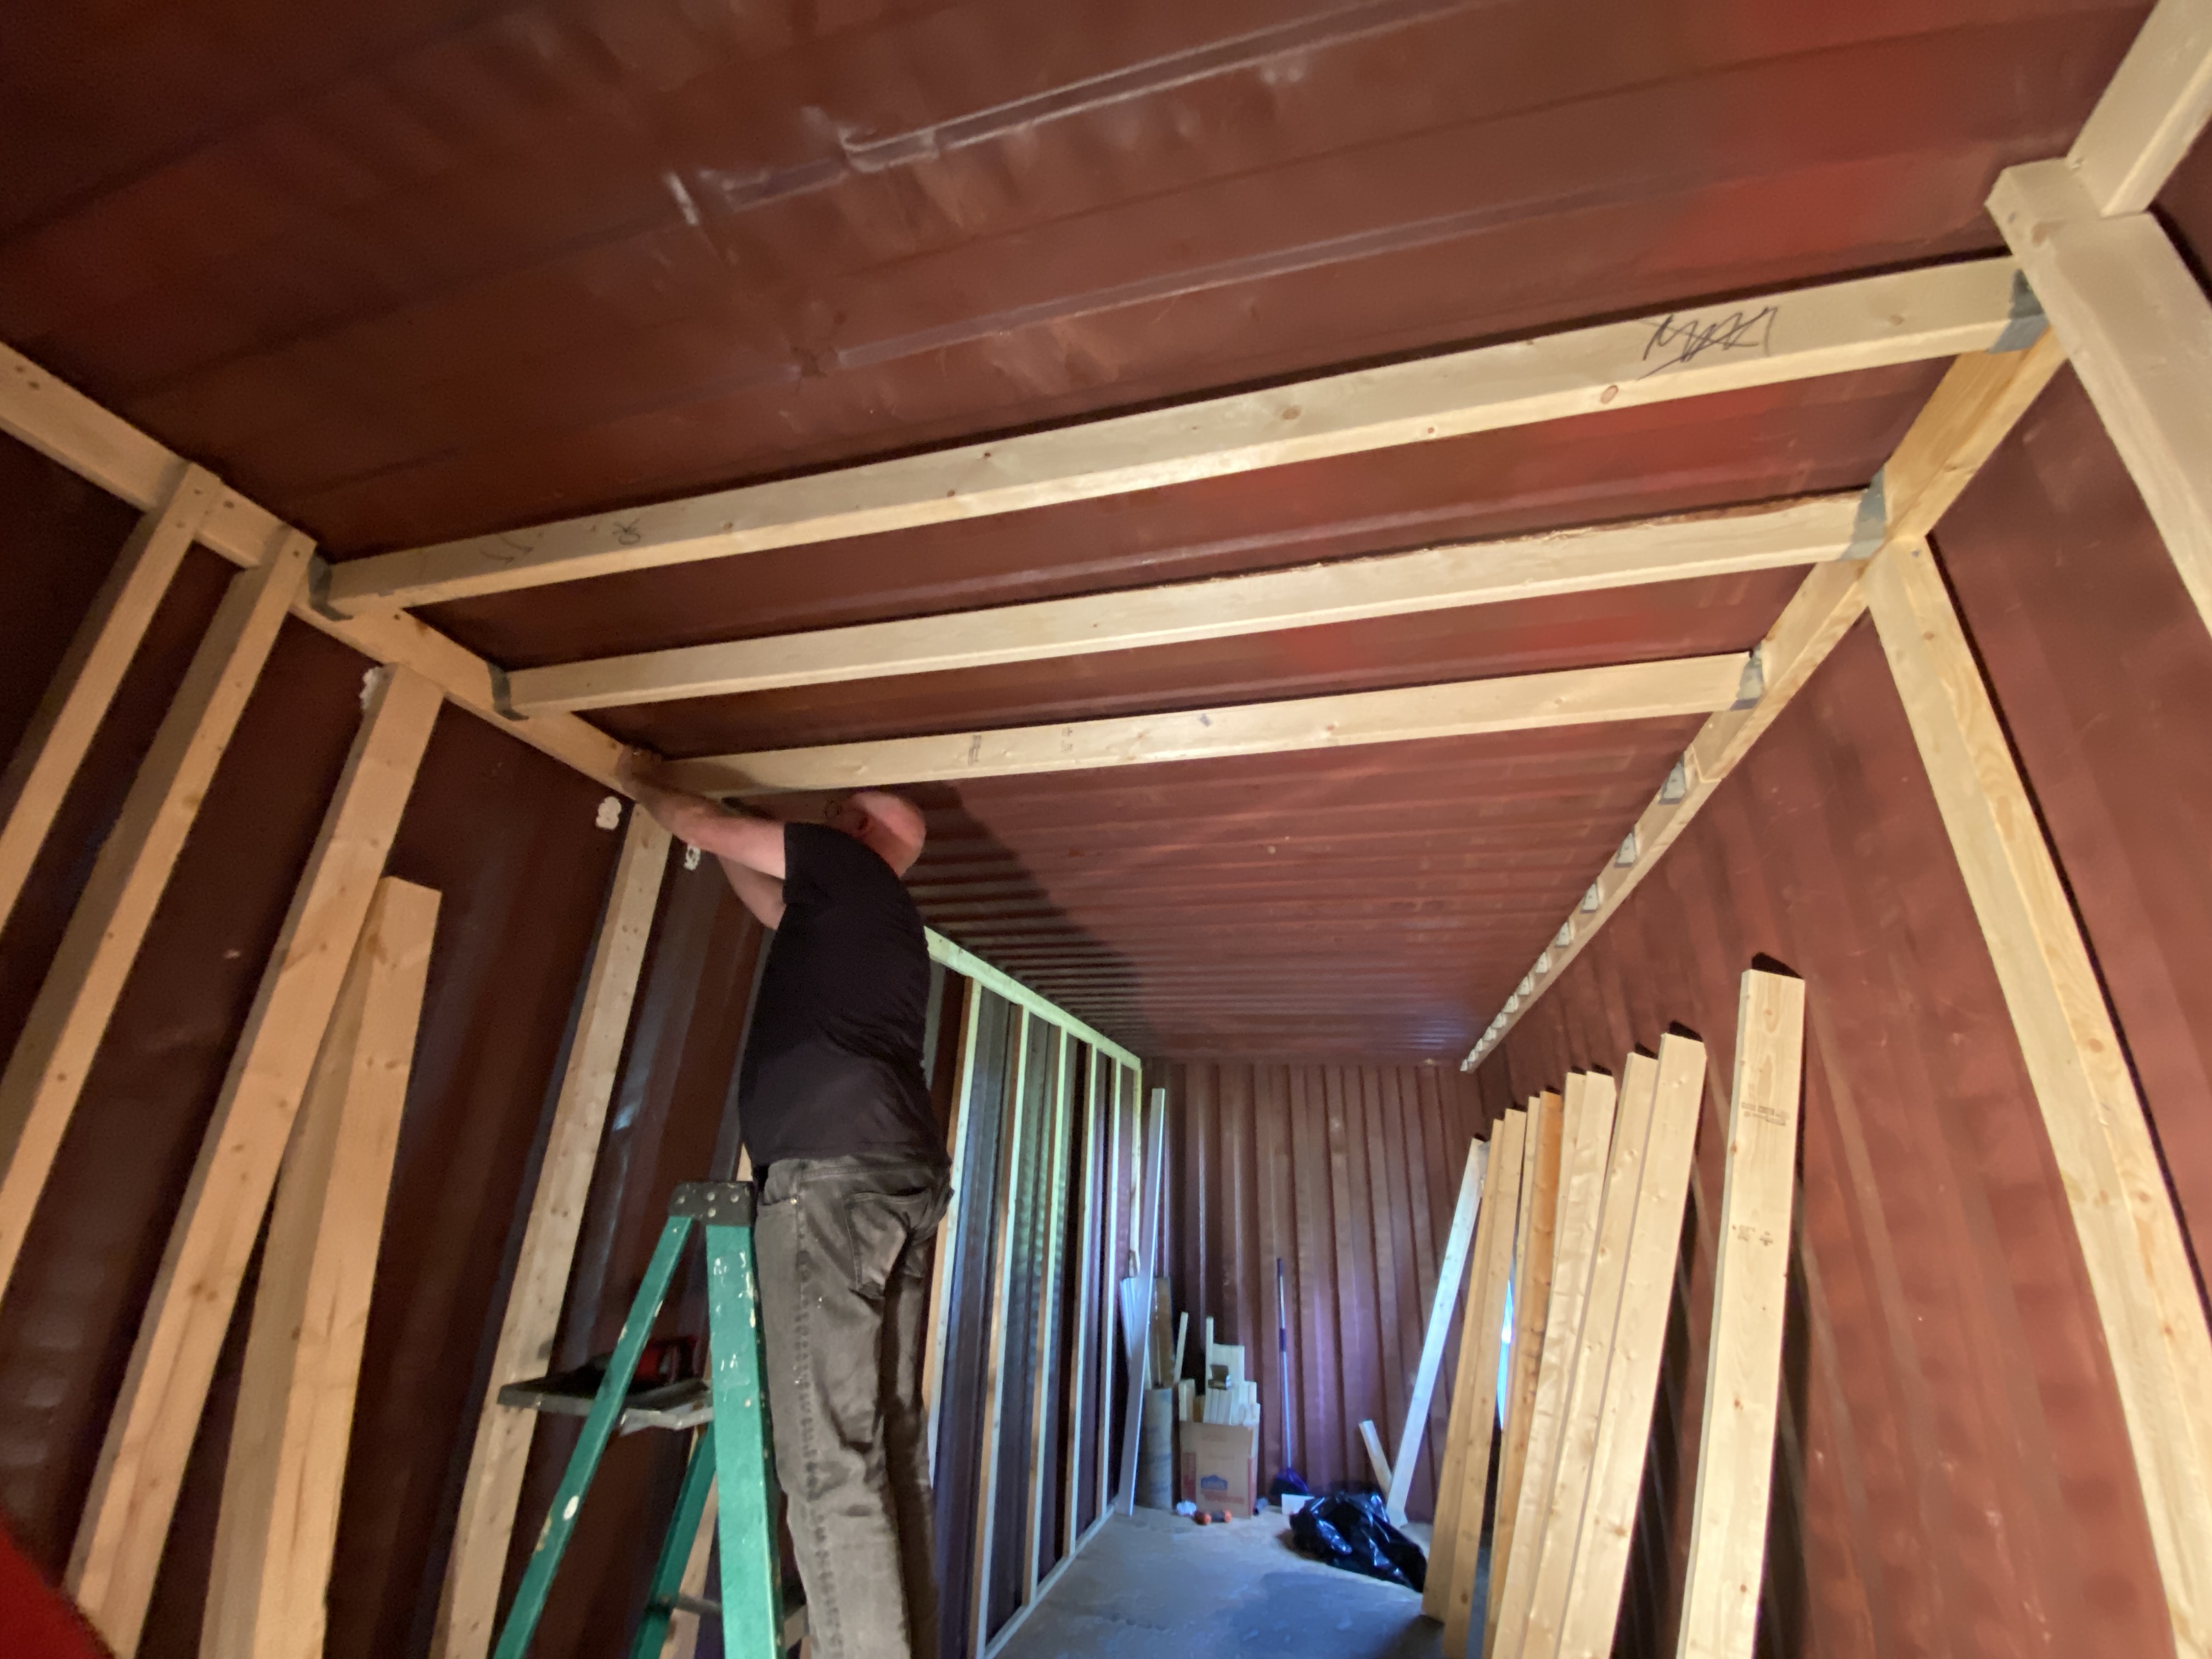
In normal circumstances, I think you’d be able to affix the hangers at both ends and then simply slip the joist into them, but we don’t have enough overhead room for that. So we’d rest the joist in the hanger at one end, then lift it into place at the other end and screw that hanger in place.
The hangers have these nifty little holes on the sides that guide nails in at just the right angle. We sometimes used two nails but often only one if the angle for hammering was awkward. The joists went solidly into place.

There are no studs along the right-hand wall in the picture because about 10 feet of that will be removed to create an opening between the living and dining rooms. This is intended to open up the space and make it feel less cramped. The same will take place between the dining room and kitchen.
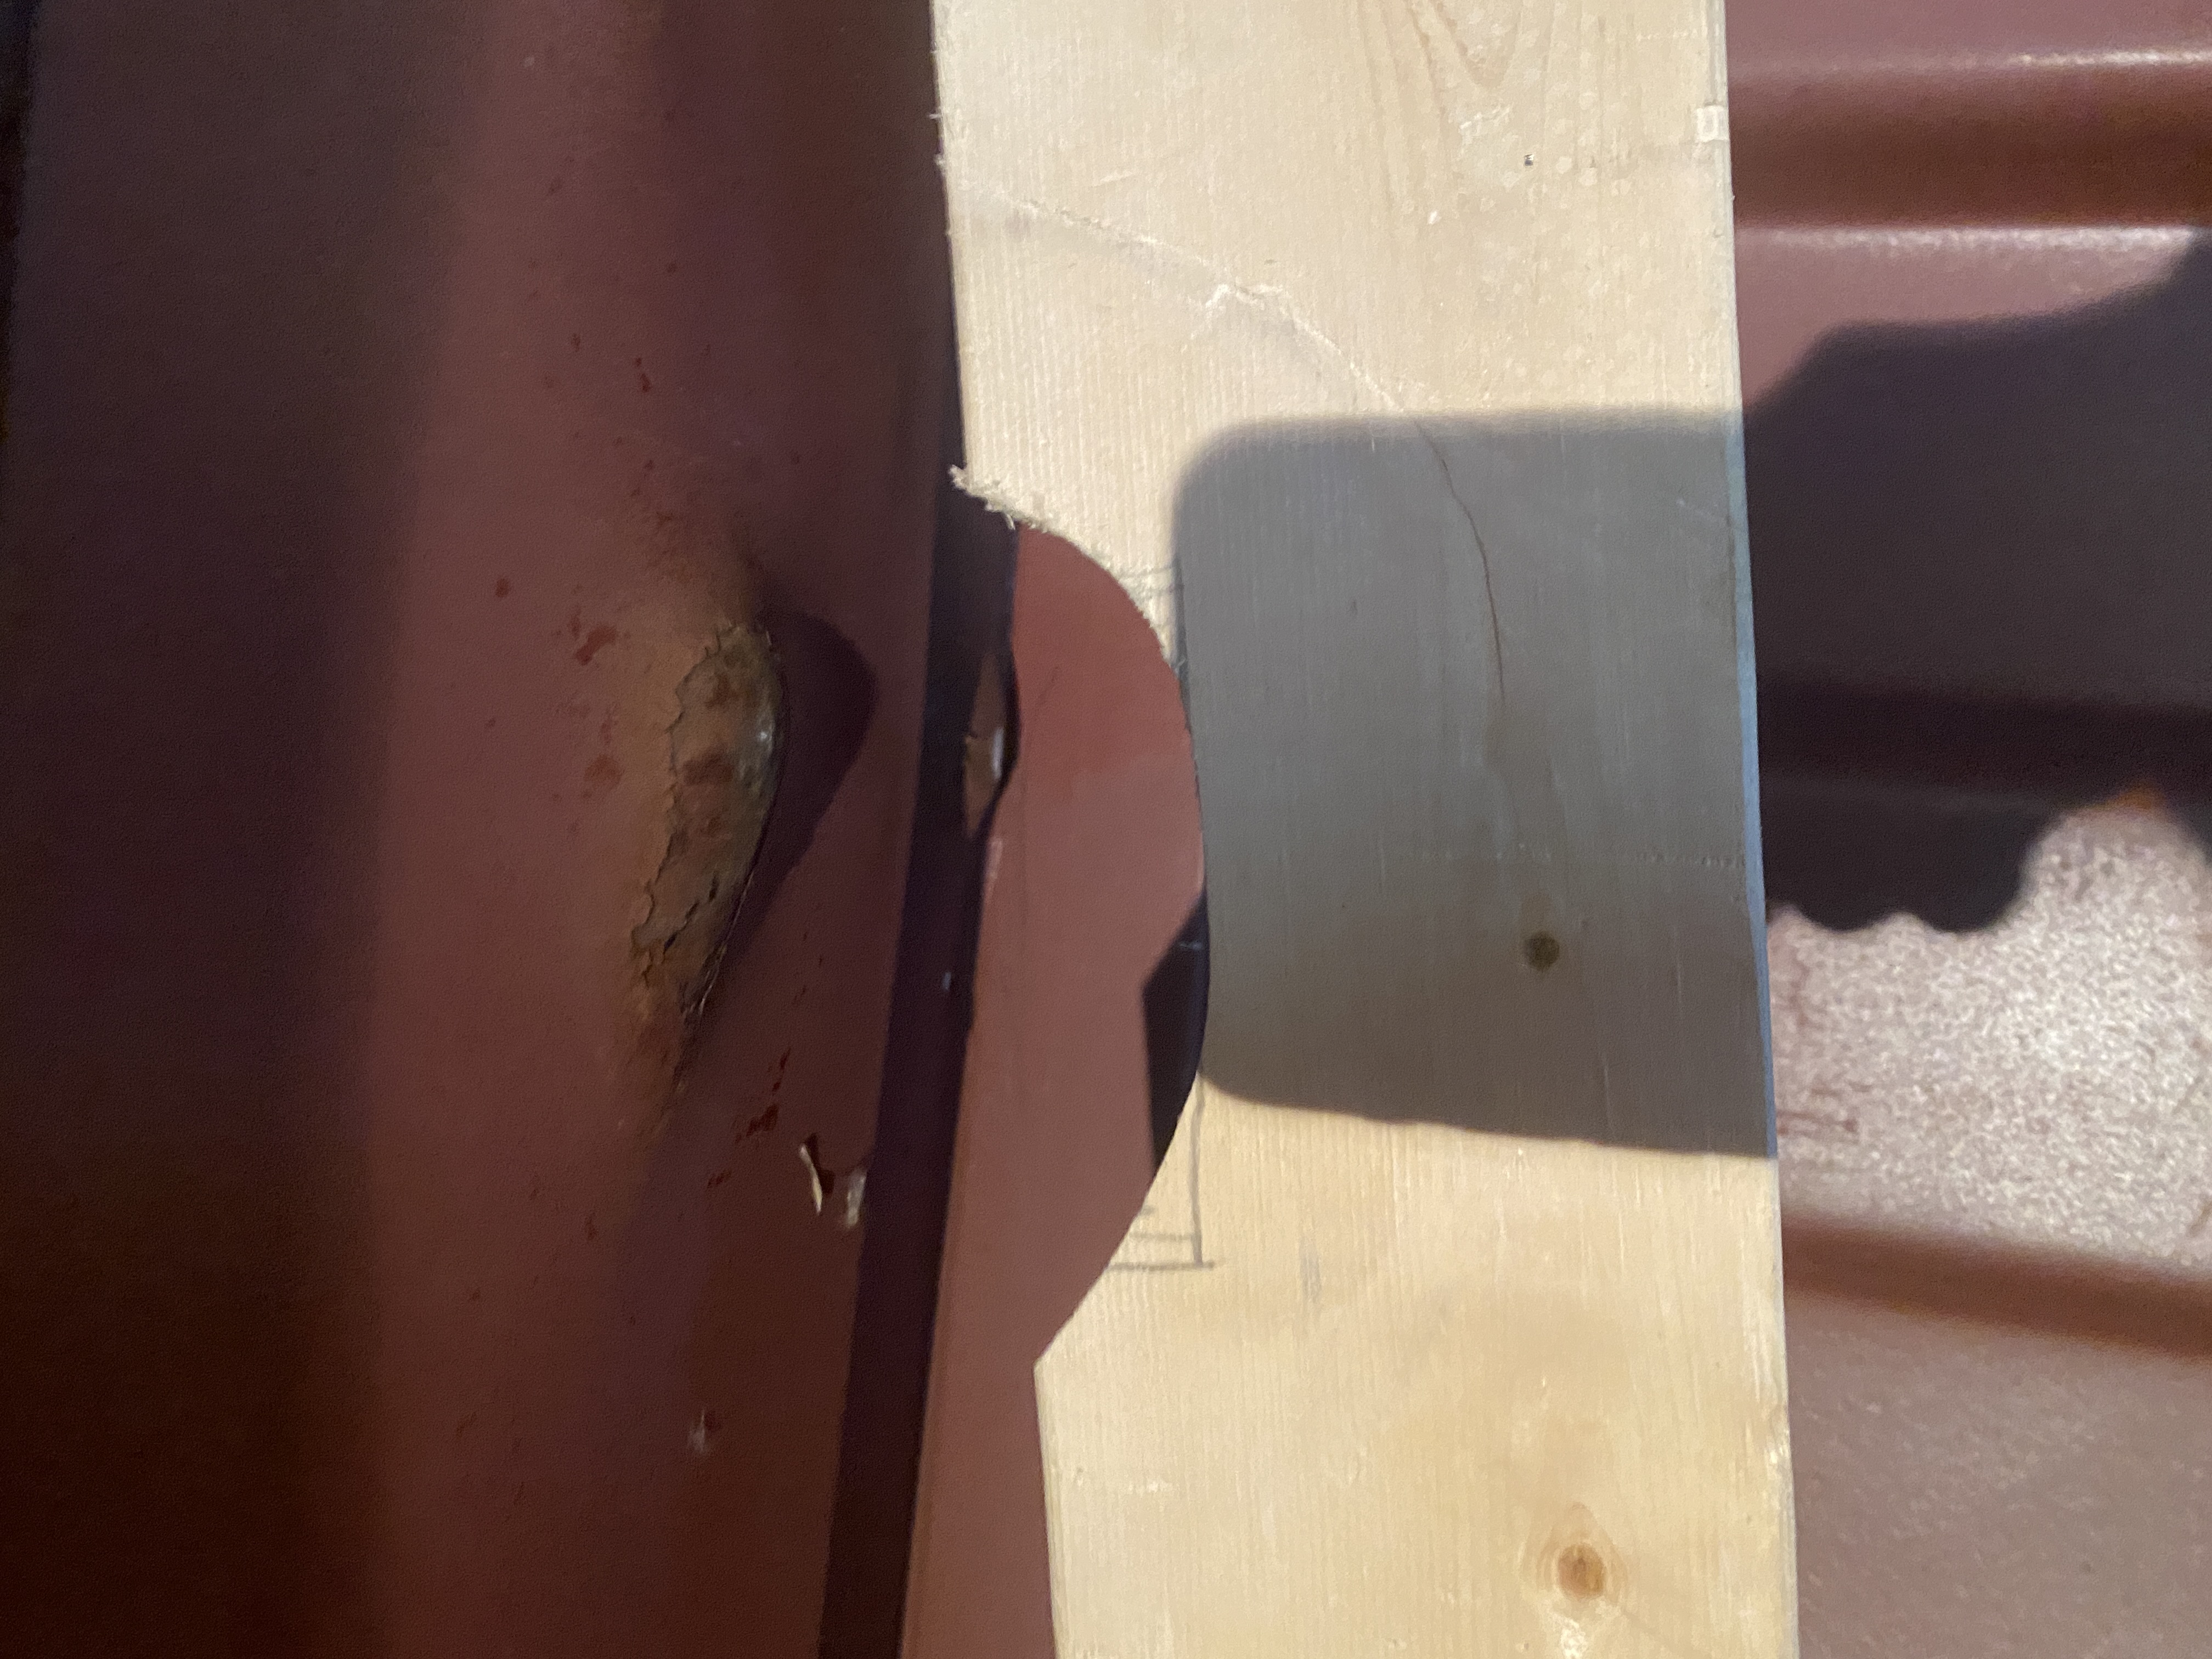
There was a little hiccup when we discovered a dent in the top of the container that got in the way of a ceiling joist. Some quick work with the jigsaw fixed things. This seemed a much more civil approach than banging upwards with a sledgehammer.
ADDITIONAL WALLS
Having figured out what to do with the outer walls, we then had to build walls between the back of the closet and the living room, and between the bedroom and the rear storage area. These would both be traditional stud walls.
Because the initial framing of the closet was elementary and awkward, the ceiling in the closet will be higher than in the living room. This was fine, though, because what does it matter in a closet?
The wall at the back of the bedroom was a lot more straightforward. It would be insulated, with drywall on the inside and plywood on the outside. We will use that storage space behind the wall to store tools and outdoor-ish items, accessible through the outer container doors.
And remember: we’re new at this.

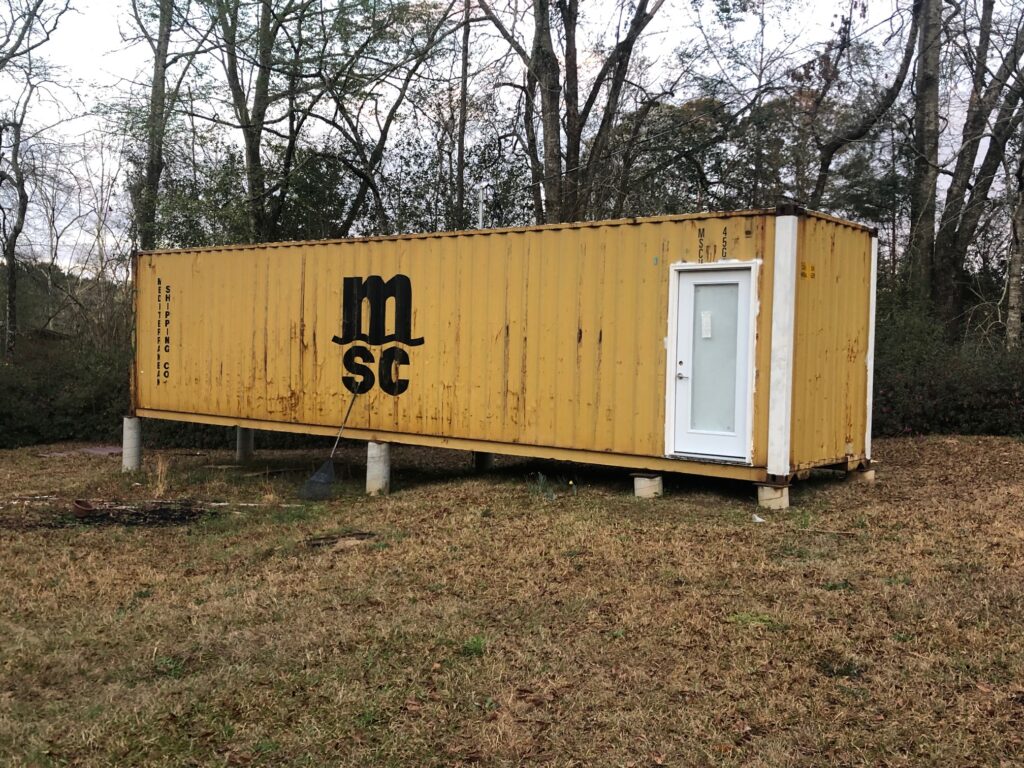
And for all that’s been going on indoors, the place still looks the same outdoors, and it probably will until next year, when Container #2 arrives.
Love it! I like the solution compared to some I’ve seen. I suppose the only small difficulty is now having to drill through the 2×4’s at their thickest to run the electrical through, but that’s a small enough price to pay for the space savings on the framing. Great deal! Love it!
No trouble at all! Here’s where it’s to our advantage that the walls bow out. In an upcoming post about electrical, you’ll see that the wires go behind the studs.
Pingback: DOOR & WINDOW INSTALLATION – Our Shipping Container House
Pingback: ELECTRICAL WIRING – Our Shipping Container House